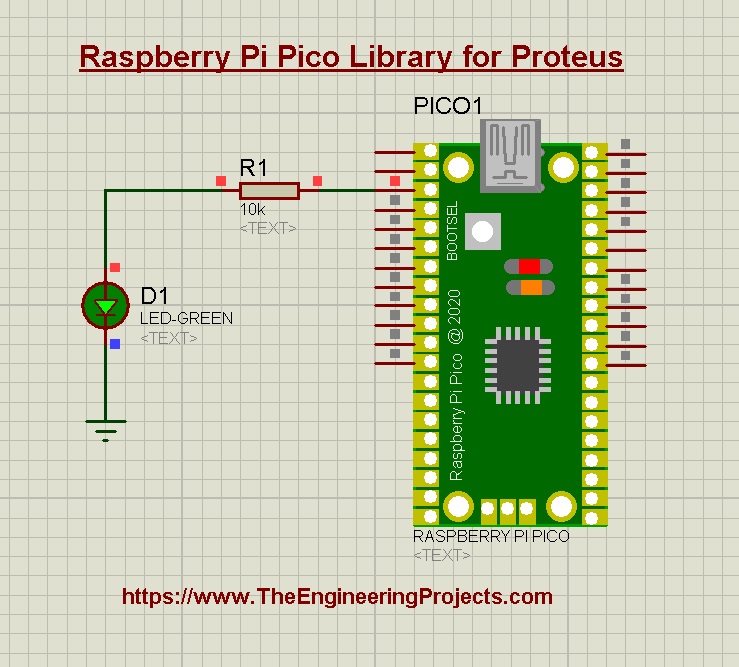
Hello friends, I hope you all are fine. In today's tutorial, I am going to share the Raspberry Pi Pico Library for Proteus. It's a dummy library, we have just designed the display. We can't add the Python Code to it, but we can make it work with Arduino code. A mixture of Arduino and Raspberry Pi, I have given it an unofficial name "Arduino Pi". It's better to have something than nothing. You can design circuit diagrams using this library and can also demonstrate your project in presentations by designing simulations.
So, let's have a look at How to simulate Raspberry Pi Pico by adding this Proteus Library:
| Where To Buy? | ||||
|---|---|---|---|---|
| No. | Components | Distributor | Link To Buy | |
| 1 | Battery 12V | Amazon | Buy Now | |
| 2 | LEDs | Amazon | Buy Now | |
| 3 | Resistor | Amazon | Buy Now | |
| 4 | Raspberry Pi Pico | Amazon | Buy Now | |
Raspberry Pi Pico Library for Proteus
- First of all, we need to download the zip file of Proteus Library for Raspberry Pi Pico, by clicking the below button:
Raspberry Pi Pico Library for Proteus
Adding Proteus Library Files
- The Proteus zip file will have a folder named "Proteus Library File".
- Open this folder and you will get two library files, named:
- RaspberryPiPicoTEP.IDX
- Raspberry PiPicoTEP.LIB
- Now, open the Library folder of your Proteus software, normally present at C > Program Files > LabCenter Electronics > Proteus 8, and copy-paste these 2 library files into it.
- The zip file of Proteus Library will also have a simulation of Raspberry Pi Pico in it.
Note: Look at How to add a new Library in Proteus 8, if you are having any issues.
Raspberry Pi Pico in Proteus
- After adding the library files, restart your Proteus software so that it could index the components of the newly added library.
- Open the Proteus components section and make a search for "Raspberry Pi Pico".
- If you have added the library correctly, you will get the below result:
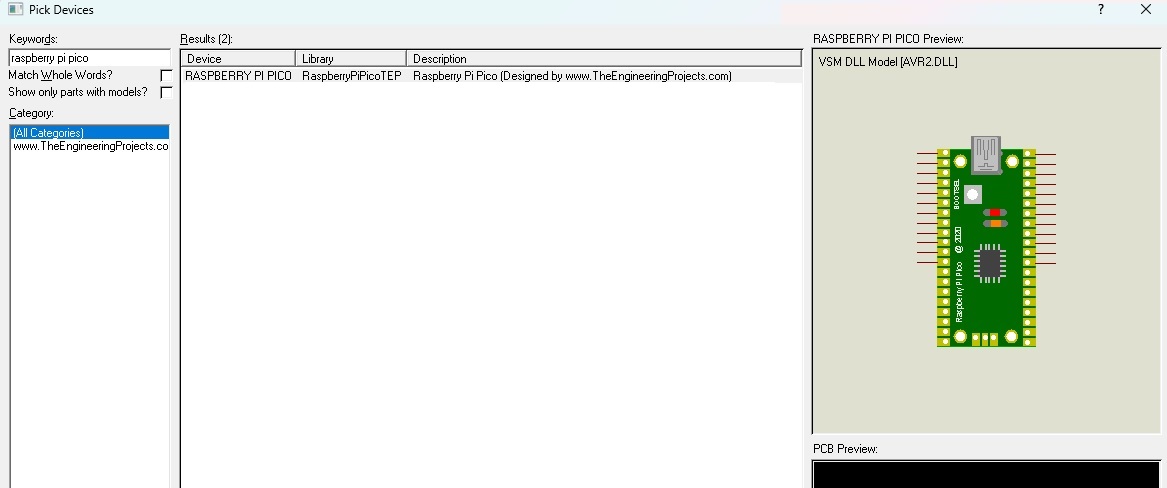
- So our Pico board is now available in the Proteus components list.
- Double-click on the Pico board to add it to your project.
- Close the components section and drag-&-drop the Pico board in the Proteus workspace, as shown in the below figure:
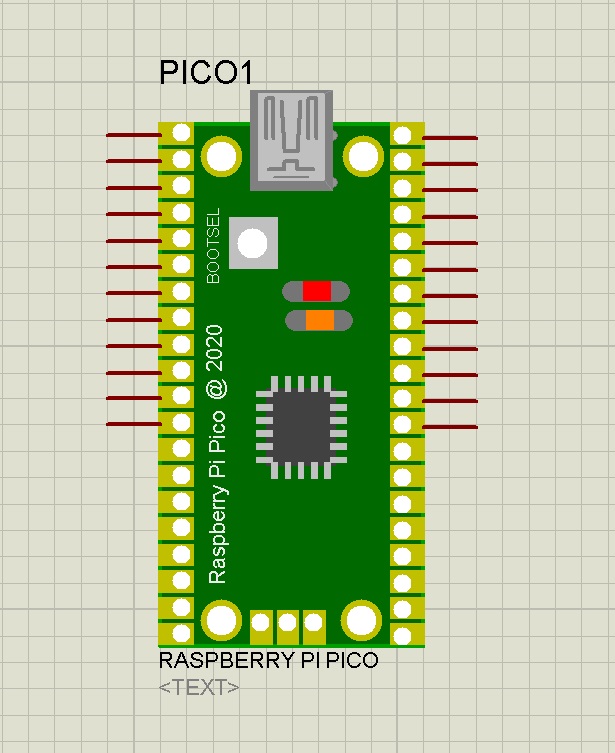
We have tried to keep it small in size so that other components could get more space.
Simulate Raspberry Pi Pico in Proteus
As I told earlier, we can't program this Pico board with Python, which is the actual programming language of this board. But just for fun, we have enabled it to read the Arduino code. Let's design a simple blink example to see how it works:
LED with Raspberry Pi Pico
- First, we need to design a simple LED circuit in Proteus, as shown in the below figure:
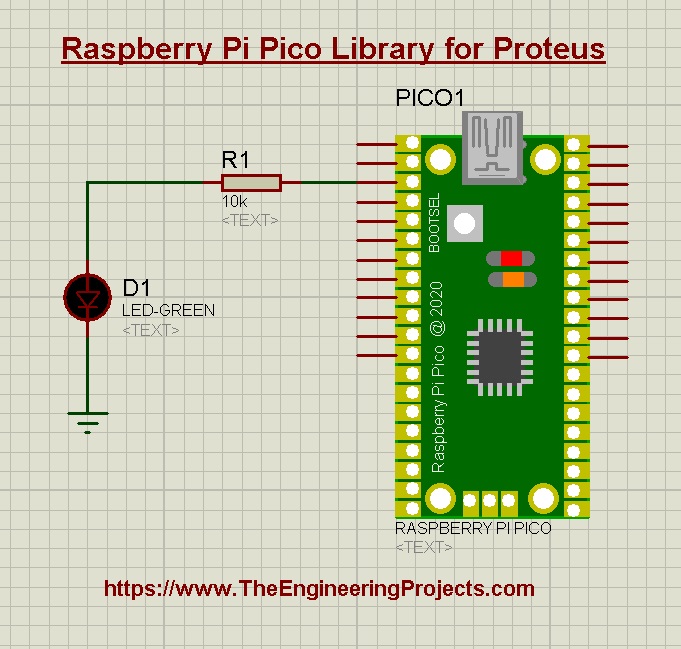
- Double-click on the LED to open its Properties panel and here, we need to change the Mode Type of LED from Analog to Digital.
Code for Raspberry Pi Pico
- Let's mention it one more time(as it's important), we can't program this board with Python code. We can only upload the Arduino Code in it.
- So, here's the LED blink code and as you can see in the below image, I have selected Arduino UNO.
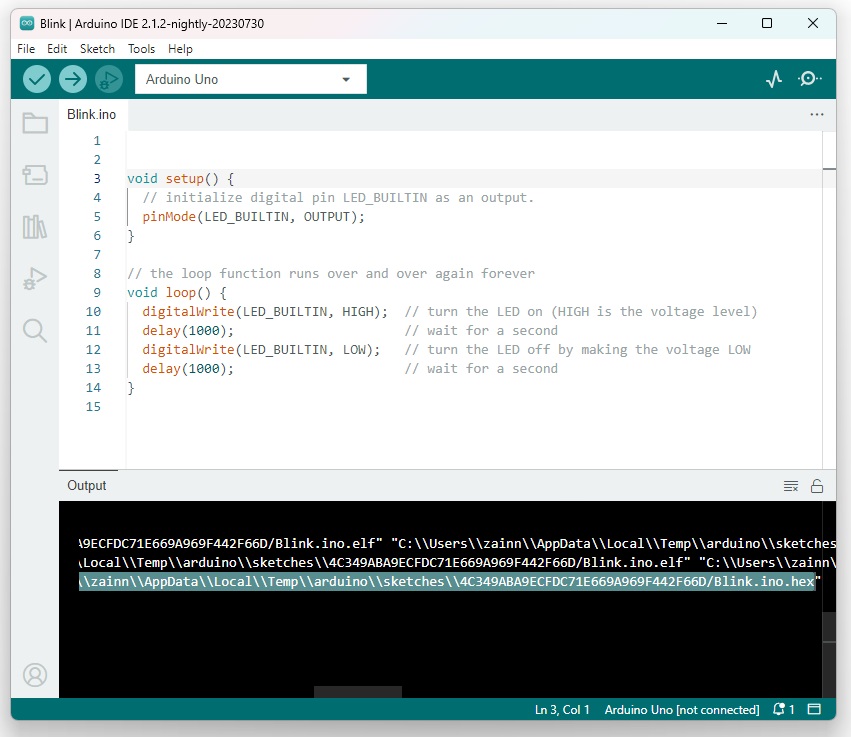
- Now compile the Arduino Code and get its hex file. Read this resource: How to Get the Hex File from Arduino IDE.
Add Hex File in Proteus
- Now, we need to add this hex file to the Pico board of Proteus.
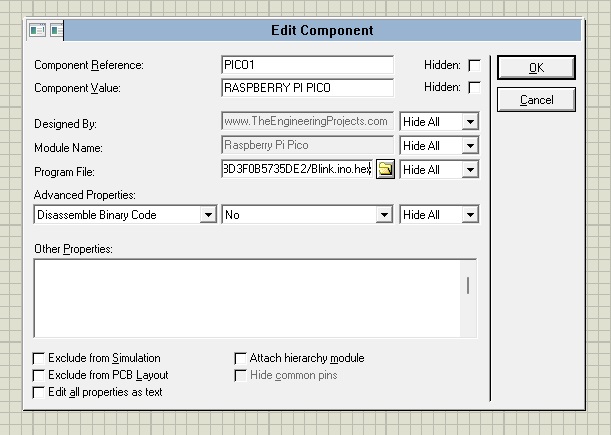
- So, double-click the Raspberry Pi Pico to open its Properties Panel.
- In the Properties Panel, there's a section called Program File, add the Hex file location here, as shown in the below figure:
Now let's run our simulation to check the results:
Raspberry Pi Pico Simulation Results
- If everything goes fine, the LED attached to the Pico board will start blinking, as shown below:

So, that was all for today. I hope you will enjoy this Raspberry Pi Pico Library for Proteus and will use it in your simulations. If you have any suggestions, use the below comment form. Thanks for reading. Take care!!!


