Arduino YUN can be used as a server, you can also run python scripts quite easily on it, which we will cover in coming posts of this tutorial. You can run the Telnet session on it, can access the FTP servers, in short you can do anything with it quite easily. Let me give you an example, around 3 months ago I have designed a project on Arduino YUN in which the sensors data attached to the YUN were uploading directly on the web server via FTP and were saved in the sql database and I did all of it, just by using Arduino YUN alone. No computer was attached for FTP connection as python scripts in the Arduino YUN were doing this task. Now, I think you have gotten better idea of capability of Arduino YUN.Arduino YUN also have built in Wifi, Ethernet, USB host and SD card slot.
One another unique feature of Arduino YUN is that you can upload Arduino sketches in it wirelessly without any cable connection, if your computer and Arduino YUN are connected with the same Wifi connection. Now, let's have a look at how to manually connect the Arduino YUN with available wifi connection, which should be your first step after buying an Arduino YUN.
Manually Connect Arduino YUN with Available Wifi Connection
Now I suppose that you have got your Arduino YUN. After getting the Arduino YUN, open your box and plug the mini usb cable into your Arduino YUN and the other side of cable in your computer. I am also assuming that you are plugging it first time with your computer via usb cable.
Note:
- You should download the Arduino software version 1.5.5 instead of 1.0.3 because Arduino sketches will be only compiled in 1.5.5 version which is specifically designed for Arduino YUN. In this tutorial, we will not use Arduino software.
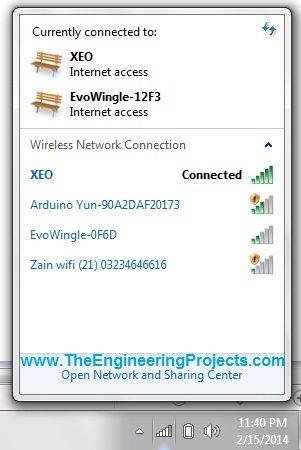
- After plugging the Arduino YUN, open your Wireless Network connections and wait for the Arduino YUN to appear as shown in below figure. It will take some time to appear so be patient.
- In the above figure, you can see YUN connection is available, now the question is why is it available?? It is available because it is not connected to any wifi connection rite now and is acting as an access point. In other words, its just similar to a Wifi router having no wifi connection.
- So, what we need to do is to connect with this YUN so click on YUN wifi connection and hit connect, so you will get disconnected with previous connection and will get connected with Arduino YUN as shown in below figure.
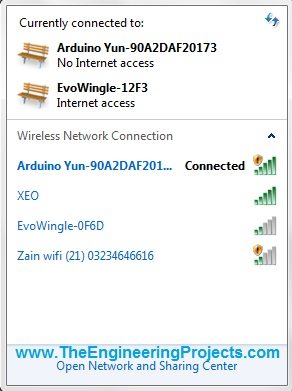
- After connecting with Arduino YUN, yur computer has came in the same network with YUN.
- YUN has a built-in page saved in it from where you can quite easily configure its properties.
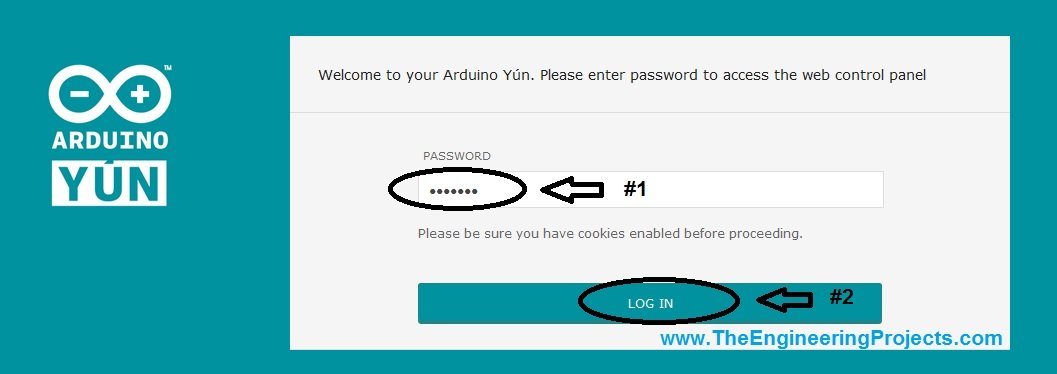
- So, opne your browser and write http://192.168.240.1/ and hit enter, its the current IP adress of Arduino YUN, so when you hit enter, a page similar to the below figure will open up asking for the password.
- The default password for this page is "arduino" so insert this password and click on Log in as in above figure.
- After log in, you will be directed to a page similar to one shown in below figure and you can see in the below figure different properties or values of Arduino YUN like current ip address, netmask etc.
- For Wifi, it is giving connected but for Ethernet, it is showing disconnected because we haven't yet connected with Ethernet.
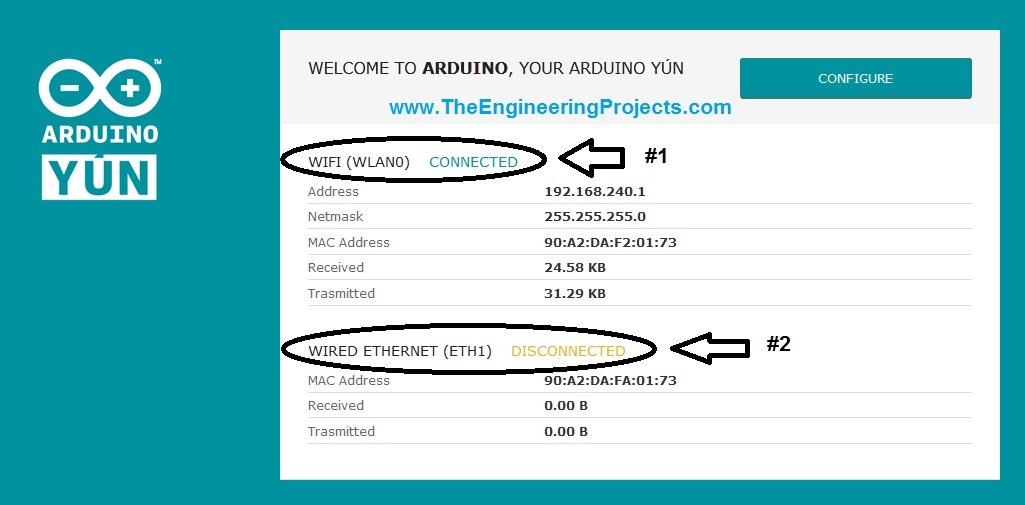
- Now click on the Configure button shown in the above figure.
- After clicking on the configure button, you will be directed to the configuration panel of YUN shown in below figure and you can see there are many fields which are ready for configuring.
- First one is YUN NAME, which I have gven is TEP, you can give it any name which you can easily remember.
- Second field is password, the default password as we have seen before is "arduino" so if you want to change that password then add a new password here, which I dont want, so I have left it blank.
- Next is TIMEZONE, select our time zone from drop down list.
- If your project involves time log or date, then its very important to select your time zone so that you get your local date and time.
- Next are wireless parameters, where we are gonna select the wifi connection with which we want to connect our Arduino YUN.
- Select the SSID of your network with which you wanna connect, its a drop down list which will have all the currently available networks, so you just need to connect with the one you want and also give its password and hit Configure & Restart button.
- That's all, when you hit this button, the below screen will appear which will say Configuration Saved and the YUN is restarting.
- It will take around 10 to 15 minutes to get completely restarted meanwhile, what you need to do is to connect with that wifi connection with which you have connected your Arduino YUN. In my case its SALAM so I connected my computer with SALAM.
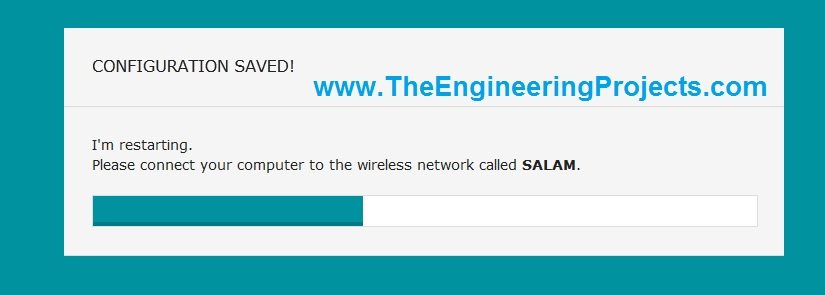
- After restart, now your Arduino YUN will be connected to the wifi connection and you won't see it in the local wireless connections as we have seen in the start.
- So now your Arduino YUN and computer both are connected with the same network, which in my case is SALAM.
- So, now open your Arduino 1.5.5 software and click on Tools and then Port and you can see below Aduino YUN is available and named as "TEP at 192.168.1.1" , where TEP is the name of Arduino YUN board which we have given in above steps and the ip address is the current ip address of Arduino YUN.
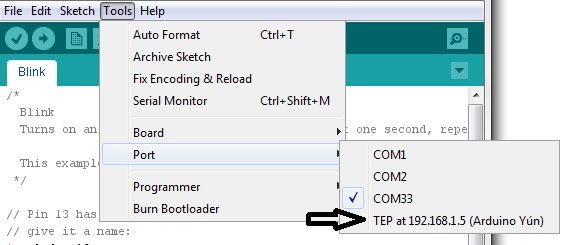
- By selecting this 4th option shown in above figure, you can burn any sketch in your Arduino YUN wirelessly without any cable unless your computer and YUN are connected with the same wifi connection.
- I don't think it was much difficult connecting YUN with the wifi connection, but quite interesting, isn't it?
- So, give it a try and have fun. I will post more tutorials on YUN soon so stay connected and have fun. :))


