


Introduction to NodeMCU V3


Introduction to NodeMCU V3
NodeMCU V3 is an open-source firmware and development kit that plays a vital role in designing your own IoT product using a few Lua script lines. Multiple GPIO pins on the board allow you to connect the board with other peripherals and are capable of generating PWM, I2C, SPI, and UART serial communications.- The interface of the module is mainly divided into two parts including both Firmware and Hardware where former runs on the ESP8266 Wi-Fi SoC and later is based on the ESP-12 module.
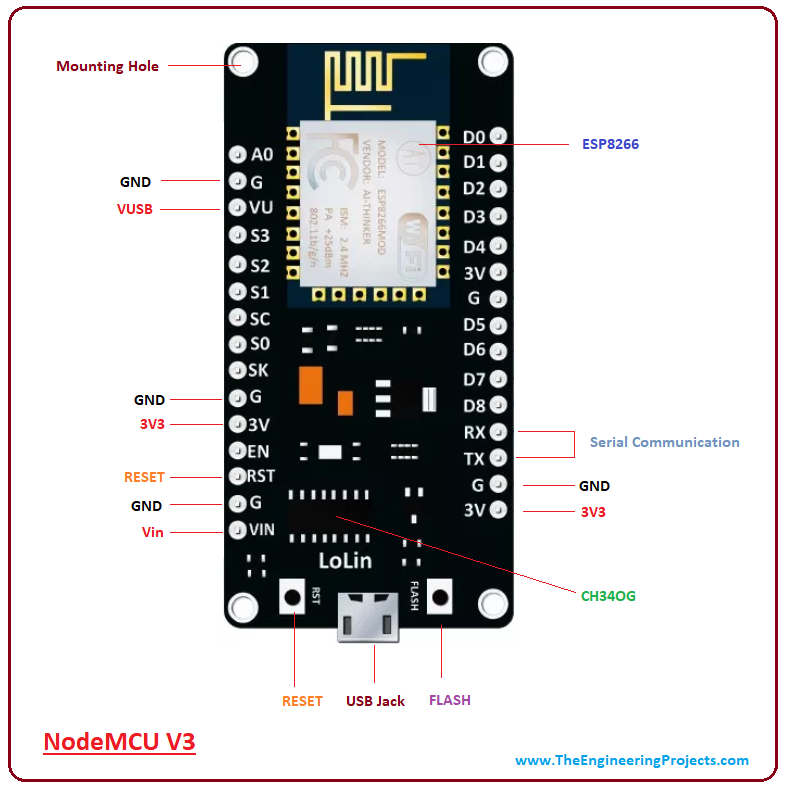
- USB to UART converter is added on the module that helps in converting USB data to UART data which mainly understands the language of serial communication.
- The board incorporates status LED that blinks and turns off immediately, giving you the current status of the module if it is running properly when connected with the computer.
NodeMCU V3 Pinout
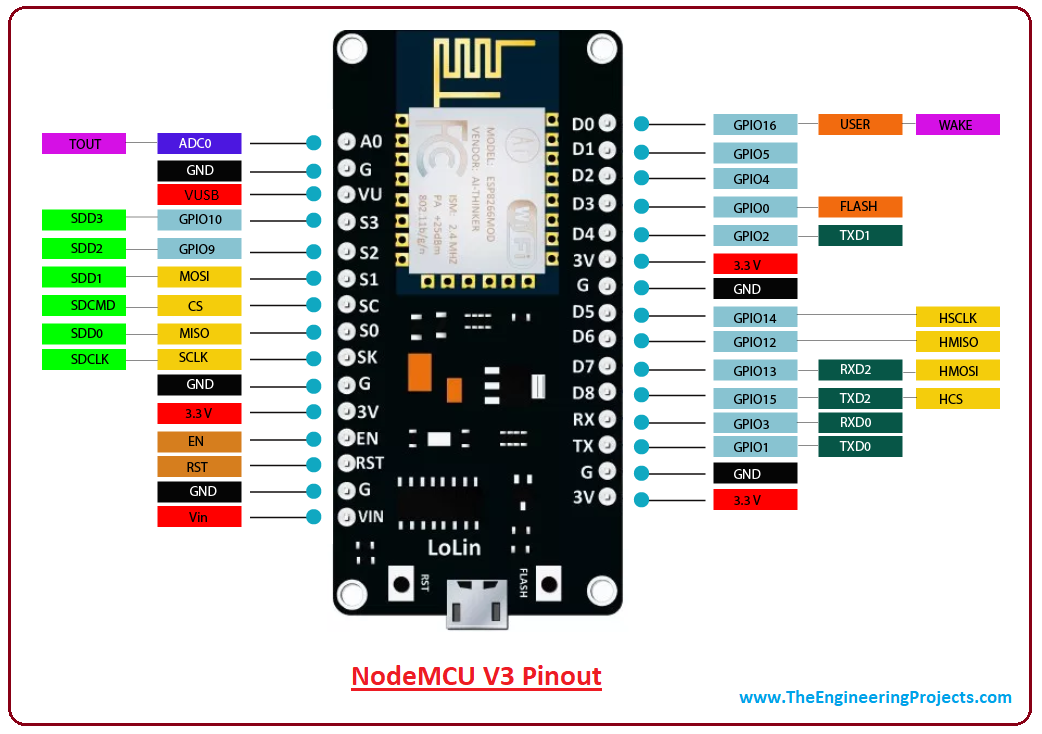
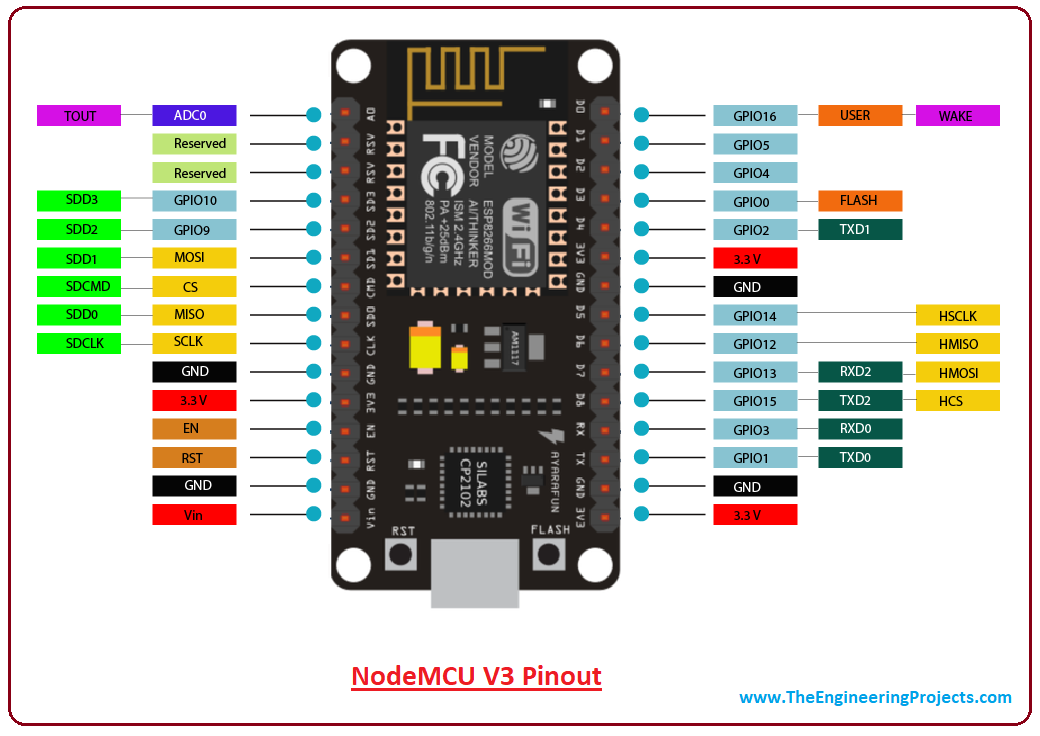
NodeMCU V3 comes with a number of GPIO Pins. Following figure shows the Pinout of the board.
- There is a candid difference between Vin and VU where former is the regulated voltage that may stand somewhere between 7 to 12 V while later is the power voltage for USB that must be kept around 5 V.
NodeMCU V3 Datasheet
- You can download NodeMCU V3 datasheet by clicking the below button:
NodeMCU V3 Features
- Open-source
- Arduino-like hardware
- Status LED
- MicroUSB port
- Reset/Flash buttons
- Interactive and Programmable
- Low cost
- ESP8266 with inbuilt wifi
- USB to UART converter
- GPIO pins
How to Power NodeMCU V3?
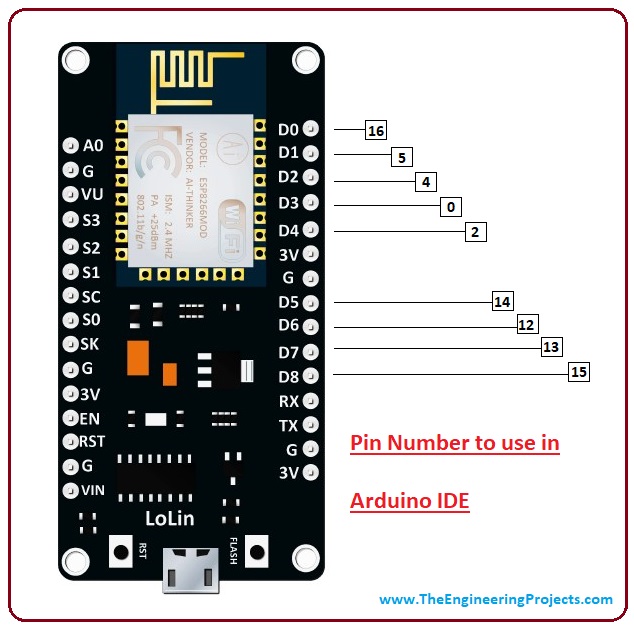
You can see from the pinout image above, there are five ground pins and three 3V3 pins on the board. The board can be powered up using the following three ways. USB Power. It proves to an ideal choice for loading programs unless the project you aim to design requires separate interface i.e. disconnected from the computer. Provide 3.3V. This is another great option to power up the module. If you have your own off-board regulator, you can generate an instant power source for your development kit. Power Vin. This is a voltage regulator that comes with the ability to support up to 800 mA. It can handle somewhere between 7 to 12 V. You cannot power the devices operating at 3.3 V, as this regulator unable to generate as low as 3.3V.NodeMCU V3 Projects and Applications
NodeMCU V3 is mainly used in the WiFi Applications which most of the other embedded modules fail to process unless incorporated with some external WiFi protocol. Following are some major applications used for NodeMCU V3.- Internet Smoked Alarm
- VR Tracker
- Octopod
- Serial Port Monitor
- ESP Lamp
- Incubator Controller
- IoT home automation
- Security Alarms

Hi mate, very good post! Excuse my english, I know it's very bad.
I am doing a project and I wanted to know if there is a library of this device for Proteus. In case the answer is yes, where can I find it?
Thanks! Bye
hay nice blog I think your post is fabulous
Hi, nice article! What is still unclear to me is how the various power-pins are connected. If you want to use them in a special way, it's not really clear.
Powering via the USB-plug is straight forward. The onboard regulator provides the 3.3V for the ESP. How is Vin connected? Directly to Vcc on the USB-plug? Via a diode? Is the USB-plug also connected via a diode to prevent current out of the USB-plug if powered via Vin? And how is VU connected? With or without diodes? To the USB-plug or to the input of the regulator?
You see, it would be best to have the schematic of this board. Can you help with one?
Regards, Karl
Comments
7