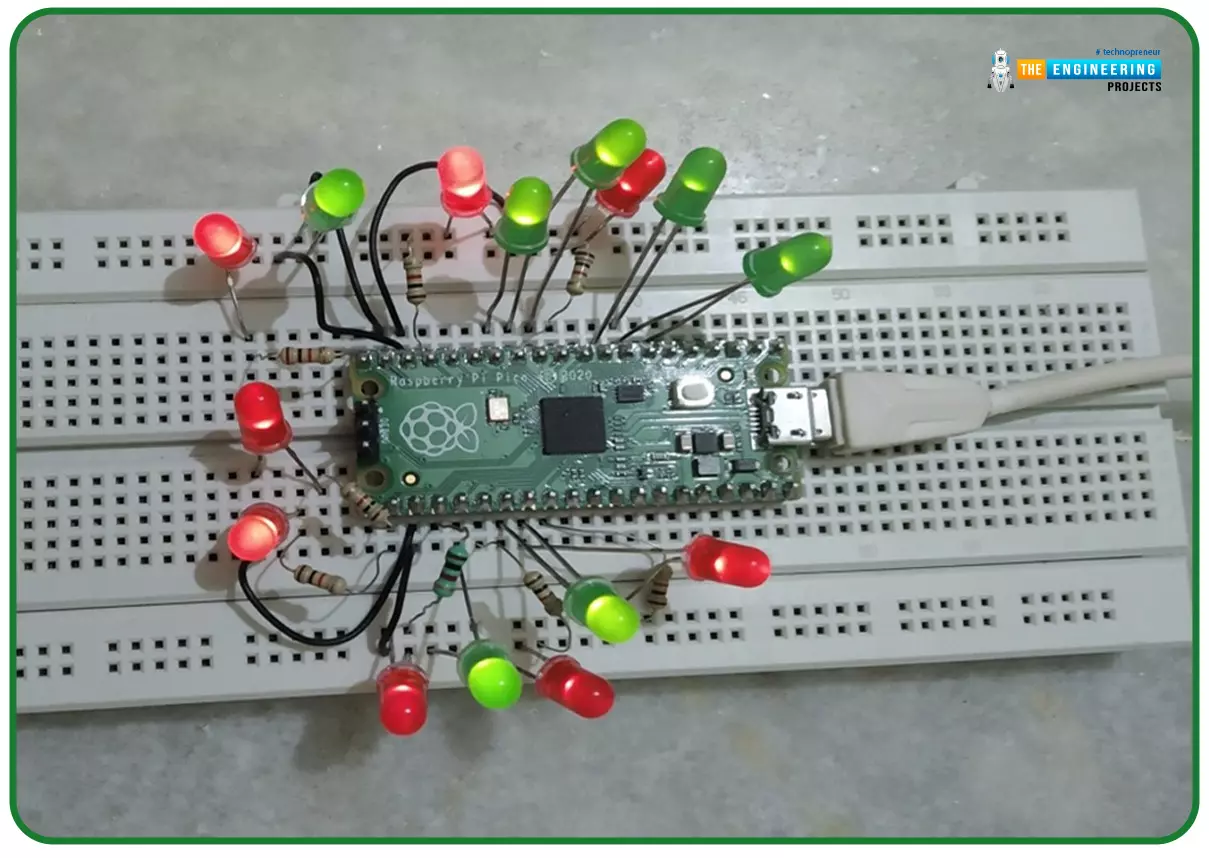
Hello readers, I hope you all are doing great. In our previous tutorial, we discussed the implementation of LED interfacing and blinking program with Raspberry Pi Pico using MicroPython programming language. So continuing with our previous tutorial, in this tutorial we will learn how to control the LED brightness using PWM (pulse width modulation technique).
As we mentioned above, in our previous tutorial we implemented the LED blinking program with a Raspberry Pi Pico board. Blinking an LED means turning ON and OFF and thus the process involves only two states that are ‘1’ (HIGH) and ‘0’ (LO ...
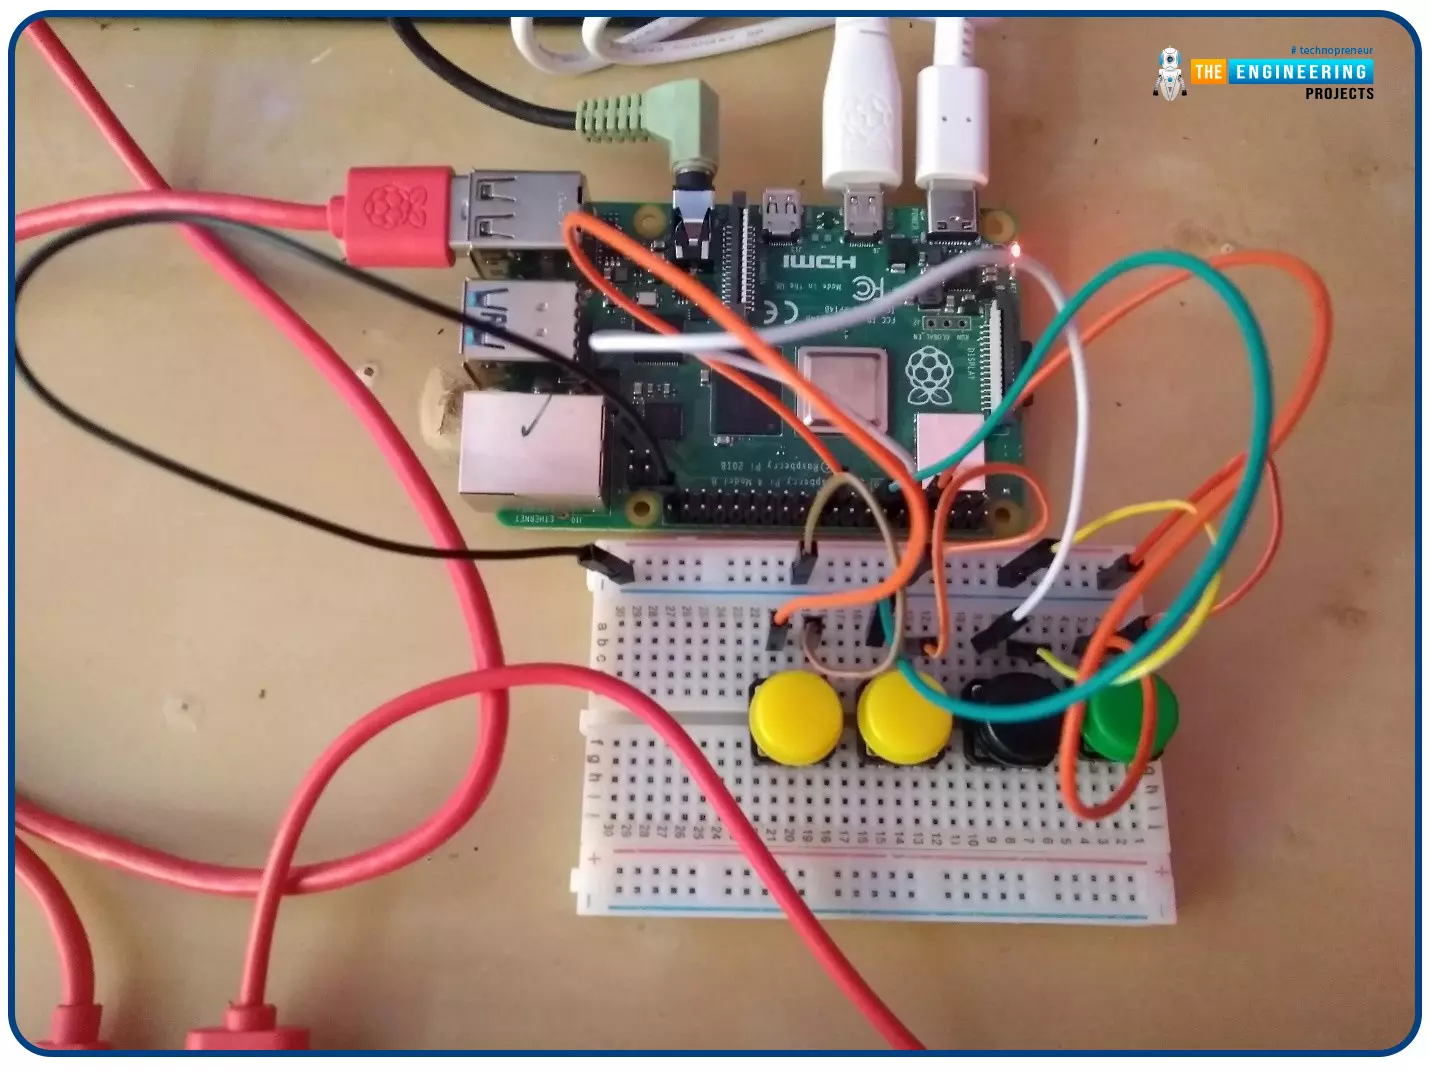
Welcome to the next tutorial of our Raspberry Pi programming course. In our previous tutorial, we learned how to create a timelapse video with still images and understand how phototimer and FFmpeg work. In this lesson, you'll make a button-controlled "music box" that plays different sounds depending on which buttons are pressed.
What you will learn
Connect button pushes to function calls using the Python gpiozero package and uses the Python dictionary data structure
Components
Raspberry Pi
Breadboard
Buttons
Jumper wires
Speaker
Set up your project
For this project, you'll need ...
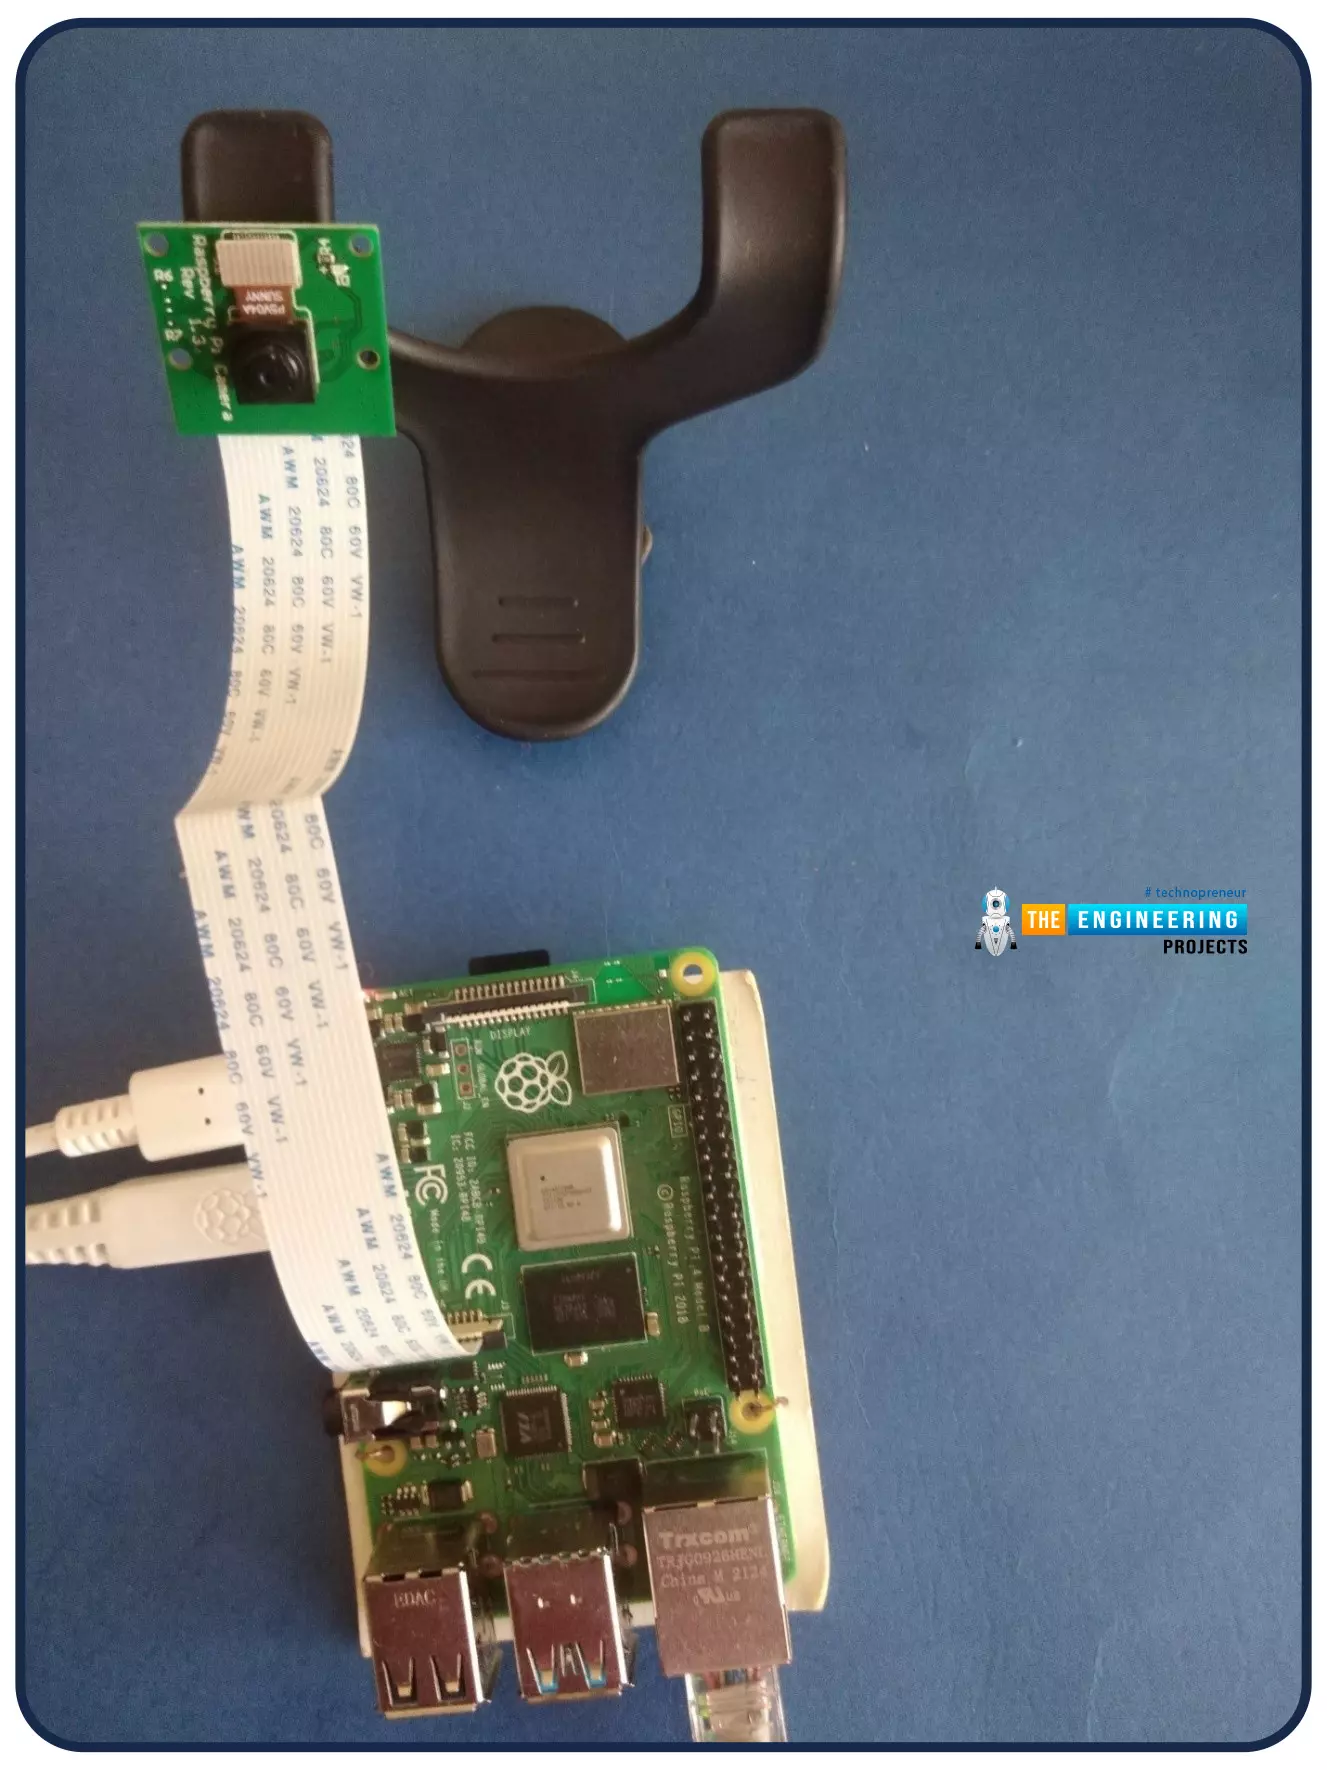
Welcome to the next tutorial of our Raspberry Pi programming course. Our previous tutorial looked at how to Interface DS18B20 with Raspberry Pi 4. This tutorial will teach us how to create a time-lapse video with still images and understand how phototimer and FFmpeg work.
What is time-lapse?
When photographing something over a lengthy period, "time-lapse" comes to mind. A video can be created by mixing the still photos. Plant development may be tracked with time-lapse movies, as can the changing of the seasons. They can also be utilized as low-resolution security cameras.
Components
Rasp ...
Hello readers, I hope you all are doing great. In our previous tutorials on raspberry pi Pico, we discussed the basic features, architecture, download and installation of development environments for raspberry Pi Pico programming. In this tutorial, we will learn how to access and control Raspberry Pi Pico and its GPIO pins to implement LED blinking using MicroPython.
Introduction
Raspberry Pi development boards are quite popular and frequently used among students and hobbyists. But the drawback of Raspberry Pi is their cost i.e., around $35-$45. So when cost of the development board is of pr ...
Hello friends, I hope you all are having fun. Today, we are going to share the 7th tutorial of Section-III in our Raspberry Pi Programming Course. In the last tutorial, we interfaced a DHT11 sensor with Raspberry Pi 4. Today, we are going to interface another temperature sensor i.e. DS18B20 with Raspberry Pi 4.
DS18B20 is a popular temperature sensor especially in severe/critical environments i.e. chemical plants, mines, industrial sites etc. because of its 1-wire operational technique and accurate readings up to 4 decimal digits.
Project Description
Today, we will interface a DS18B20 ...
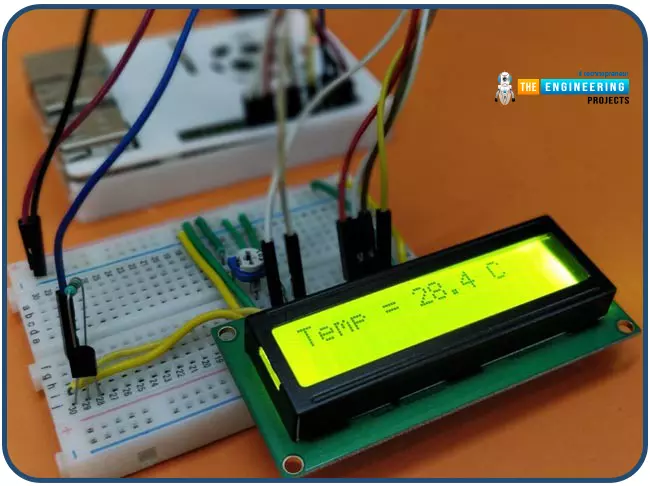
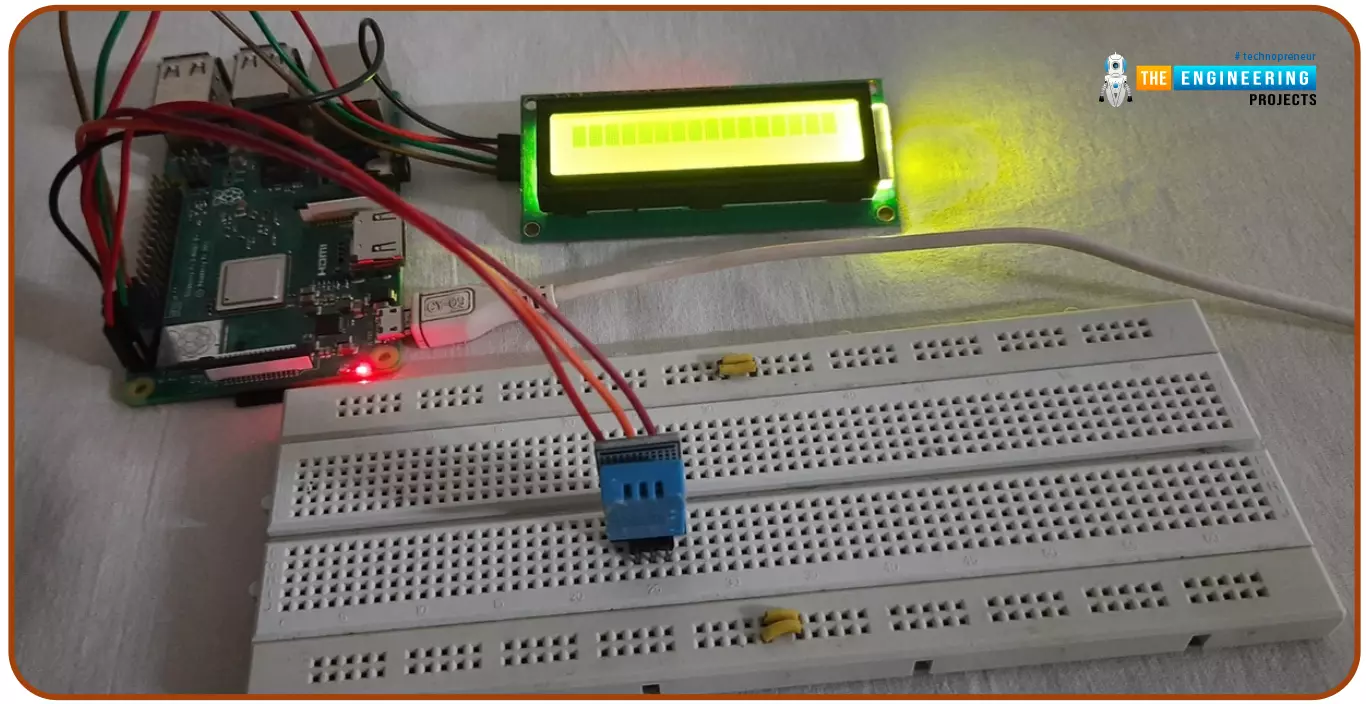
Hello friends, I hope you all are doing great. Today, I am going to share the 6th tutorial of Section-III in the Raspberry Pi Programming Course. In our previous tutorial, we have seen how to interface an Ultrasonic Sensor with Raspberry Pi 4 and used Python to perform its calculations. In today's tutorial, we'll discuss how to interface a DHT11 temperature and humidity sensor to a Raspberry Pi. So, let's get started:
ComponentsHere's the list of components, we are going to use in today's circuit:
LCD display
DHT11 sensor
Raspberry pi
Breadboard
Male-to-female jumper wires
...


 Getting Started Guide
 Help Center
 Contact us
 Doist Blog
 Privacy
 Security
 Terms of Service
 What's new: Channel Descriptions


 1 user


 2
2


 20K
20K 900
900 900
900 20K
20K


