Thank you for joining us for yet another session of this series on Raspberry Pi programming. In the preceding tutorial, we constructed a personal Twitter bot using Tweepy, a Py framework for querying the Twitter application programming interface. We also constructed a Response to robot mentions that would post a response to everybody's tweet mentioning it with a certain keyword. However, in this tutorial, we will implement a security system using a motion sensor with an alarm. This is what it looks like: PIR Motion Sensors can be implemented with RPi by understanding how it is connected to a ...
Thank you for joining us for yet another session of this series on Raspberry Pi programming. In the preceding tutorial, we integrated a real-time clock with our raspberry pi four and used it to build a digital clock. However, In this tutorial, we will construct your personal Twitter bot using Tweepy, a Py framework for querying the Twitter application programming interface.
You will construct a Response to mentions robot that will post a response to everybody's tweet mentioning it with a certain keyword.
The response will be a photo we will make and put any text over it. This message is a qu ...
Introduction
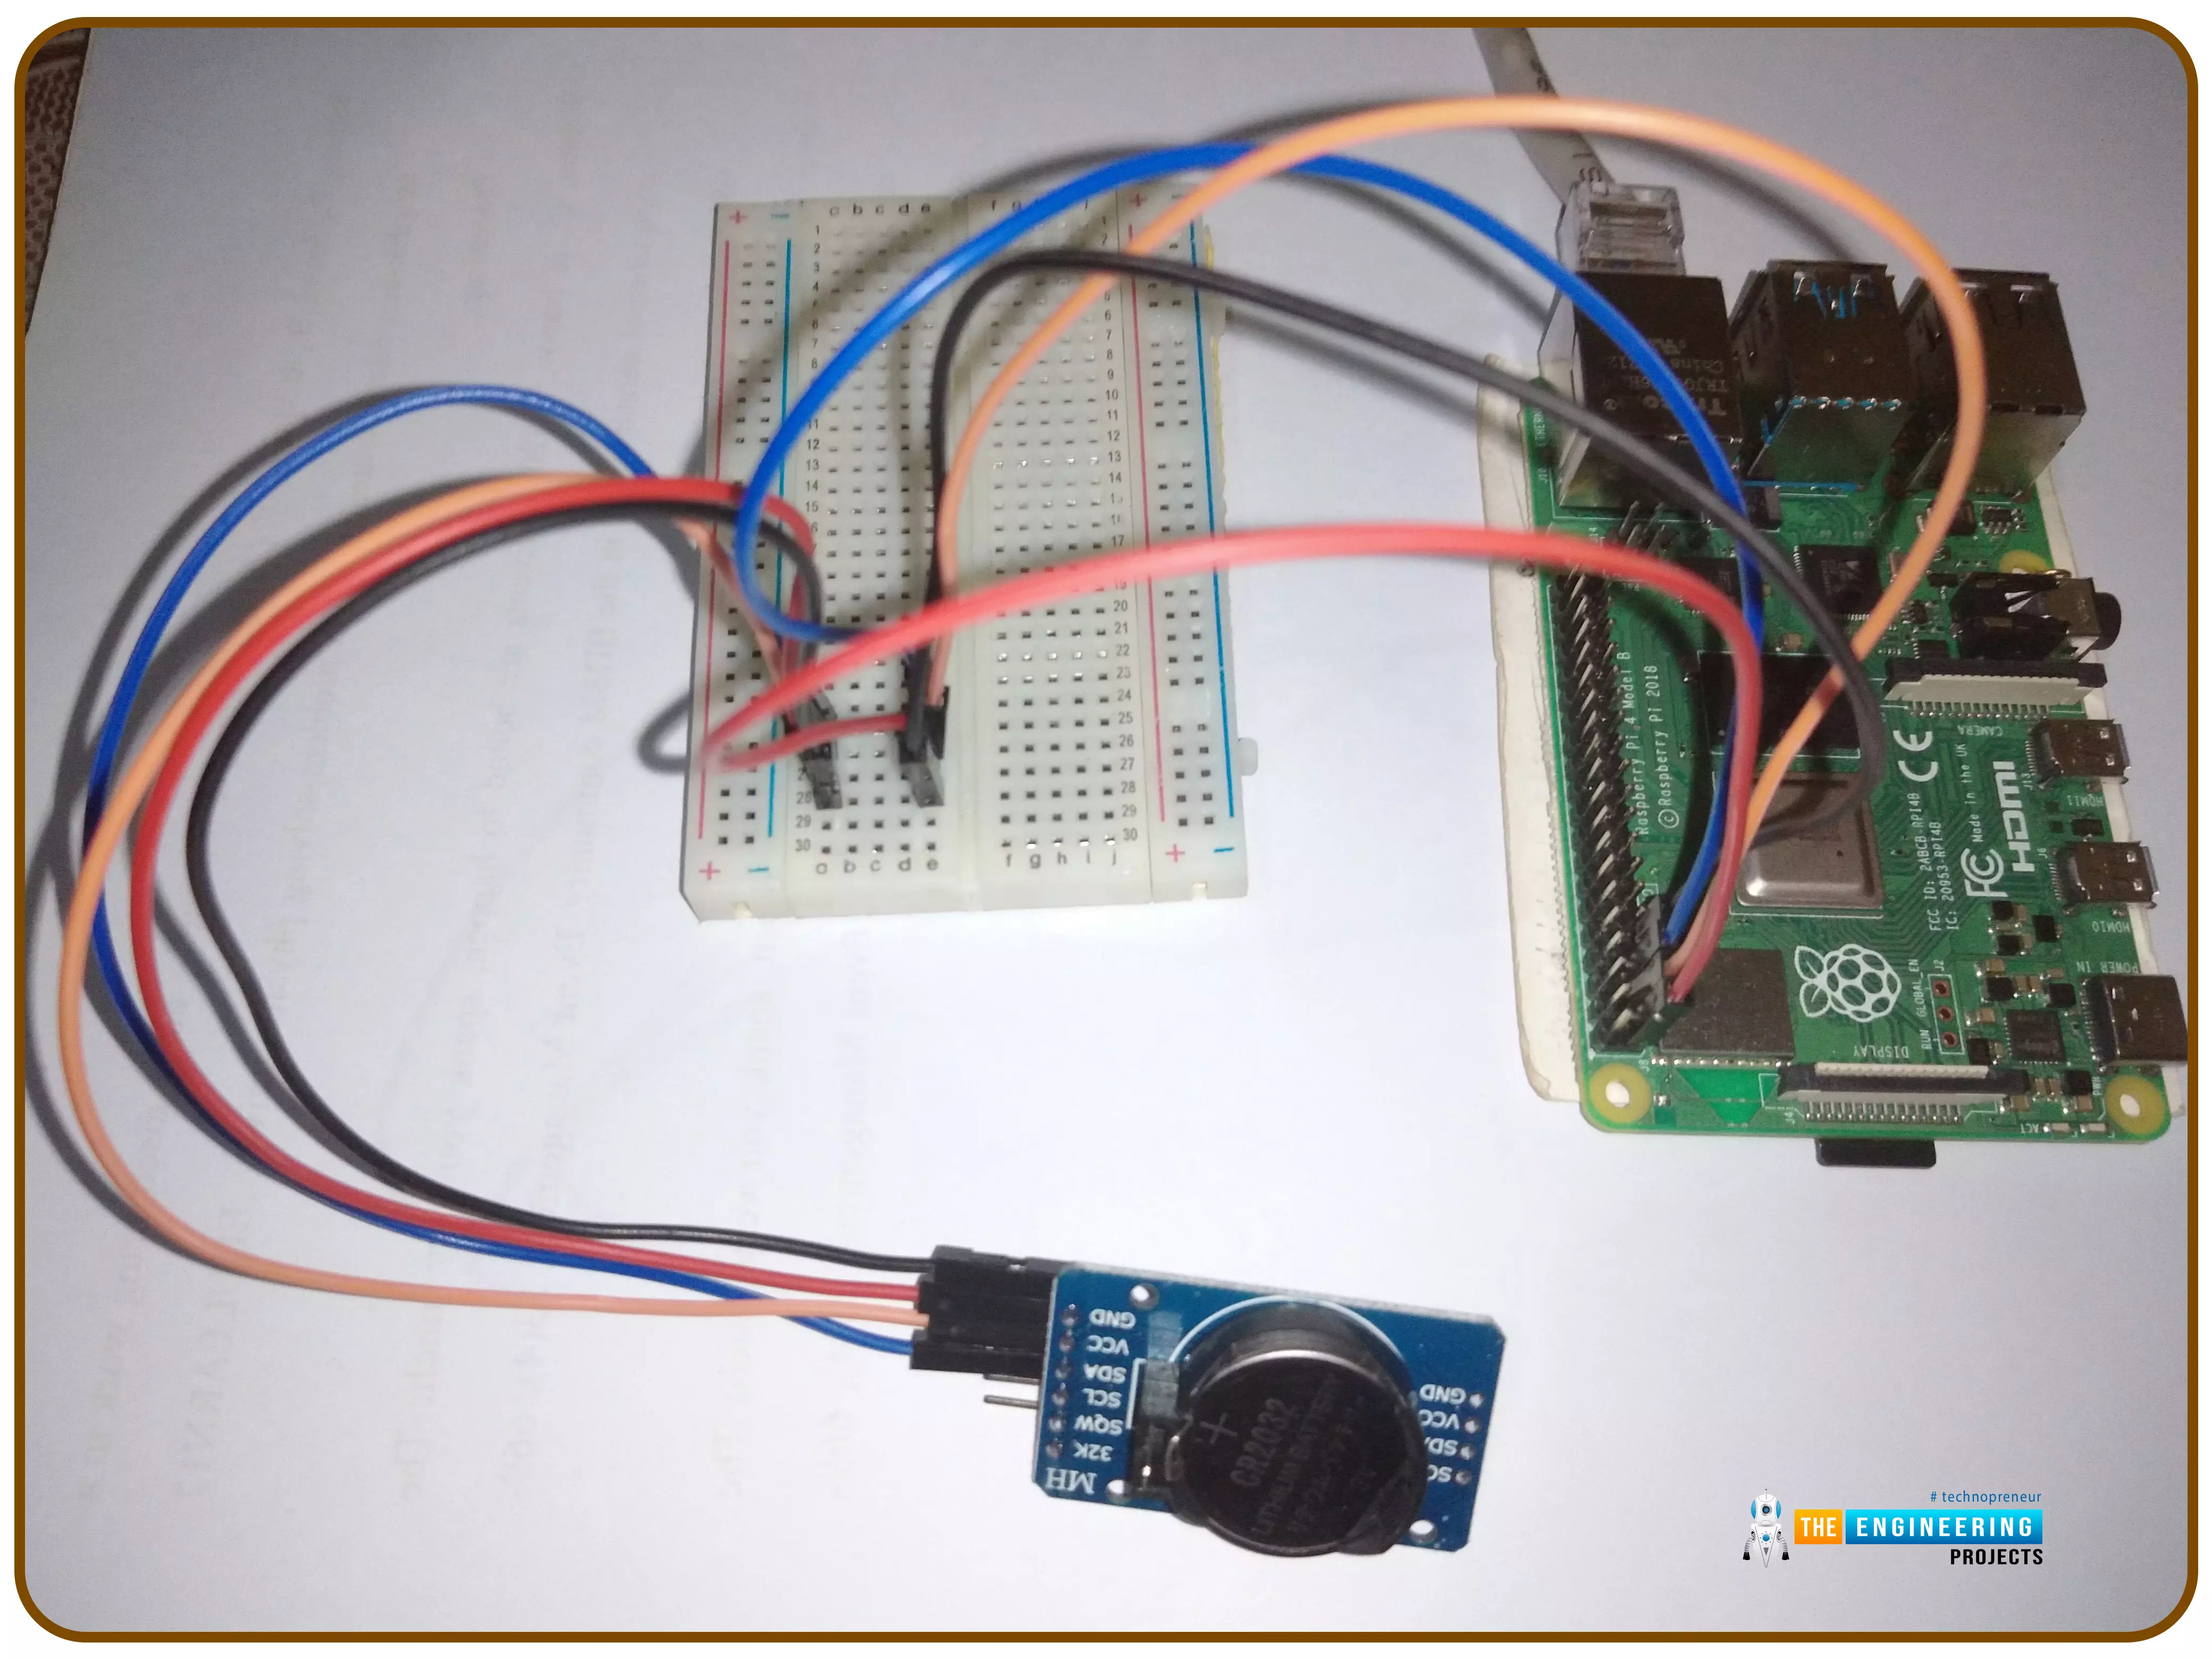
Thank you for joining us for yet another session of this series on Raspberry Pi programming. In the preceding tutorial, we implemented a speech recognition system using raspberry pi and used it in our game project. We also learned the fundamentals of speech recognition and later built a game that used the user's voice to play. However, this tutorial will integrate a real-time clock with our raspberry pi four and use it to build a digital clock. First, we will learn the fundamentals of the RTC module and how it works, then we will build a digital clock in python3. With the help of ...
Introduction
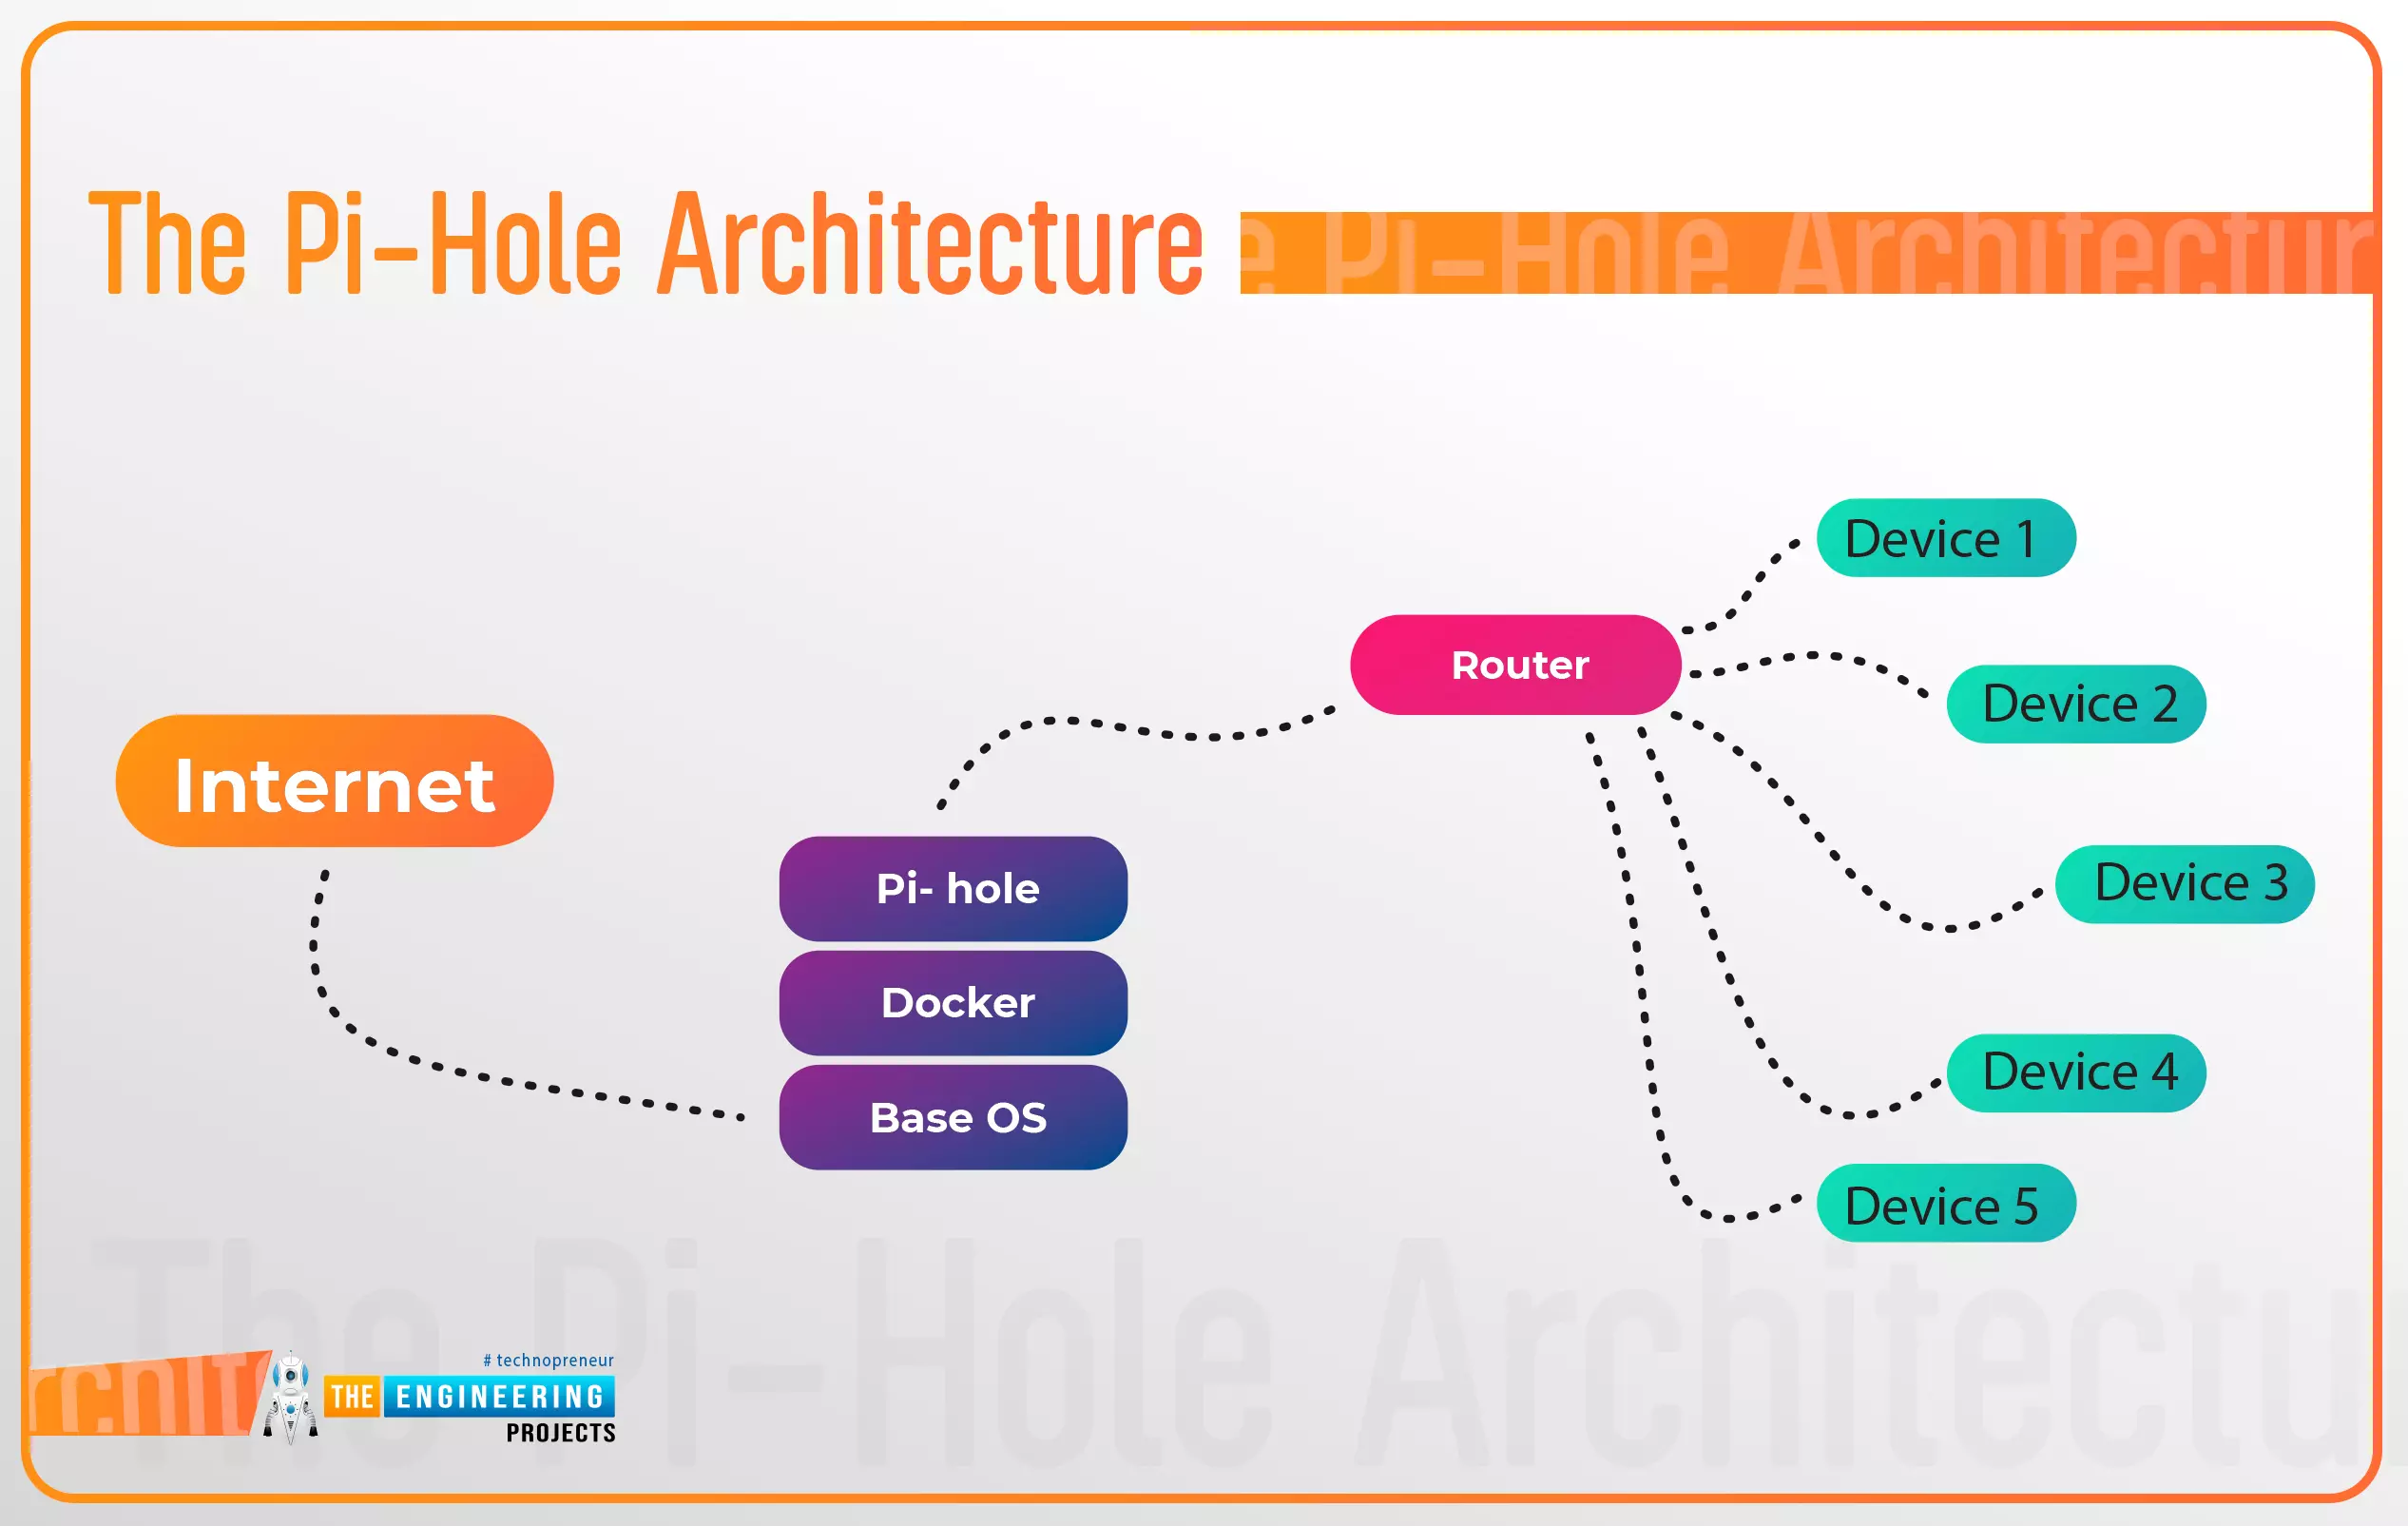
Thank you for joining us for yet another session of this series on Raspberry Pi programming. In the preceding tutorial, a facial recognition system on a Raspberry Pi 4 was used to develop a smart security system. We also learned how to create a dataset using two Python scripts to train and analyze a series of photographs of a certain person. This tutorial will teach you how to install pi-hole on a Raspberry Pi 4 and use it to block advertisements from anywhere. This is a great initiative for folks who are tired of annoying pop-up adverts while browsing. First, we'll learn how to ...
Thank you for joining us for yet another session of this series on Raspberry Pi programming. In the preceding tutorial, we created a pi-hole ad blocker for our home network using raspberry pi 4. We also learned how to install pi-hole on raspberry pi four and how to access it in any way with other devices. This tutorial will implement a speech recognition system using raspberry pi and use it in our project. First, we will learn the fundamentals of speech recognition, and then we will build a game that uses the user's voice to play it and discover how it all works with a speech recognition pac ...
Hello readers, I hope you all are doing great. In this tutorial, we will learn how to interface the PIR sensor to detect motion with the Raspberry Pi Pico module and MicroPython programming language. Later in this tutorial, we will also discuss the interrupts and how to generate an external interrupt with a PIR sensor.
Before interfacing and programming, the PIR and Pico boards let’s first have a look at the quick introduction to the PIR sensor and its working.
Fig. 1 Raspberry Pi Pico and PIR sensor
PIR motion sensor and its working
PIR stands for Passive Infrared sensors and the PIR modul ...


 Getting Started Guide
 Help Center
 Contact us
 Doist Blog
 Privacy
 Security
 Terms of Service
 What's new: Channel Descriptions


 1 user


 2
2


 20K
20K 900
900 900
900 20K
20K


