Home Security System using Arduino UNO in Proteus

Hello friends, I hope you all are doing well. In today's tutorial, we are going to design a Home Security System using Arduino UNO in Proteus software. It's the most commonly designed engineering project, especially in electrical, electronics and mechatronics engineering. Normally engineering students design it as a semester project during their engineering course.

So, today we will design a home security system from scratch in Proteus software. I have given the complete project below to download but I would suggest you to design it on your own so that you could understand it better. So, let's get started:

Where To Buy?
No.ComponentsDistributorLink To Buy
1Battery 12VAmazonBuy Now
2BuzzerAmazonBuy Now
3LM7805AmazonBuy Now
4OptoCouplerAmazonBuy Now
5RelayAmazonBuy Now
6Keypad 4x3AmazonBuy Now
7LCD 20x4AmazonBuy Now
8Flame SensorsAmazonBuy Now
9MQ-2AmazonBuy Now
10PIR SensorAmazonBuy Now
11Arduino UnoAmazonBuy Now

Home Security System: Project Description

  • Before going into the detail, let's first download the complete Proteus Simulation with Arduino Code, by clicking the below button:
Home Security System using Arduino UNO in Proteus

Let me first give you a detailed project description i.e. what we actually want to design? We want to build a Home Security Project, which should follow these security protocols:

  • Fire alarm: It should be able to detect the fire and sound an alarm to alert everyone at home.
  • Smoke alarm: It should detect the gas(smoke) and turn on the alarm(if detected).

The above-mentioned security protocols will be followed 24/7. Moreover, there will be two security modes in the project, named:

  • Secure Mode.
  • Normal Mode.

Let's have a look at both of these modes, one by one:

1. Secure Mode

  • This mode should be selected, when owners want to completely secure their home i.e. they are leaving home or while sleeping at night.
  • If the Secure Mode is selected, the project should follow the following security protocols:
    • Intruder Detection Alarm: It should detect the presence of any human being in the occupied premises.
    • Windows Security Alarm: If someone tries to break through the windows, the project should sound an alarm.
    • Door Security Alarm: If any intruder tries to break through the main door, it should again sound the alarm to alert everyone.

2. Normal Mode

  • This mode should be selected, when owners are at home and just want to take the basic security measures.
  • In this mode, only the Fire Alarm & Gas Alarm will work, while all other alarms will remain on standby.

Other Features

  • There should be an LCD, to display values of all parameters.
  • It should have a buzzer to generate an alarm, in case of emergency.
  • There should a Push Button to make switches between these security modes.

Here's the final simulation, which we are going to design in today's lecture:

So, these are our requirements, which we want to achieve in this Home Security Project. Now let's have a look at the components selected for this project:

Home Security System: Components Selected

Now let's have a look at the list of components, which I have selected for this Home Security Project. I will also briefly explain the purpose of using each component.

1. Arduino UNO

  • As clearly it's an Embedded Systems Project, so first of all we need to select a Microcontroller for our project.
  • As I have mentioned earlier, we will use the Arduino UNO Microcontroller board for designing this project.
  • Arduino UNO will act as the brain of the project and will control all sensors and modules.

2. Flame Sensor:

  • A flame sensor is used to detects the presence of fire.
  • The sensor basically consists of a photo-diode that detects the Infrared rays that emit from the fire. When it detects a fire, its output goes HIGH.

3. Gas Sensor (MQ-6)

  • MQ-6 Gas Sensor is used to detect the concentration of gases in the environment.
  • The sensor produces a potential difference proportional to the concentration of the particular gases.
  • The type of gas that it detects depends upon the material used in the sensor.
  • There are many gas sensors available in the market i.e. MQ-2, MQ-3, MQ-4 etc.
  • These sensors are available as ready-made modules for easy interfacing with the microcontroller.

4. PIR Sensor(HC-SR501)

  • HC-SR501 PIR sensor is used to detect any human being(intruder) in the Secure Mode.
  • It detects the IR radiations from the human movement & generates a pulse on its output.
  • The time period of the pulse could be varied by using the potentiometer on the sensor.

5. Vibration sensor(SW-420)

  • The SW-420 vibration sensor is used to detect any forced entry through windows.
  • In Secure Mode, if someone tries to open the window, the sensor will detect vibrations and will send a HIGH signal to the microcontroller.

6. Infrared Sensor

  • An infrared sensor will be placed at the door and someone tried to enter through that door, the sensor will detect it.
  • It consists of an IR transmitter and a photo-diode that are placed close to each other.
  • If any object movement occurs in front of the sensor, the IR rays hit the object and return back with a particular angle called incident angle.
  • This pulls the comparator output to ground or logic LOW.

7. LCD 20x4

  • LCD 20x4 will be used for displaying the values of all these sensors.
  • It will also display useful information i.e. which mode is selected.

8. Buzzer

  • A small 5V Buzzer is used to sound the alarm.

9. LM7805

  • LM7805 is a voltage regulator and is used to convert voltage from 12V to 5V.
  • Power sources(i.e. battery, adapter etc.) available are normally 12V, as it has become a standard.
  • Moreover, many components also operate at 12V like a buzzer or DC motor.
  • While microcontrollers and sensors work on 5V, so in Embedded projects, it's quite necessary to design a voltage regulator from 12V to 5V and in some cases 3.3V.
  • I normally prefer LM7805 for converting voltage from 12V to 5V.

10. Resistances(1kohm)

  • We need to use a few resistances of 1kohm.

11. Small LED

  • We will also use a small LED for power indication.

12. Capacitors(100uF)

  • We will also use few capacitors of 100uF, as it removes any noise/ripples.
So, these are the components, we are going to use for designing Home Security System. Now let's get started with designing the Proteus Simulation:

Proteus Simulation of Home Security System

As I have told you earlier, I am going to use Proteus software for designing this project. Proteus is an excellent simulation tool, where we will not only design the circuit of this project but will also test its output. I always design my programming algorithms on simulations as working on real hardware is too time-consuming. You should remove all your programming bugs in simulation and once confirmed then design your project in real hardware. So, let's start:

Install Proteus Libraries

Once you added all the libraries, now open your Proteus software.

Designing Circuit Diagram in Proteus

  • Now we need to design a circuit for our project, so select these components from Proteus Components Search Box.
  • First of all, let's design the voltage regulator circuit using LM7805, which will be simply converting the voltage from 12V to 5V.
  • As you can see in the above figure, I have used 12V Battery, while the output of LM7805 is showing 5V and I have also placed an LED for power indication.
LCD Interfacing with Arduino:
  • Next, we need to interface 20x4 LCD with Arduino UNO, so design the circuit as shown in the below figure:

Next, we need to interface five sensors with Arduino UNO, so let's add them to our Proteus simulation:

Sensors Interfacing with Arduino:
  • These are simple digital & analog sensors and are all powered up at 5V.
  • So, simply connect them as shown in the below figure:
  • The Flame Sensor is connected to pin A0 of Arduino UNO.
  • Gas Sensor is connected to pin A1 of Arduino UNO.
  • PIR Sensor is connected to pin A2 of Arduino UNO.
  • The Vibration Sensor is connected to pin A3 of Arduino UNO.
  • The Infrared Sensor is connected to pin A4 of Arduino UNO.

For simulation, ensure all hex files are uploaded to each sensor for proper working. You can upload the source code hex file to the Arduino, by pressing Ctrl+E or by right click --> Edit properties.

Buzzer & Push Button:
  • Finally, we need to add the Buzzer to sound the alarm in emergency cases, I have connected it to Pin A5 of Arduino UNO.
  • I have also connected a push-button for switching the modes, connected to Pin 7 of Arduino UNO, as shown in the below figure:
  • Here's the image of the complete Proteus Simulation for Home Security System:

Now let's design the Arduino programming code for Home Security Project:

Arduino Code for Home Security System

In the previous section, we have designed the Proteus simulation of the project, now let's design its Arduino Code to make it alive. Let's get started:

Initialization LCD Arduino Code

  • First of all, we need to define all our variables, as you can see in the code shown in the right figure.
  • I have included the Liquid Crystal Library, which is used to operate LCD.
  • Next, I have defined all my sensors to the respective pins and then initialized boolean variables for storing the output of sensors.
  • In the Setup loop, I have made the sensors' pins input pullup using the pinMode Arduino command.
  • Finally, displayed an initialization message on the LCD screen i.e. "Home Security System using Arduino UNO By TEP".
  • The message will display for around 1 second and then LCD will be cleared and the SensorDisplay function will be called, which will simply write sensors' names on the LCD screen.
  • Now compile your code and add the hex file in Arduino UNO and run your PRoteus simulation.
  • If everything goes fine, you will get results as shown in the below figure:

So far, we have just displayed the sensor's names, now let's read the sensors' data in the loop section:

Reading Sensors' Data

  • In the loop section, first of all, we need to read the sensors' data using the digitalRead command, as shown in the code.
  • After reading the sensor's data, I have called the SensorValues function, in which I have placed a check on each sensor's value and updated it on LCD.
  • It's quite straightforward code, if the sensor is giving HIGH output, I am displaying Yes on LCD and if it's LOW, I am simply printing No.
  • We haven't yet defined the modes, so the project will keep on reading the sensors and will display their respective value in the LCD.
  • As you can see in the below figure, if the TestPin of the sensor is HIGH, its respective value on LCD is showing "Yes" and if it's LOW then "No" is written.
  • Now, if you change any sensor's value, its respective value on LCD will be updated.

So, we have successfully interfaced our sensors with Arduino UNO and now it's time to add operational modes to our project.

Two Operational Modes

  • As I mentioned earlier, we need to add two operational modes in our project, and the push button will be used for conversion from one mode to another.
  • So, I have simply added an If loop in my code, as shown in the figure on the right side.
  • In normal mode, I have simply displayed the name of the mode at the first line of LCD.
  • While in secure mode, I am checking if either of the sensors goes HIGH, simply turn ON the Buzzer.
  • Although, you won't be able to hear the Buzzer sound in the below figure, but you can see Buzzer's Pin is HIGH because two of the sensors are giving a response. Check the video for Buzzer working.
  • We normally need to use an optocoupler or relay driver in between the buzzer and microcontroller as buzzers normally operate at 12V, but 5V buzzers are also available.
  • Here's the complete Arduino Code:
/* * All rights reserved to TEP www.TheEngineeringProjects.com */ #include const int rs = 12, en = 11, d4 = 5, d5 = 4, d6 = 3, d7 = 2; LiquidCrystal lcd(rs, en, d4, d5, d6, d7); #define Flame A0 #define Gas A1 #define Pir A2 #define Vib A3 #define Ir A4 #define Buzzer A5 #define Switch 7 boolean Fire, Smoke, Intruder, Window, Door; boolean Mode = false; void setup() { pinMode(Flame,INPUT_PULLUP); pinMode(Gas,INPUT_PULLUP); pinMode(Pir,INPUT_PULLUP); pinMode(Vib,INPUT_PULLUP); pinMode(Ir,INPUT_PULLUP); pinMode(Switch,INPUT_PULLUP); pinMode(Buzzer,OUTPUT); lcd.begin(20,4); pinMode(Buzzer, OUTPUT); lcd.setCursor(0,1); lcd.print("HOME SECURITY SYSTEM"); lcd.setCursor(0,2); lcd.print(" USING ARDUINO UNO "); lcd.setCursor(7,3); lcd.print("By TEP "); //delay(700); lcd.clear(); SensorDisplay(); } void loop() { Fire = digitalRead(Flame); Smoke = digitalRead(Gas); Intruder = digitalRead(Pir); Window = digitalRead(Vib); Door = digitalRead(Ir); Mode = digitalRead(Switch); SensorValues(); if(Mode==false) // Normal mode { lcd.setCursor(4,0); lcd.print("Normal Mode"); } else // Secure Mode { lcd.setCursor(4,0); lcd.print("Secure Mode"); if((Fire == HIGH) || (Smoke == HIGH) || (Intruder == HIGH) || (Window == HIGH) || (Door == HIGH)){ digitalWrite(Buzzer, HIGH); }else{ digitalWrite(Buzzer, LOW); } } } void SensorDisplay() { lcd.setCursor(0,1); lcd.print("Fire:"); lcd.setCursor(10,1); lcd.print("Smoke:"); lcd.setCursor(0,2); lcd.print("Door:"); lcd.setCursor(10,2); lcd.print("Window:"); lcd.setCursor(0,3); lcd.print("Intruder:"); } void SensorValues() { if(Fire == true){ lcd.setCursor(6,1); lcd.print("Yes");} else{ lcd.setCursor(6,1); lcd.print("No ");} if(Smoke == true){lcd.setCursor(17,1); lcd.print("Yes");} else{lcd.setCursor(17,1); lcd.print("No ");} if(Intruder == true){lcd.setCursor(11,3); lcd.print("Yes");} else{lcd.setCursor(11,3); lcd.print("No ");} if(Window == true){lcd.setCursor(17,2); lcd.print("Yes");} else{lcd.setCursor(17,2); lcd.print("No ");} if(Door == true){lcd.setCursor(6,2); lcd.print("Yes");} else{lcd.setCursor(6,2); lcd.print("No ");} }

Future Scope of Home Security System

  • Embedded has taken over the whole world because of its user-friendliness and low cost.
  • Instead of hiring security guards(which is quite expensive), now smart homes in modern societies are equipped with such home security systems.
  • Modern Home Security systems are even linked with local police or security agencies for emergency help.
  • Moreover, these security systems are not bound to homes only, nowadays offices, banks, shopping malls etc. are all equipped with such smart security systems.

Future Work on Home Security System

  • Today, we have designed a very simple Home Security System, where we interfaced few sensors and have only placed a Buzzer.
  • We will continue this project and will add smart features to it.
  • Let's have a look at few features, which we can add to this project:
    1. We can interface the GSM module to send messages, in case of emergency.
    2. We can add more sensors i.e. ultrasonic sensors, different types of Gas sensors in it.
    3. We can also improve our code by using interrupts instead of polling.
    4. We can also add a camera for facial recognition.
    5. To improve the security, we can add a keypad and only authorized persons will have the access to enter.
    6. The fingerprint sensor can also be used for identification purposes.

No matter what happens, you should put safety first. Even a great security system won’t ensure full protection, which is why you might want to consider secondary measures. Hiring fire watch security will assist you on a daily basis, performing tasks that machines cannot. These veterans will protect your home or office, addressing potential hazards as they appear.

So, that was all for today. I hope you guys have enjoyed today's project. If you have any questions/queries, please ask in the comments and I will try my best to resolve them asap. Thanks for reading, take care. Bye :)

DC Motor Control using XBee & Arduino in Proteus

Hello friends, I hope you all are doing great. In today's tutorial, we are gonna design a project named DC Motor Control using XBee & Arduino in Proteus ISIS. I have shared the complete code and have also explained it in detail. You can also download the complete working Proteus Simulation given at the end of this tutorial. In this project, I have designed two Proteus Simulations. The first Simulation is of Remote control in which I have used a keypad. The second simulation contains our two DC Motors and I am controlling the direction of those DC Motors with my Remote Control. XBee Module is used for sending wireless data. The code will also work on hardware as I have tested it myself. So, let's get started with DC Motor Control using XBee & Arduino in Proteus ISIS:

DC Motor Control using XBee & Arduino in Proteus

  • I have designed two Proteus Simulations for this project.
  • The First Simulation is named as Remote Control while the second one is named as DC Motor Control.
  • I am controlling the directions of these DC Motors from my Remote.
  • So, let's first have a look at Remote section and then we will discuss the DC Motor Control.
  • You can download both of these Proteus Simulations (explained below) and Arduino codes by clicking below button:
Download Proteus Simulation
Remote Control
  • Here's the overall circuit for Remote Control designed in Proteus ISIS:
  • As you can see in the above figure that we have Arduino UNO which is used as a microcontroller and then we have XBee module which is used for RF communication and finally we have Keypad for sending commands.
  • You have to download this XBee Library for Proteus in order to use this XBee module in Proteus.
  • You will also need to download Arduino Library for Proteus because Proteus doesn't have Arduino in it.
  • The Serial Monitor is used to have a look at all the commands.
  • Now next thing we need to do is, we need to write code for our Arduino UNO.
  • So, copy the below code and Get your Hex File from Arduino Software.
#include <Keypad.h>

const byte ROWS = 4; //four rows
const byte COLS = 4; //three columns
char keys[ROWS][COLS] = {
  {'7','8','9', '/'},
  {'4','5','6','x'},
  {'1','2','3','-'},
  {'*','0','#','+'}
};
byte rowPins[ROWS] = {13, 12, 11, 10}; //connect to the row pinouts of the keypad
byte colPins[COLS] = {9, 8, 7, 6}; //connect to the column pinouts of the keypad

Keypad keypad = Keypad( makeKeymap(keys), rowPins, colPins, ROWS, COLS );

int KeyCheck = 0;

void setup() 
{
  Serial.begin(9600);   

}

void loop() 
{
  char key = keypad.getKey();
  
  if (key)
  {
    if(key == '1'){KeyCheck = 1; Serial.print("1");}
    if(key == '2'){KeyCheck = 1; Serial.print("2");}
    if(key == '3'){KeyCheck = 1; Serial.print("3");}
    
    if(key == '4'){KeyCheck = 1; Serial.print("4");}
    if(key == '5'){KeyCheck = 1; Serial.print("5");}
    if(key == '6'){KeyCheck = 1; Serial.print("6");}

    if(KeyCheck == 0){Serial.print(key);}
    KeyCheck = 0; 
  }

}
  • The code is quite simple and doesn't need much explanation.
  • First of all, I have initiated my Keypad and then I have started my Serial Port which is connected with XBee Module.
  • In the Loop section, I am checking the key press and when any key is pressed our microcontroller sends a signal via XBee.
  • Now let's have a look at the DC Motor Control Section.
DC Motor Control
  • Here's the image of Proteus Simulation for DC Motor Control Section:
  • We have already installed the XBee & Arduino Library for Proteus in the previous section.
  • Here you need to install L298 Motor Driver Library for Proteus, which is not available in it.
  • So here we have used two DC Motors, which are controlled with L298 Motor Driver.
  • XBee is used to receive commands coming from Remote Control.
  • Now use below code and get your hex file from Arduino Software:
int Motor1 = 7;
int Motor2 = 6;
int Motor3 = 5;
int Motor4 = 4;

int DataCheck = 0;

void setup() 
{
  Serial.begin(9600);
  pinMode(Motor1, OUTPUT);
  pinMode(Motor2, OUTPUT);
  pinMode(Motor3, OUTPUT);
  pinMode(Motor4, OUTPUT);
   
  digitalWrite(Motor1, HIGH);
  digitalWrite(Motor2, HIGH);
  digitalWrite(Motor3, HIGH);
  digitalWrite(Motor4, HIGH);

  Serial.print("This Arduino Code & Proteus simulation is designed by:");
  Serial.println();
  Serial.println("        www.TheEngineeringProjects.com");
  Serial.println();
  Serial.println();
  Serial.println();
   
}

void loop() 
{
  if(Serial.available())
  {
    char data = Serial.read();
    Serial.print(data);
    Serial.print("      ======== >      ");
    
    if(data == '1'){DataCheck = 1; digitalWrite(Motor2, LOW);digitalWrite(Motor1, HIGH); Serial.println("First Motor is moving in Clockwise Direction.");}
    if(data == '2'){DataCheck = 1; digitalWrite(Motor1, LOW);digitalWrite(Motor2, HIGH); Serial.println("First Motor is moving in Anti-Clockwise Direction.");}
    if(data == '3'){DataCheck = 1; digitalWrite(Motor1, LOW);digitalWrite(Motor2,  LOW); Serial.println("First Motor is Stopped");} 

    if(data == '4'){DataCheck = 1; digitalWrite(Motor3, LOW);digitalWrite(Motor4, HIGH); Serial.println("Second Motor is moving in Clockwise Direction.");}
    if(data == '5'){DataCheck = 1; digitalWrite(Motor4, LOW);digitalWrite(Motor3, HIGH); Serial.println("Second Motor is moving in Anti-Clockwise Direction.");}
    if(data == '6'){DataCheck = 1; digitalWrite(Motor3, LOW);digitalWrite(Motor4,  LOW); Serial.println("Second Motor is Stopped.");}

    if(DataCheck == 0){Serial.println("Invalid Command. Please Try Again !!! ");}
    Serial.println();
    DataCheck = 0;
  }

}
  • In this code, I am receiving commands from my remote and then changing the direction of my DC Motors.
  • When it will get '1', it will move the first motor in Clockwise Direction.
  • When it will get '2', it will move the first motor in Anti-Clockwise Direction.
  • When it will get '3', it will stop the first motor.
  • When it will get '4', it will move the second motor in Anti-Clockwise Direction.
  • When it will get '5', it will move the second motor in Clockwise Direction.
  • When it will get '6', it will stop the second motor.
  • It will say Invalid Commands on all other commands.
  • Now let's have a look at its working & results.
Working & Results
  • Now run both of your Simulations and if everything goes fine, then you will have something as shown in below figure:
  • Now when you will press buttons from keypad then DC Motors will move accordingly.
  • Here's an image where I have shown all the commands.
So, that's all for today. I hope you have enjoyed today's project in which we have designed DC Motor Control using XBee & Arduino in Proteus ISIS. Thanks for reading !!! :)

Real Time Security Control System using XBee and GSM

Hello everyone, I hope you all are doing great. In today's post, I am going to share a Final Year Project in detail, named as Real Time Security Control System using XBee and GSM. I will give you all the details so that you can easily design it on your own. I've given the Proteus Simulation to download below. In that zip file, you will get both the Arduino codes and Proteus Simulations.

I have divided this whole project design into four parts. If you got into any trouble in your project, then ask in comments and I will try my best to resolve them. So, today we are gonna have a look at the basics of this Security project. There are a lot of systems introduced in the market these days that are used to transfer sensor data from one node to another either wirelessly or through some wired connection. The proposed technique also works on this same principle. But a lot of modifications are intended to introduce in order to enhance this technique.

Where To Buy?
No.ComponentsDistributorLink To Buy
1LCD 20x4AmazonBuy Now
2NEO-6MAmazonBuy Now
3SIM900AmazonBuy Now
4DS18B20AmazonBuy Now
5Flame SensorsAmazonBuy Now
6MQ-2AmazonBuy Now
7Arduino UnoAmazonBuy Now

Real Time Security Control System

  • You can download this Project by clicking the below button:
Real Time Security Control System using XBee and GSM Now let's have a look at the project description:

Project Description

In this project, I have designed a real-time security system, which consists of two wireless nodes named as
  • Sensor Node
  • Base Node.
So, first of all, let's have a look at these two nodes one by one. First, I am going to discuss Sensor Node:

Sensor Node

The sensor node is placed in that building which is needed to be secured. Sensor node consists of three different sensors and two modules used for security purposes named as:
  • Sensors:
    • Smoke Sensor: To detect Smoke.
    • Flame Sensor: Used for Fire Detection.
    • Temperature Sensor: Measuring Temperature of surroundings.
  • Modules:
    • GSM module: is used to deliver the notification message if any fault occurs in the system.
    • GPS module: is used to locate the exact position of the fault that occurred.
Below two modules are used for controlling purposes:
  • Modules:
    • Arduino UNO: All these Sensors and modules are connected to Arduino UNO.
    • XBee Module: To send sensors' data & GPS Location to Base Node.
Block Diagram for the Sensor Unit of Real Time Security Control System using XBee and GSM is shown in below figure: Now let's have a look at the Base Unit of Real Time Security Control System using XBee and GSM.
Base Unit:
  • The base node will be placed in the Control Department. It could be your security guard's room or the nearby police station.
  • This node will receive the data from the sensor node via XBee module.
  • So, in total it will have three modules on it which are:
    • XBee Module: It is used to maintain wireless communication between the sensor node and base node.
    • LCD 20x4: It is used to display real-time conditions like sensors' values & GPS Location.
    • Arduino Mega 2560: It is used to control both of these modules.
  • Here's the block diagram of Base Unit for Real Time Security Control System using XBee and GSM:

Components Selected

In the previous section, we have had a look at the basic Introduction of our Real Time Security Control System using XBee and GSM. This section will elaborate on the selection of the components which is the most important factor before designing any project/product. This is basically a simulation based project so there is no hardware involved in this project. The proposed technique is designed in Proteus ISIS. All of the components are taken from the Proteus library.

Flame Sensor

  • The flame sensor is an electronic device usually used for fire detection purposes.
  • It can be used in homes, industries, offices, schools etc.
  • A certain threshold is adjusted while designing the algorithm.
  • When the fire flames cross that particular threshold, the flame sensor will send a signal to Arduino which will send that signal through Xbee to Base Unit immediately.
  • As soon as the signal will be received on the Base Unit, the alarm will turn ON and hence guards will come to know that this area has become dangerous now.
  • Immediate precautions must be taken in this case.
  • Flame Sensor is not available in Proteus so we have designed its library.
  • You should download this Flame Sensor Library for Proteus.

Smoke Sensor

  • A smoke sensor is used to detect a certain level of smoke within the desired region.
  • It is usually used in homes and organizations for the detection of fire or internal burns.
  • It is a low-cost and very sensitive sensor that also beeps if someone is smoking in its coverage area.
  • This Smoke Sensor will detect any smoke in the area then it will warn the Arduino board which will, in turn, send a signal via XBee to Base Unit.
  • Proteus software doesn't have a smoke sensor in it so you should download this Smoke Sensor Library for Proteus.

Temperature Sensor

  • The temperature sensor is an electronic sensor used to estimate the temperature in the surroundings.
  • The temperature range can be adjusted while designing its algorithm.
  • When the temperature in the surroundings reaches the adjusted threshold, it generates a notification.
  • Most of the time an alarm is attached to the temperature sensor. The alarm starts to beep when the desired temperature is reached. It can be used in homes, offices and organizations to maintain the temperature of a certain area according to the desired requirements.
  • But in our project we want to send a signal to the base unit, so that's why this sensor will send a signal to the base unit.

XBee Module

  • XBee is selected as a wireless module. The proposed technique consists of two XBee modules.
  • One is attached to the base unit and the other is attached to the sensor unit.
  • The data is transmitted by the sensor unit via XBee module.
  • And the XBee module attached to the base unit receives that data from the sensor unit and sends it to the microcontroller to manipulate it.
  • There are many wireless modules available in the market these days e.g. Radio Frequency (RF) module.
  • Some of them are not used commonly due to their shorter ranges e.g. Bluetooth module.
  • XBee module is far better as compared to the Bluetooth module and provides a larger coverage area in comparison to similar wireless modules.
  • So, XBee is used in this project. XBee module is not available in Proteus so that's why you should download XBee Library for Proteus.

Arduino UNO

  • The microcontroller plays a vital role in any project and is like a backbone of a particular project.
  • Arduino UNO and Mega 2560 both are selected as a microcontroller.
  • Arduino UNO is attached to the sensor unit and Arduino Mega 2560 is attached to the base unit.
  • Arduino is an open-source device. Students can take online help in almost every task. Online source codes are also available for different tasks.
  • So, a student can easily perform them with a proper understanding.
  • Arduino boards are also not available in Proteus so you should download this Arduino Library for Proteus.

GPS Module

  • GPS module is used to locate the exact location of the fault.
  • GPS module will be attached to Sensor Unit, so if anything goes wrong then we can also get the GPS location via SMS.
  • It will provide us the longitude and latitude of the fault that occurred on the sensor unit.
  • So, now if any of these sensors goes wrong then you can easily get the location of your sensor node via SMS.
  • Proteus doesn't have GPS Module in it so you should download this GPS Library for Proteus.

GSM Module

  • GSM module is used for security purposes.
  • If a fault occurs at any position within the network, a notification message will be generated and sent towards the base unit from the sensor unit.
  • We can also generate a call using this GSM which will be a much better way.
  • This GSM module will also send the location via SMS. We have received this location from GPS in the form of longitude and latitude.
  • Proteus doesn't have GSM Module in it so you should download this GSM Library for Proteus.
So, these are all the components/modules, which I have used in this project. So, in the first part, have seen the basic Introduction of the project and then in the second section, we have had a detailed overview of all the modules used. So, now in the next section which is the third part I am gonna show you How to design these Proteus Simulations.

Proteus Simulation of Security Control System

In this section, we are gonna have a look at how to design these Proteus Simulations for Real Time Security Control System using XBee and GSM. As you know, I have used Arduino so we also need to discuss the code in order to run these simulations. So, first, we will design the proteus simulations and then we will write its code.

Proteus Simulations

  • I have designed two simulations for this project.
  • First of all, what you need to do is to download all those above Proteus Libraries and add them properly.
  • I have given detailed instructions in each post about How to use them.
  • After adding all these Libraries, now restart your Proteus software and design a circuit for the Sensor Unit.
  • Proteus Simulation of Sensor Unit is shown in the below figure:
  • As you can see in the above figure, the Sensor unit consists of three different sensor modules, which are:
    • Temperature sensor.
    • Smoke sensor.
    • Flame sensor.
  • In this unit, Arduino UNO is used as a microcontroller to get data from all the sensors and this data will be transmitted wirelessly towards the base unit for proper monitoring.
  • XBee module is used for wireless communication between the sensor unit and the base unit.
  • GPS module is interfaced in order to locate the exact position of the fault that occurred in the system.
  • Now we are gonna design our second simulation for the Base Unit.
  • The Proteus Simulation of Base Unit is shown in the below figure:
  • The base unit is basically a monitoring end of the system.
  • All the data obtained from the sensors is transmitted by the sensor unit towards the base unit.
  • The base unit has an Arduino Mega 2560 as a micro-processing unit.
  • Just like the sensor unit, an XBee module is also attached to the base unit in order to receive the data wirelessly sent by the base unit.
  • There is an LCD on the base unit. It is used to visualize the obtained results. It displays different messages e.g. fault detection, sensors data etc.
  • GSM module is used in the base unit to send the notification if a fault occurs in the system or the system is showing some abnormal behavior even for an instance.
  • This GSM module will also send the location in SMS. You have to enter the number of recipients in the programming code.

Arduino Code of Security Control System

  • When you download this project, you will get a .rar file and within that file, you will find two folders.
  • One of them will have the Arduino Codes and the other one will have Proteus Simulations.
  • I have already added all the hex files so you just need to run these simulations.
  • If you got into any trouble then use our Contact Form and our team will help you out.
  • You should also need to read How to Get the hex file from your Arduino Software.

Proteus Simulation Results

  • Now coming towards the last section of this project, now I am gonna show you the results of these simulations.
  • So, I have run both of these Simulations and here's the first look at Base Unit:
  • The LCD on the base unit is displaying the title of our project.
  • Virtual Terminal is connected with Arduino so that we could also have a look at incoming or outgoing data.
  • After that first of all, Arduino will communicate with the GSM module and will set its settings, as shown in the below figure:
  • Now our GSM module has configured, so the next screen of the base unit is shown below:
  • As you can see in the above figure that LCD is displaying the values of all three sensors and because all are normal that's why the Alarm is OFF.
  • The temp value is 0 because we haven't yet received the data from the sensor unit.
  • Now let's run our Sensor Unit and make our Fire Sensor HIGH, then you will get results as shown in the below figure:
  • The alarm is also ON in the above figure and SMS has also been sent which is shown in Virtual Terminal.
  • In case, when both fire and smoke are detected, LCD will display smoke as well as fire detection messages.
  • SMS will also be sent as you can see in the Virtual Terminal. GSM has sent the message indicating Fire Detected and GPS Location.
  • Base Unit Proteus Simulation is shown in the below figure:
  • So, whenever you change any of these sensors' values in the Sensor Unit then the respective value will change in the Base Unit.
So, that was all about Real Time Security Control System using XBee and GSM. If you got into any trouble then ask in the comments and I will help you out. Thanks for reading, take care and have fun !!! :)

Home Automation Project using XBee & Arduino

Hello friends, I hope you all are fine and having fun with your lives. Today, I am going to share a new Home Automation Project using XBee & Arduino. Home Automation Project is a most commonly designed project by the engineering students. So, that's why I have thought to create a complete Home Automation Project so that engineering students can get benefit out of it.

We all know about automation which is originated from automate or automatic. In automation the task is done automatically and you don't need to control it. In normal Home automation project, there are few sensors which are displayed wirelessly to user and there are few controls like user can ON or OFF Lights, Fans etc via remote or mobile App.

In this Project, I have used Arduino UNO board and I have designed its complete working simulation in Proteus software, so that users got sure that its working perfectly. Because we have to work a lot in designing this complete working simulation of home Automation Project that's why its not free but you can buy it for a small price of $50. In this price, you will get the compelte Arduino code along with the working Proteus Simulation. But before buying this project, must have a look at the details below so that you are sure what you are buying. So, let's get started with Home Automation Project using XBee & Arduino.

Home Automation Project using XBee & Arduino

  • You can buy the complete working Proteus Simulation along with the Arduino Programming Code by clicking the below button.
  • You can pay via Paypal and the download link will be instantly available to you and if you don't have the PayPal account then use our Contact Us Form and we will find some other way for you.

Buy This Project

1: Overview
  • First of all, let's have an overview of this Home Automation Project.
  • In this Project, I have designed two simulations, one simulation is for Remote using which we are gonna control our appliances and the second simulation is for the controlling of these appliances.
  • So, when you press buttons from your remote section, a wireless command will be sent to the control board and it will turn ON or OFF the respective load.
  • Moreover, there's an LCD on the Remote on which you will also check the values of the sensors.
  • So, in simple words, the remote will be in your hand and using this remote you can easily turn ON or OFF your appliances and can also check the status of your different sensors wirelessly.
  • Let's first have a look at the remote section:
Remote Control:
  • In Remote Control Section, I have used the below main modules:
    • Arduino UNO: Microcontroller Board.
    • KeyPad: Commands will be sent by clicking this Keypad's buttons.
    • LCD (20 x 4): For Displaying Sensor's Data & Commands.
    • XBee Module: It's an RF Module used for sending wireless commands.
  • Now when you click any button on your Keypad, a command is sent from Arduino to XBee Module and the XBee module then forwards that command to other XBee on the Control Unit.
  • Moreover, when the Control Unit sends the Sensors' data on xbee then Arduino receives that data and then displayed that data on LCD.
  • Here's the block diagram of Remote control section which will give you a better idea of its working:
  • Here's the Proteus Diagram of our Remote Section:
  • In the above Proteus Simulation of Remote Control, you can see that we have Arduino UNO board which is connected with LCD, KeyPad and XBee Module.
  • Working of this Remote section will be discussed in the later section.
  • Now let's have a look at the Control Unit Side of Home Automation Project.
Note:You must also have a look at below tutorials because I have interfaced these modules separately with Arduino as well: Control Unit:
  • In the previous section, we had an overview of the Remote section, now let's have a look at the Control Unit.
  • The Control Unit is the Unit which is being controlled by the Remote Control.
  • The Main components of Control Unit are:
    • Arduino UNO: Microcontroller Board.
    • Relays: Used to control the appliances. I have added eight relays so you can control eight appliances.
    • Lamps: Indicating the Bulbs.
    • DC Motors: Indicating the Fans.
    • Smoke Sensor: Used to detect the Smoke.
    • Flame Sensor: Used for Fire detection.
    • DS18B20: Used to measure atmospheric temperature.
Note:
  • On this Control unit, the Arduino UNO is getting the data from the smoke sensors and then sending this data via XBee to Remote Control.
  • We have seen in the previous section that this data is then displayed over LCD.
  • Moreover, when any button is pressed from the Remote Control, the command is received by this Arduino via XBee.
  • On receiving this command, Arduino UNO then turns ON or OFF the respective relay which in turn ON or OFF the respective appliance.
  • Here's the block diagram of this control unit:
  • You can see in the above block diagram that I have connected three sensors with Arduino and Arduino is receving their values and then sending these values to the remote control via XBee.
  • Moreover Relays are also connected to Arduino and then loads are further connected to these Relays.
  • So, Arduino is controlling these Relays which in turn are controlling the loads.
  • I have used eight relays and hence eight loads.
  • The Loads I have used are all DC loads because Proteus doesn't have AC active loads in it but you can place AC loads as well.
  • Here's the Proteus Simulation of Control Unit:
  • You can see all the modules are present in it.
  • Eight relays are present on the right side and their outputs are going into the loads.
  • I have used four lamps and four DC Motors.
  • Now let's have a look at their operation.
Note:You should also have a look at below tutorials in which I have interfaced these sensors separately with Arduino:
2: Operation
  • I have already mentioned their operation in above section so I am not gonna discuss it in detail.
  • But let's have a little talk about their operation.
  • First I am gonna discuss the operation of Remote Control:
Remote Control:
  • The remote Control has an XBee module which is used for wireless communication.
  • The Keypad has buttons on it so now when you press button "1" on the keypad then the Signal is sent via XBee to Control Unit.
  • The control unit will automatically turn on the first load when it will receive the command from button "1" of Remote Control.
  • When you press "1" for the first time then the first load will turn ON but when you press button "1" again then the first load will go off.
  • So, its like if you want to turn it ON then press it and if you want to turn it OFF then press again. (Quite simple :P)
  • As there are eigth loads, so button "1" to "8" are working for loads "1" to "8" respectively.
  • Moreover, when sensor's data come from control unit then it is updated in the LCD of Remote Control.
  • Now let's have a look at the operation of Control Unit:
Control Unit:
  • As the Control Unit is concerned, it keeps on waiting for the command from remote and whenever a command is received from the Remote Control, it turns ON or OFF the respective load.
  • Moreover, it also sends the data of sensors continuously to the Remote Control.
  • For this wireless communication, XBee is used here.
3: Working
  • This is the last section of this project where will will have a look at the working of the project.
  • I haven't divided this section in parts instead I have create a video which will explain the working in detail.
  • Here's the First look of Remote section image while working:
  • Now when the Sensor's data come from the remote Section then it will be displayed in the LCD as shown in below figure:
  • You can see in the above figure that both sensors are detecting and the temperature is also displayed in the LCD.
  • Now the complete working of this project is shown in the below video which will give you complete idea of this project:
Note:
  • If you buy this project and you are unable to run it properly then we will provide you free service and will make it work on your laptop perfectly. :)
So, that's all for today. I hope you have liked this Home Automation Project and are gonna buy this one. But again before buying it must read this tutorial and also watch the video so that you get complete understanding of this project.

XBee Library for Proteus

Hello everyone, today I am going to share a new XBee Library for Proteus. I am quite excited while sharing it as we are the first developer for this XBee Library. Now you can quite easily use XBee module in your Proteus software using this XBee Library for Proteus.Wehave spent quite a lot of time in developing this and that's the reason I couldn't share new tutorials in the past few days. Anyways we are done with this new exciting XBee Library for Proteus, hope you are gonna enjoy this one. I have already sharede two libraried for Proteus which are Arduino Library for Proteus and GPS Library for Proteus. You can also interface this XBee module with Microcontrollers like Arduino, PIC Microcontroller and 8051 Microcontroller quite easily.

As its the first version of our XBee Library for Proteus so its not quite perfect and can't do the complex tasks such as analog inputs etc. It will just do the serial communication. This xbee module has two pins TX and RX and you can do your communication with it quite easily. We have designed this XBee Library for Proteus, after quite a lot of effort and we are quite proud that we are presenting it first time for Proteus. Other bloggers are welcome to share this library on their blogs to share the knowledge but do mention our blog post link in your post. :) You should also have a look at XBee Arduino Interfacing. So, let's get started with it.

XBee Library for Proteus

  • First of all, download this XBee Library for Proteus by clicking on the below button:
XBee Library for Proteus

  • Now once you click it you will get a zip file to download so download this zip and open it.
  • In this zip file you will get two files named as:
    • XBeeTEP.LIB
    • XBeeTEP.IDX
  • So, now place these two files in the libraries folder of your Proteus software.
Note:
  • Now, start your Proteus ISIS software or restart it if its already running.
  • Go to your components library and search for XBee Module as shown in below figure:
  • Now place it in your workspace and it will look something as shown in below figure:
  • If you don't know much about xbee module then you should also have a look at Introduction to XBee Module.
  • As you can see in the above figure, its our xbee module in Proteus for the first time.
  • As, I mentioned earlier, its a first version of xbee module so its not very advanced and it will do just the basic serial communication i.e. sending and receiving data.
  • It has two pins on it which are TX and RX and using these two pins you can send and receive data quite easily.
  • So, let's design a simple example and we will see How to do the Serial communication using this new XBee library for Proteus.
  • Design a simple circuit as shown in below figure:
  • Now what I did is, I simply place a Virtual terminal with both of these xbee modules.
  • Now we need to change the Properties of one of these XBee module so double click on any one of these and you will get the below window:
  • You should also have a look at Interfacing of XBee with Computer.
  • Now, I have simply changed the Physical Port of this module to COM2 while the other module is at COM1.
  • So, now one of my XBee module is at COM1 while the second module is at COM2.
  • Now when I run my simulation then both XBee will start sending and receiving data on their respective COM Ports.
  • So, what I need to do is to virtually combine these two ports and for that I have used a software named as Virtual Software Driver from Eltima and I combine these two ports.
  • Now, run your simulation and whatever you type in the Virtual Terminal of first xbee will appear in the virtual terminal of second xbee. as shown in below figure:
  • You can also interface this XBee modue with other microcontrollers like Arduino, PIC Microcontrollers or 8051 Microcontrollers etc.
  • I have explained this whole tutorial in below video as well.
I hope you have enjoyed it and are gonna like it. Let me know if you got into any trouble and have problems in using this library. Also share your suggestions about improvement in this XBee Library for Proteus. :)

XBee Arduino Interfacing

Hello friends , I hope you all are fine and having fun with your lives. Today, I am going to share a new project which is XBee Arduino Interfacing. In my previous tutorials in the XBee series, we have had first Introduction to XBee Module and after that we have also discussed How to Interface XBee Module with Computer. Now we are all well aware of XBee Module and can easily do the XBee Arduino Interfacing. We have seen in the previous tutorial that XBee Module works on Serial protocol so we have to use the Serial Pins of Arduino UNO board.

If you want to use any other microcontroller then you can its not a big issue, just see the way how the programming goes and convert it to the language of your microcontroller i.e. PIC Microcontrollers or 8051 Microcontrollers. If you guys have any question, you may contact me or can ask in the comments. so, let's get started with XBee Arduino Interfacing:

Other XBee Projects:

XBee Arduino Interfacing

  • First of all you need to do is XBee Arduino Interfacing.
  • So, in order to do that you have to connect the Pin # 2 and Pin # 3 of Xbee with the Tx and Rx of Arduino and Pin # 1 to 3.3V of Arduino and Pin # 10 to ground of Arduino as shown in the below figure:
Note :
  • Don't solder the XBee pins directly into the Arduino as it may damage the XBee.
  • You can buy the XBee Shield for Arduino.
  • After that attach your XBees with the two Arduino Boards and use the below code:
int b1 = 2;
int b2 = A3;int mode1 = A4;
int mode2 = A5;void setup()
{
Serial.begin(9600);
delay(100);
pinMode(b1,OUTPUT);digitalWrite(b1, LOW);

pinMode(b2,INPUT_PULLUP);
pinMode(mode1,INPUT_PULLUP);
pinMode(mode2,INPUT_PULLUP);

}

void loop()
{
if (Serial.available() > 0)
{
delay(500);
Serial.print("+++"); delay(1000);
Serial.print("rnATDL1"); delay(100);
Serial.print("rnATCN"); delay(100);
Serial.print("A");
}

}
  • Now add this code in one of your Arduino Board and a simple serial receiving code on the second arduino.
  • Now whenever you press the button you will get A on the second arduino board.
  • You can change it with anything you like and on the second side you can do anything by adding a condition.

That's all for today. I hope you have enjoyed this tutorial XBee Arduino Interfacing. I will share more projects on XBee Arduino Interfacing soon. If you are getting any problem you can ask in comments. Thanks. ALLAH HAFIZ :))

Interfacing of XBee with Computer

Hello friends, I hope you all are fine and having fun with your lives. In today's tutorial, I am going to show you the Interfacing of XBee with Computer. In the previous part of this tutorial, I have given the Introduction to XBee Module. Hope you guys have read it and if not then go visit it so that you may have some idea about XBee module.

Now come to the second part about how to interface xbee with computer because its important as if you cant interface the xbee with computer then you cant interface it with any microcontroller and later I will tell you its interfacing with microcontroller. You should also check this XBee Library for Proteus which will help you to simulate XBee module in Proteus.

We will cover arduino with more detail as its the most usable microcontroller these days with XBee. In this tutorial, I will remain to the basics of XBee i.e. we will just simple send data from one xbee to another but in coming tutorials we will have a look on quite difficult projects i.e. plotting of nodes using Rssi value. I have also posted a tutorial on Interfacing of XBee Module with Arduino. If you guys have any question, you may contact me or can ask in the comments. So, let's get started with Interfacing of XBee with Computer:

Interfacing of XBee with Computer

  • XBee works on the TX / RX logic so if we want to interface xbee with computer, we need to use a serial module.
  • There are two type of module, one is usb module available at sparkfun and its costly for the students of Pakistan.
  • So we have created our own module, its based on serial port and works is a similar way as this sparkfun module.
  • This serial module consists of MAX232 and here's its circuit diagram.
  • You just need to do is, the pins going to the uC are now go to the pin # 2 and pin # 3 of XBee.
  • Moreover, +3.3 V to the pin # 1 of XBee and Ground to the pin # 10 of XBee.
  • One more thing , dont forget to common the grounds of XBee and this circuit.

Software to Download

  • There is a software named X-Ctu, is used for Interfacing of XBee with Computer.
  • So first of all, download X-Ctu and install it in your computer.
  • Attach your module's serial port with the computer after placing the XBee in it.
  • Open the software, the first interface of this software is shown in the image below :
  • The White Box in which there is written USB Serial Port (COM 9) indicates the serial ports attached to your computer.
  • In my case it is COM 9 and in your case it will be mostly COM 1.
  • Now Click on the Test / Query button and if everything's going fine then the following window will pop up.
  •  This prompt box tell us a few things about XBee.
  • In case if something's missing and not working properly then you will get something like that :

Configuring the XBee

  • There are a lot of AT commands used for the configuring XBee. I will tell you where to enter these commands but first lets have a view at these commands.
  • Here I am explaining those which we are going to use for the simplest communication.
  • + + +  : This command will initiate the command mode and now our xbee is ready for taking orders and in this mode it wont transmit data.
  • ATMY2 : ATMY is used to set the address of xbee we are using and 2 is the address we have set for our module.
  • ATDL5 : ATDL is used to set the address of the destination module and 5 is the address. In other words now our module 2 only send data to that module which has address 5 .
  • ATWR : This command is used to write these configurations into XBee . If you don't use these commands then once you removed your xbee your values will be erased.
  • ATCN : To terminate the command mode and after that you are ready to send data.
NOTE :
  • ATDL of tranmitter = ATMY of reciever
  • Suppose I have two modules so in order them to communicate I will set the first module as ATMY = 2 and ATDL = 5 and the second module as ATMY = 5 and ATDL = 2. Now both the modules can send data to each other.But if I change the second module's ATDL = 3 then my second module can't send the data to first but still my first module can send data to the second. ( a bit complicated :) )
  • Only this +++ command doesn't require ENTER but in all other press the ENTER tab after entering command.

Where to Enter These Commands

  • Now the most common question is where to enter these commands.
  • Let's come back to X-Ctu,Now click the Terminal tab on top of the software as shown below :
  •  Now Enter the Commands one by one as shown in the image below :
  • In the above figure, I have set my first xbee as ATMY = 1111 and ATDL = 2222.
  • Now remove the first XBee and attach the second XBee , restart the software and do the same steps as for first but now the settings will be as follows :
  • In the above figure, I have set my first xbee as ATMY = 2222 and ATDL = 1111.
  • Check the difference in addressing of both XBees.
  • Your both XBees are configured.

Communication Between XBees

  •  Now attach first XBee to one computer using the module and the second to other computer using another module.
  • Open the software and click the terminal tab.
  • Now whatever you enter in the terminal tab of first xbee , it will be receiving on the terminal tab of second and vice versa.
  • So, that's all about Interfacing of XBee with Computer.

That's all for today and I am a bit tired too while writing this tutorial on Interfacing of XBee with Computer, so I will continue it tomorrow regarding the microcontroller part. One more thing play with the software and do let me know what you find in the comments. Thanks. ALLAH HAFIZ :))

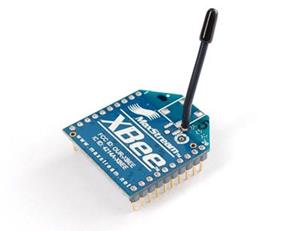
Introduction to XBee Module

In this tutorial, we are gonna hanve an Introduction to XBee Module. XBee is an RF module and these days its using in lots of student projects and I am getting a lot of queries reagarding this module. So first we will cover the introduction of XBee in this post. Soon I will tell you about Interfacing of XBee Module with Computer and also after this discussion we will also discuss Interfacing of XBee Module with Arduino. You can also Interface it with other Microcontrollers like PIC Microcontroller or 8051 Microcontroller.

We will cover arduino with more detail as its quite famous and easily accessible microcontroller these days. In this tutorial I am gonna add just simple interfacing of XBee module with arduino but soon I will post few quite difficult project on XBee like mesh networking. If you guys have any question, you may contact me or can ask in the comments. So, let's get Started with Introduction to XBee Module:

What is XBee ?

  • XBee is a very complicated module used for RF communication. It is used for wireless communication.
  • It is used these days in many projects as it is very easy to use and its advantages are more than any other RF module.
  • You can use XBee for point to point communication also.
  • There are two commonly used versions of XBee, one is XBee series 01 and other is XBee pro.
  • The only difference between the two is in their range.XBee pro has more range to operate than the simple XBee.
  • Its hardly available in Pakistan so if you want to buy XBee Series 01 in Pakistan then use our Contact Form. You will get it within 2 days.
  • Download the datasheet of XBee and must read it as reading datasheet is always beneficial.

How to operate XBee ?

  • To operate XBee, you will need two XBees, one will act as a transmitter and the other will act as a receiver.
  • Now suppose you want to send something from one side to another, now you have to connect one xbee at the transmitter side and the other at the reciever side.
  • Let's take an example of home automation project in which you are using a remote to switch on your light or fan etc.
  • So in that case there must be one XBee in your remote and the second one in your board where the light circuit is placed.
  • So when you press the button of remote, the XBee in remote will send an instruction to the XBee in the board.
  • As soon as the XBee in the board recieve the instruction from XBee in the remote it will on the light.
  • Obviously there will be microcontrollers attached with both the xbees and you need hell of a programming to do this operation but I was just explaining the procedure.
So, that's all about Introduction to XBee Module, I hope you have enjoyed this Introduction to XBee Module and are gonna use it in your projects. Thanks for reading and have fun !!! :)
Syed Zain Nasir

I am Syed Zain Nasir, the founder of <a href=https://www.TheEngineeringProjects.com/>The Engineering Projects</a> (TEP). I am a programmer since 2009 before that I just search things, make small projects and now I am sharing my knowledge through this platform.I also work as a freelancer and did many projects related to programming and electrical circuitry. <a href=https://plus.google.com/+SyedZainNasir/>My Google Profile+</a>

Share
Published by
Syed Zain Nasir