PLC Troubleshooting and Online Debugging

Hi Everyone! How are you doing, my friends? Today I bring a crucial topic for PLC programmers, technicians and engineers. We have been working together for a long time using ladder logic programming. We have completed together dozens of projects from real life and industry. One day I was thinking about what we have done in this series of ladder logic programming, and I came across that I missed talking about one essential topic ever. You know what? It’s the PLC troubleshooting and online debugging! After writing a ladder logic program for the project, you can imagine it should operate from the download moment 24/7. As usual, any system goes faulty one day. So we need to go through this matter, showing you how to find our PLC faults, troubleshoot, and go online with the PLC to figure out the cause of the problem. Is it in the program logic? Or inputs and outputs? The hardware has an issue, i.e. battery has died, and the program has gone. For those of you who do not know the meaning of the expression going online with the CPU, do not worry, my friends, as we will show you the operation of the PLC.

What’s after the first program download?

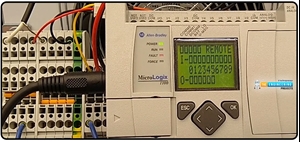
That is such an excellent question to open our tutorial by saying that dealing with PLC has mainly three modes of operations: program mode, in which we are allowed to download from PC to PLC, remote mode, in which we are permitted to download and upload to and from PLC, and the run mode that allows us to go online for monitoring and troubleshooting. So Folks, assume we have just completed the programming of the project. Then we tested the logic and downloaded the program to PLC. So what if a fault occurred, as shown in figure 1, and the operator called you for support? That’s what we are going to discuss in this tutorial trying to transfer our experience to you, helping you to get familiar with troubleshooting PLC, and doing live debugging to your program while it is running on the PLC and all IOs connected to the actual device, including sensors and actuators. So let’s get to the tutorial.

Connecting to PLC

First, you bring the PLC programming cable and plug it from PC into PLC. The type of PLC cable depends on the plc type and model. That information you can find in the PLC manual or google it easily. After plugging the PLC cable from PLC into PC, you open the RSLINX software and create a connection using the appropriate driver. The next step is selecting the CPU to see many options to go with one of them. For example, you will see the “download” option used to move the program from PC to PLC; there is also an “upload” option used to get a copy from PLC to PC. And “GO-ONLINE,” which you use to debug the program while running on the PLC. You also need to know, my friends there are many operating modes of the PLC. The program mode allows you to change and modify the program, but the program is not running in that mode of operation. The run mode of operation is also one option to let the program run, and there is no way to do modifications in that mode. The last mode of operation is the remote mode which allows you to make changes and clear the faults, and the program runs simultaneously.     

Faulty PLC

Once you have tried to connect to the CPU, you will see what Figure 2 depicts below. You can notice, everyone, the status in is red “faulted,” and that fault will not allow the program to run. Now you need to do two things. The first is to go into the vault to see what it is and the cause of the fault to find a way to fix it. Second, after setting the fault, you will need to clear the fault. And ultimately, you will change to run mode.

So now, my friends, how to see the fault description to know the reason behind it? It is straightforward, as you can see in figure 3. You go to the fault and right-click to see a popup menu appear. The popup menu has a couple of options like go to error or clear the fault and other options like go online, download, and upload. Now, why not choose to clearing the fault? That might work if the reason behind the fault has gone. But it won’t as long as the fault is still there. If you try, it wbe incorrectrect once you try to move to remote or run mode. By the way, you can clear the error in the program mode only.

Exploring the Fault

Figure 4 shows how to go to the fault to get to know some information about the fault, like which routine in which the fault took place, the precise description and reason for the fault, and the status bits to show you the statuses of PLC. Figure 4 shows the window of the status bits. One tab is the “errors” tab which shows the details about the fault. Now you can see that guy clearly says there is an issue in the expansion module, so you can check the modules and fix the problem, and then you can go ahead clearing the error, as we will show you in the next section.

Clearing the Fault

Now everyone, after checking the fault reason and getting rid of that issue, it is time to clear the fault and return the CPU to regular operation by switching it back to run mode. Remember, if the fault causes are not eradicated correctly, the fault will return once you try to switch to remote or ryn mode. Figure 5 shows how to clear the fault by right click on the fault highlighted in red and choosing “clear fault.” Now let’s see what happens.

Figure 6 shows a message confirming to clear the fault because going with that will remove the saved information about the fault.

Figure 7 shows that the fault has been successfully cleared, and the program switched to remote program mode meaning the CPU is removed from the fault, but the program still is not running and need to switch to run mode. Remember, my friends, up to this point, we were curious if the fault reason had cured correctly until the CPU switched successfully to run mode.

Figure 8 shows the CPU has switched to run mode in green! That means the errors have cleared, and the causes have gone. Now we need to move on to showing you how to do debugging by going online with your program that is running on the PLC. So let’s see that together, folks.

Connecting and going online

Figure 9 shows the direct step to connect to the PLC by clicking the comms menu and selecting your PLC guy.

Figure 10 shows the connection has been established, and the remote running green appears on the top left, as you can see, my friends.

Figure 11 shows how to go online by clicking on the menu at the top left corner, as shown below, and you will see a popup menu that comes out showing their options: Download, Upload, and GO Online options. Choose the last to complete the online going procedure. So now you are connected and online with the PLC, meaning you can monitor all the parameters and values and see the IO’s statuses.

What’s next???

Thanks, my friends, for following up with me in this tutorial I see it’s essential for you all to practice because I can not imagine a PLc programmer who does not know such practice. Next time will bring a new project from the factory to continue learning and practice together the PLC ladder logic programming. So please stay safe and be ready to meet soon with a new tutorial. 

Syed Zain Nasir

I am Syed Zain Nasir, the founder of <a href=https://www.TheEngineeringProjects.com/>The Engineering Projects</a> (TEP). I am a programmer since 2009 before that I just search things, make small projects and now I am sharing my knowledge through this platform.I also work as a freelancer and did many projects related to programming and electrical circuitry. <a href=https://plus.google.com/+SyedZainNasir/>My Google Profile+</a>

Share
Published by
Syed Zain Nasir