Matrices are an essential topic in different fields of study, especially in mathematics, where you have a bulk of data and want to organize, relate, transfer, and perform different operations on data in a better manner. We have studied a lot of types and operations on the matrices and have worked on different types with the help of MATLAB. Today, we are here to present the applications of the matrices in different fields of study to clarify the importance of this topic. So, have a look at the list of topics we are going to learn. Yet, first of all, I am going to describe what a matrix is.
What is a Matrix?
In the fields of physics and mathematics, there is the use of different types of numbers in groups of various types. In order to organize the data into a manageable format, matrices ar ...
Hello learners. Welcome to The Engineering Projects. We all know that matrices have been used in the engineering field for a long time, and they have a vital role in the calculation of different data. Therefore, we are learning about some very special kinds of matrices that are usually introduced to engineers at a higher level. Till now, we have seen some general operations on matrices and also examined the special kinds of matrices. Yet, today, we are moving a step forward and learning about some complex types of matrices that require strong basic concepts. So, have a glimpse at the topics that you are going to learn, and then, we’ll start practicing.
What is a matrix?
What are the different types of matrices that are less common?
How can we implement some interesting commands in MAT ...
Hey students welcome to another tutorial in The Engineering Projects where we are going to learn a lot about matrices. If you are a beginner to the metrics, then you should go to learn the fundamentals of matrices. Yet, if you know the basic introduction, you are at the right lecture because we are learning about the special kinds of matrices and you are also going to see the matrices in action using MATLAB. So, here is a simple list of today’s topics.
What is a matrix?
How can we identify the matrix with the help of its general form?
What are the different types of matrices?
What is the concept of transpose while dealing with matrices?
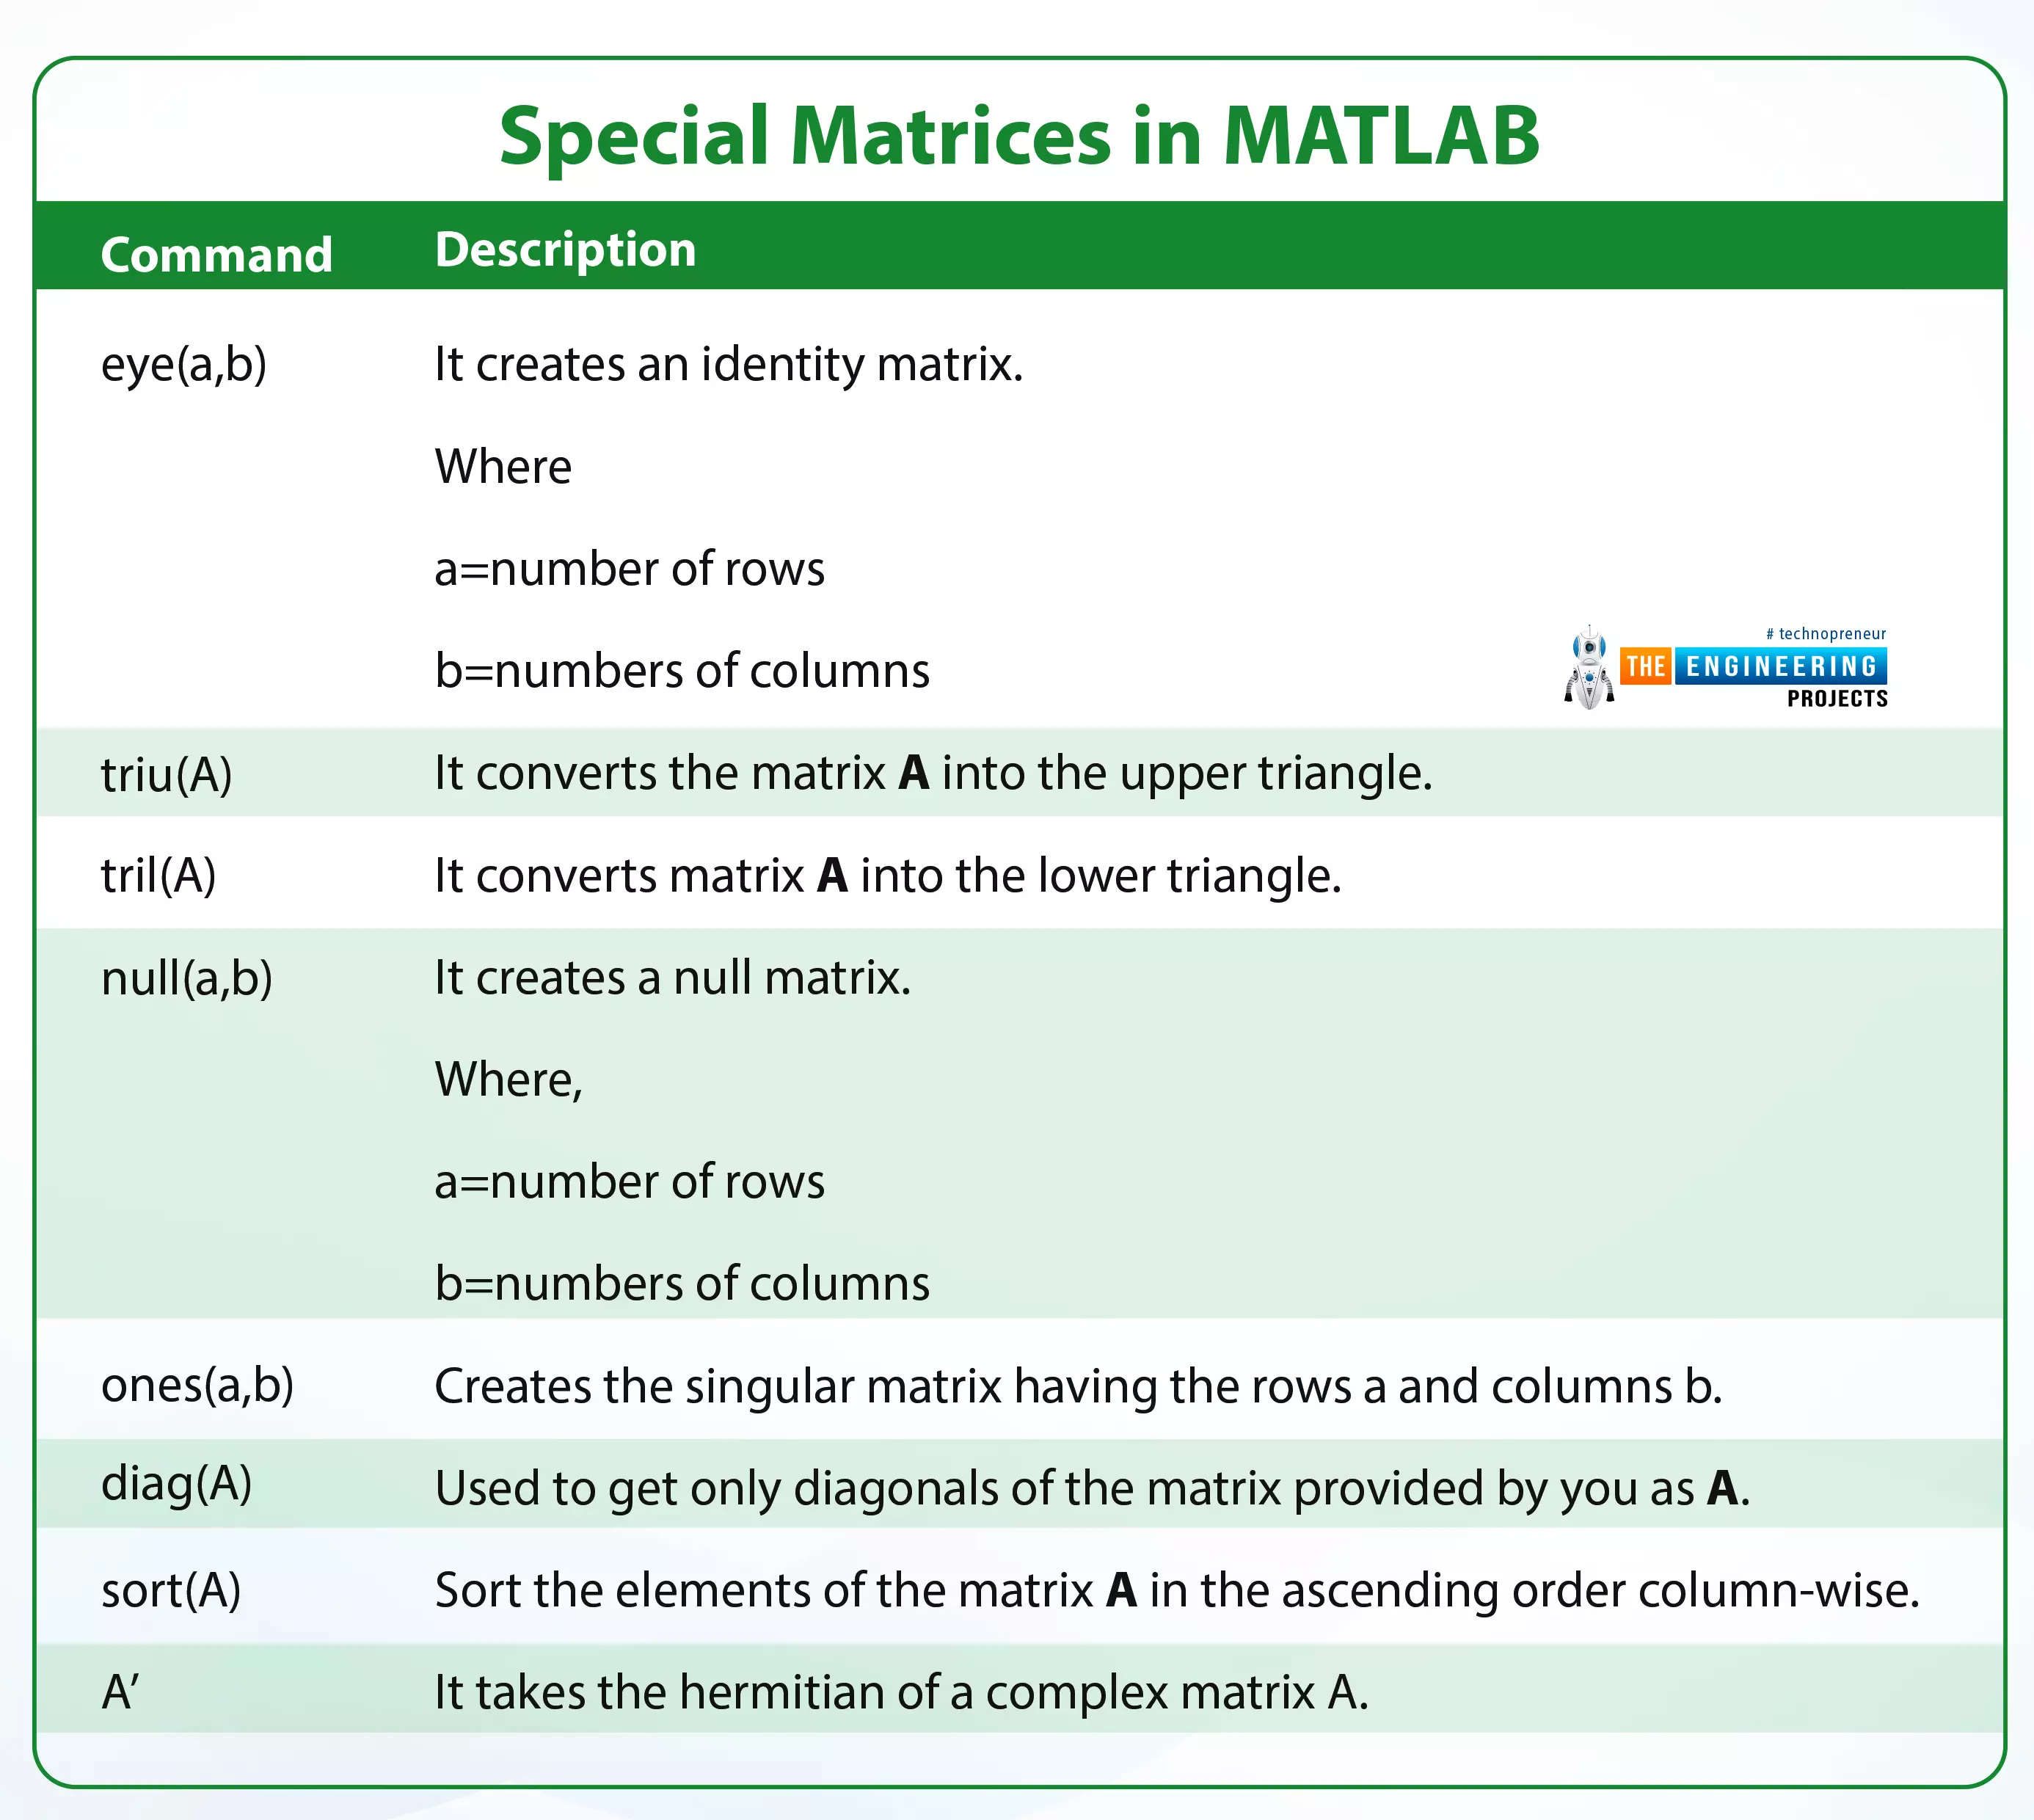
How can we implement these types of matrices in MATLAB by different commands?
What is a Matrix?
A matrix is a type of array that stores da ...
Before starting this important topic there are some of the important terminologies related to the theorem that are frequently used throughout. So let us have a look at them.
System
Some important key points related to the system are as follows:
In thermodynamics, a system is a quantity of matter of fixed quantity.
The system is mostly closed. system. There is a change in the size and shape of the system but due to the closed system, no mass can cross the boundary.
One of the important points is that the mass of the system remains constant.
Control Volume
Some important key points related to the control volume are as follows:
The control volume is also known as the open system and it is defined as the region that is specified for a case study.
In the case of a contr ...
Flow visualization widely uses Computational Fluid Dynamics (CFD) and physical experiments. So following are the types of patterns that can be visualized computationally and experimentally. So without wasting any time, let us start.
Streamlines and Streamtubes
There are two patterns. I will first explain the streamlines. So the definition of streamlines is as follows:
A streamline is a curve that is tangent everywhere to the instantaneous local velocity vector.
You might not understand the definition by reading it, so just for your ease, let me explain to you in few key points:
A streamline defines fluid’s motion throughout the flow field.
A streamline acts as an indicator of the instantaneous direction of motion of the fluid. To explain this situation, let me exemplify it with an ex ...
Hello friend. In this article, I will cover essential points related to fluid kinematics, i.e., what fluid kinematics is and how the motion of the fluids can be explained without describing the forces acting on them. Further, I will explain Lagrangian and Euler about the motion of fluid and a lot more. So buckle up, and let’s start.
What is Fluid kinematics?
The definition of fluid kinematics is as follows:
Fluid kinematics is related to fluid motion without considering the forces responsible for the motion.
The following are some essential key points related to fluid kinematics:
The nature of fluid motion is categorized into two types: Lagrangian Euler.
I will extensively explain both types in upcoming topics.
The acceleration, velocity ...
As I have discussed the pressure now I will explain fluid mechanics. The definition of fluid mechanics is as follows:
Fluid mechanics deals with the properties and characteristics of fluid at rest.
Some of the important key points related to the fluid statics are as follows:
Fluid statics has many properties just as hydrostatics when the fluid is in a liquid state and acts as aerostatics when it is in a gaseous state.
The only stress that is in fluid statics is the normal ones other than that there is no shear stress.
The main application of fluid statics is to determine the forces that are acting on the floating or the submerged bodies.
That is a brief introduction to fluid statics further I will explain the forces that are acting on submerged and floating bodies. So without wasti ...
The article will cover essential aspects of fluid statics and pressure forces applied to the fluid. The article will start with the absolute pressure gauge and the variation of pressure with depth in different gravitational field manometers and barometers, respectively. Then I will explain the forces that deal with fluids, such as hydrostatic force, buoyant force, etc. So, dear friends, without wasting any time, let’s start.
Pressure
The definition of pressure according to fluid mechanics is as follows:
Pressure is the normal force applied by a fluid per unit area.
Unit of Pressure
The units of pressure Pascal is too small to deal with in practical cases. For instance,
Kilopascal: 1kPa=103Pa
Mega Pascal: 1MPa=106Pa
The three common pressure units used are standard atmosphere ba ...
In the introduction, I will extensively explain the property r and how to impact them are so. Let us start. Then I explain properties that are related to fluid flow.
First of all, I will start with the word Property. The definition of property is as follows:
Property
The word property is defined as any characteristic of the system. There are two main types of the property named intensive and extensive.
Example
The examples of property are as follows
Temperature -T
Pressure - P
Mass – m
Types of Properties
Following is a brief explanation of the types of properties.
Intensive Property
The intensive properties are the ones that are independent of mass, temperature, densit ...
Introduction
Greetings, and welcome to the next section of our Raspberry Pi 4 tutorials. In the last section, we discovered how to set up and run our self-host bitwarden on our Raspberry Pi. We learned how to set up admin panels and perform a wide range of actions, such as limiting the creation of new accounts and users for security purposes. However, in this guide, we will discover how to configure a PS3 or PS4 joystick with our raspberry pi and set up and run Xbox cloud gaming on our Pi 4.
Components
Raspberry pi 4
SD card
Power supply
Ethernet cable or wifi
Xbox controller
Xbox game pass ultimate subscription
USB keyboard
USB mouse
HDMI cable
Through a service called Xbox Cloud Gaming, users may play a wide variety of games witho ...