Hi Guys! Hope you’re well today. I welcome you on board. In this post, I’ll walk you through How a Hobbyist Can Work on Electronic Projects in America.
Working on electronic projects is a bit inundating.
From selecting the topic to research work and development to execution, you need to hustle, grind and drill to keep your final product up and running.
When you are new to the electronic field, you must not be afraid to get your hands dirty in diving deep into the nitty-gritty of the project. This means that no matter what kind of technical project you pick, you need to spend a significant amount of your time and money to reach your final goal. It's not just about making sure that whatever it is you're looking for is done well—it's also about making sure that your project is done ri ...
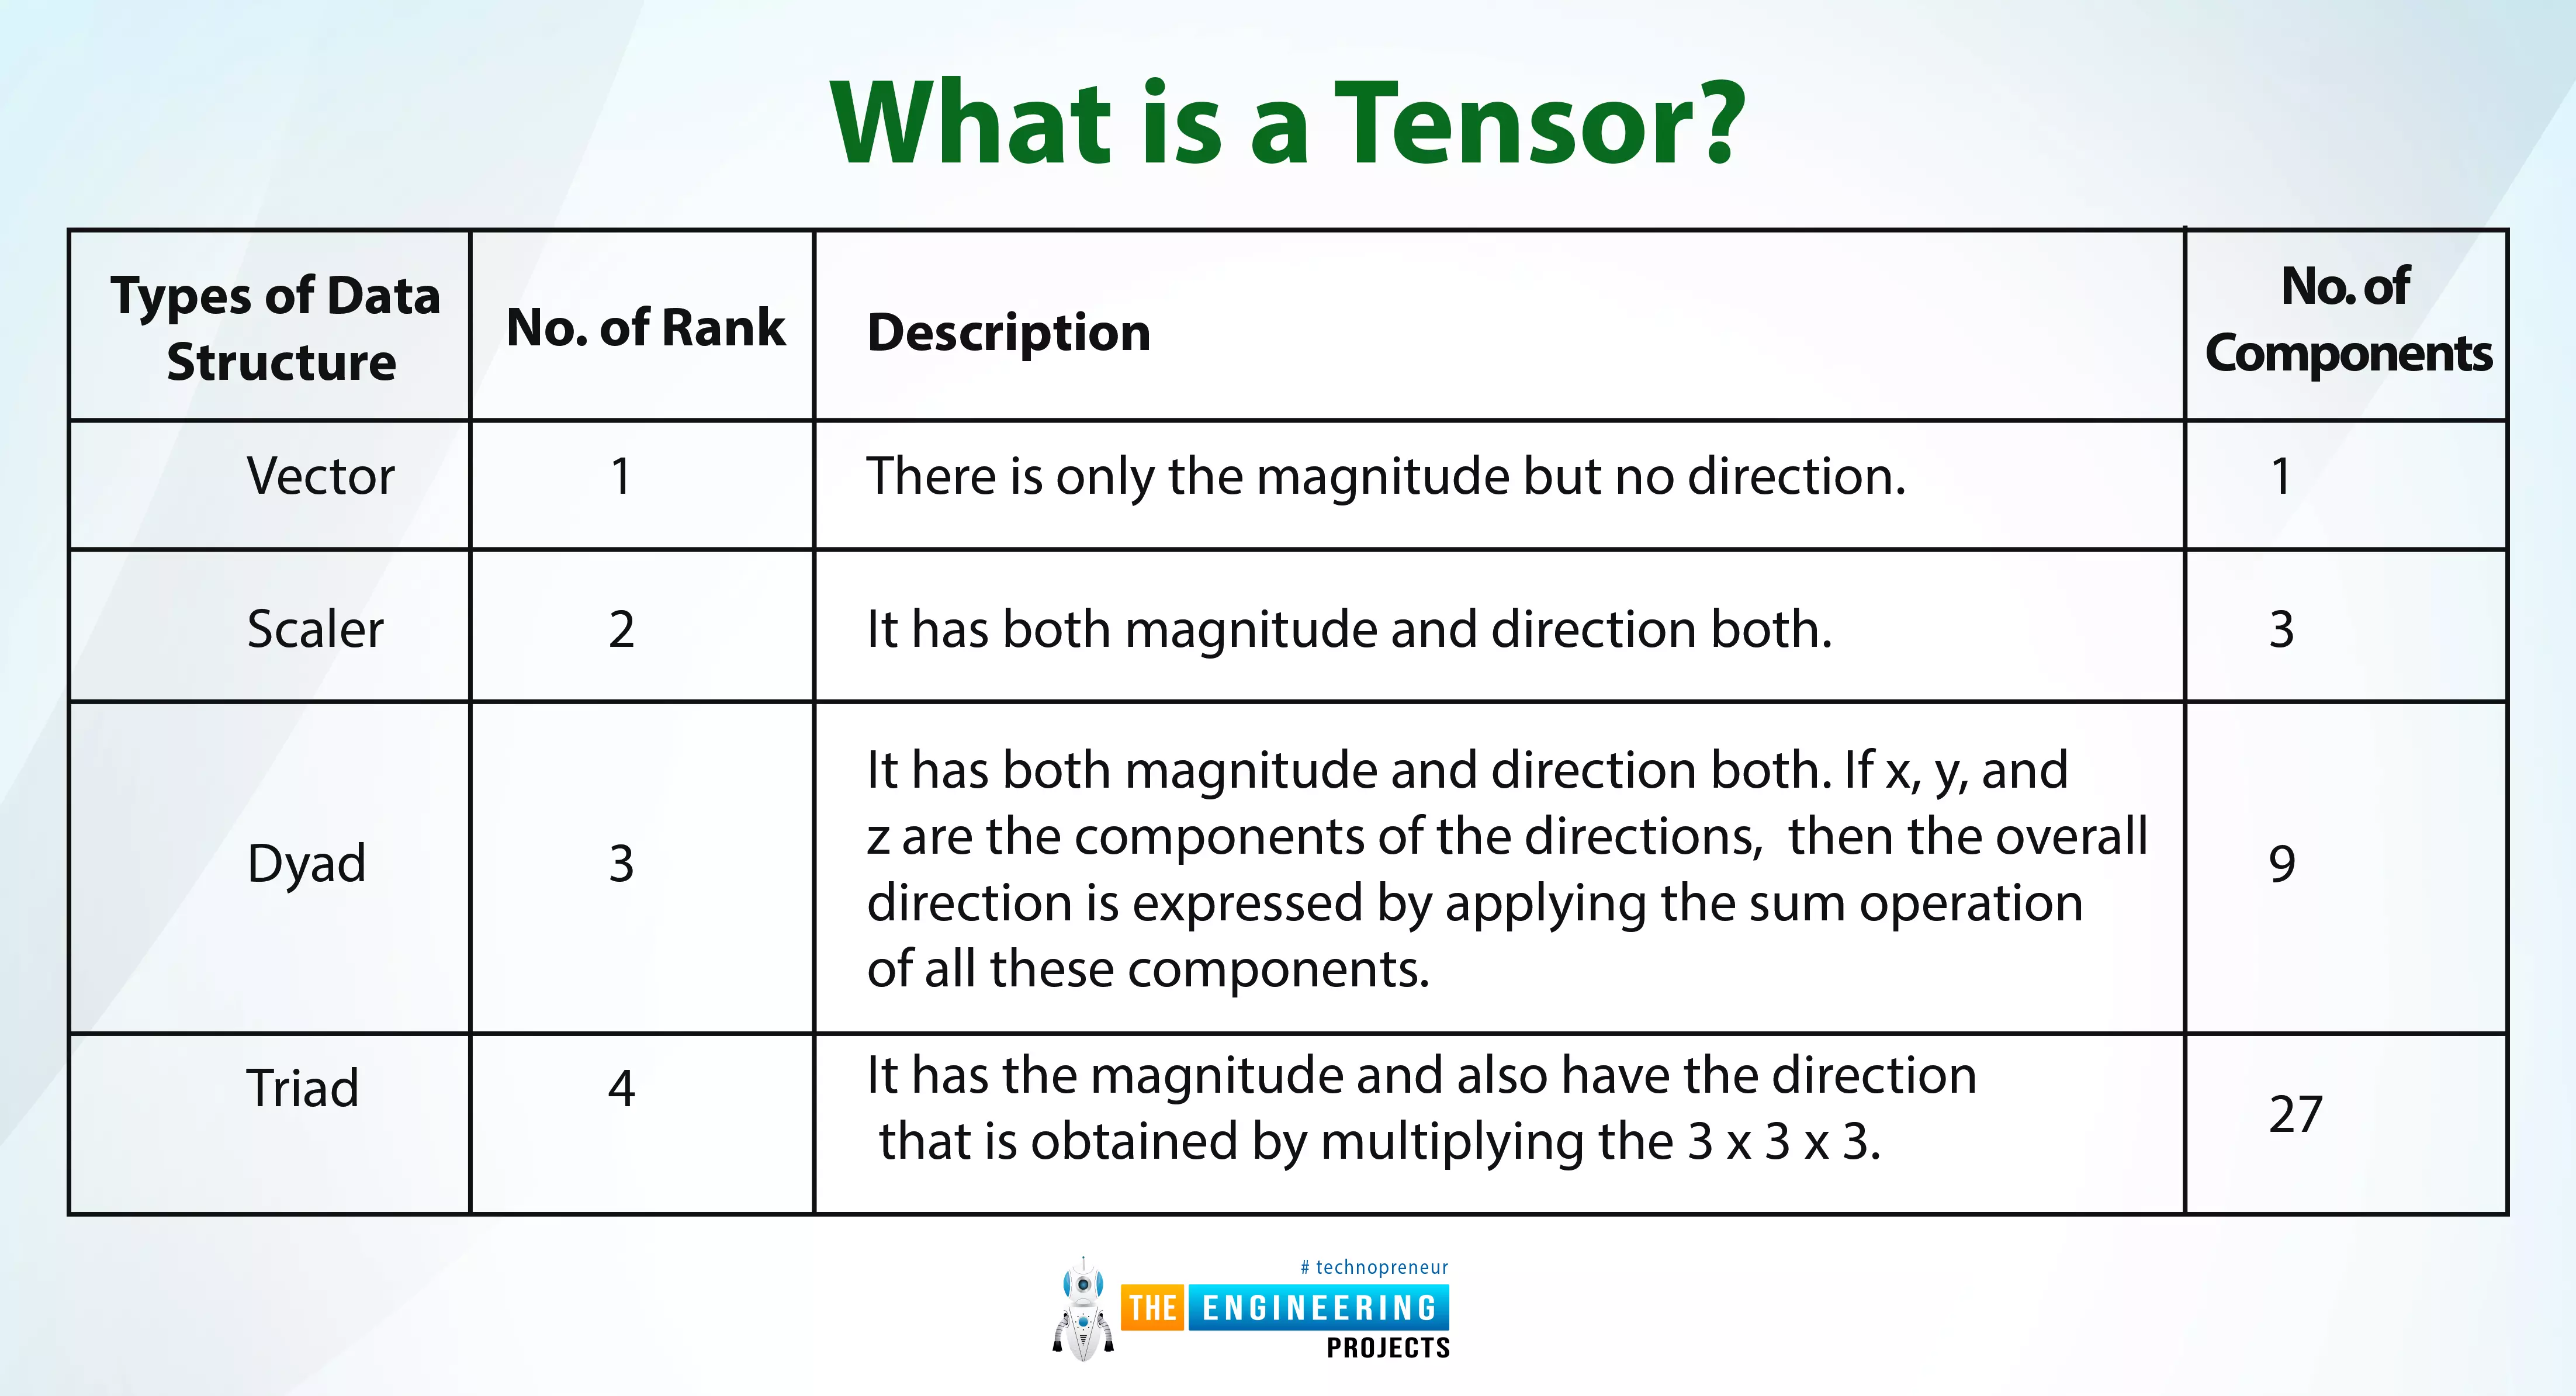
Hi pals! Welcome to the next deep learning tutorial, where we are at the exciting stage of TensorFlow. In the last tutorial, we just installed the TensorFlow library with the help of Anaconda, and we saw all the procedures step by step. We saw all the prerequisites and understood how you can follow the best procedure to download and install TensorFlow successfully without any trouble. If you have done all the steps, then you might be interested in knowing the basics of TensorFlow. No matter if you are a beginner or have knowledge about TensorFlow, this lecture will be equally beneficial for all of you because there is some important and interesting information that not all people know. So, have a look at the topics that will be discussed with you in just a bit.
What is a tensor?
What are ...
Hello Peeps! Welcome to the next lecture on deep learning, where we are discussing TensorFlow in detail. You have seen why we have chosen TensorFlow for this course, and we have read a lot about the working mechanism, programming languages, and advantages of using TensorFlow instead of other libraries. Instead of using the other options for the same purpose, we have seen several reasons to use TensorFlow. Because of the latest work on the library for more improvement and better results, it's now time to learn the specifics of TensorFlow installation. But before this, you have to check the list of the concepts that will be cleared today:
Is Installation of TensorFlow Difficult?
The simple and to-the-point answer to this question is, the installation is easy and usually does not require ...
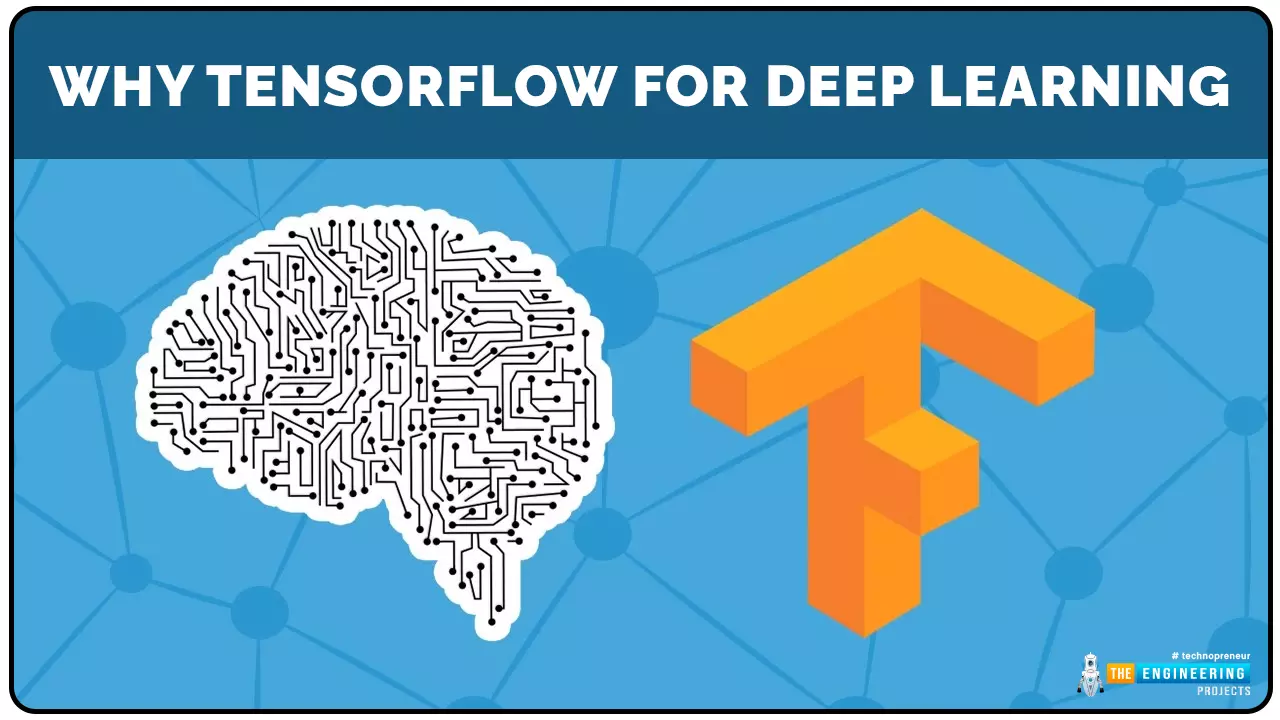
Hey learners! Welcome to the new tutorial on deep learning, where we are going deep into the learning of the best platform for deep learning, which is TensorFlow. Let me give you a reminder that we have studied the need for libraries of deep learning. There are several that work well when we want to work with amazing deep-learning procedures. In today’s lecture, you are going to know the exact reasons why we chose TensorFlow for our tutorial. Yet, first of all, it is better to present the list of topics that you will learn today:
Why do we use TensorFlow with deep learning?
What are some helpful features of this library?
How can you understand the mechanism of TensorFlow?
Show the light towards the architecture, and components of the TensorFlow.
In how many phases you can complete t ...
Hey buddies! Welcome to the next tutorial on deep learning, in which you are about to acquire knowledge related to Python. This is going to be very interesting because the connection between these two is easy and useful. In the last lecture, we had an eye on the latest and trendiest deep learning algorithms, and therefore, I think you are ready to take the next step towards the implementation of the information that I shared with you. To help you make up your mind about the topics of today, I have made a list for you that will surely be useful for you to understand what we are going to do today.
How do you introduce the Python programming language to a deep learning developer?
How is Python useful for deep learning training in different ways?
Do Python provide the useful frameworks for ...
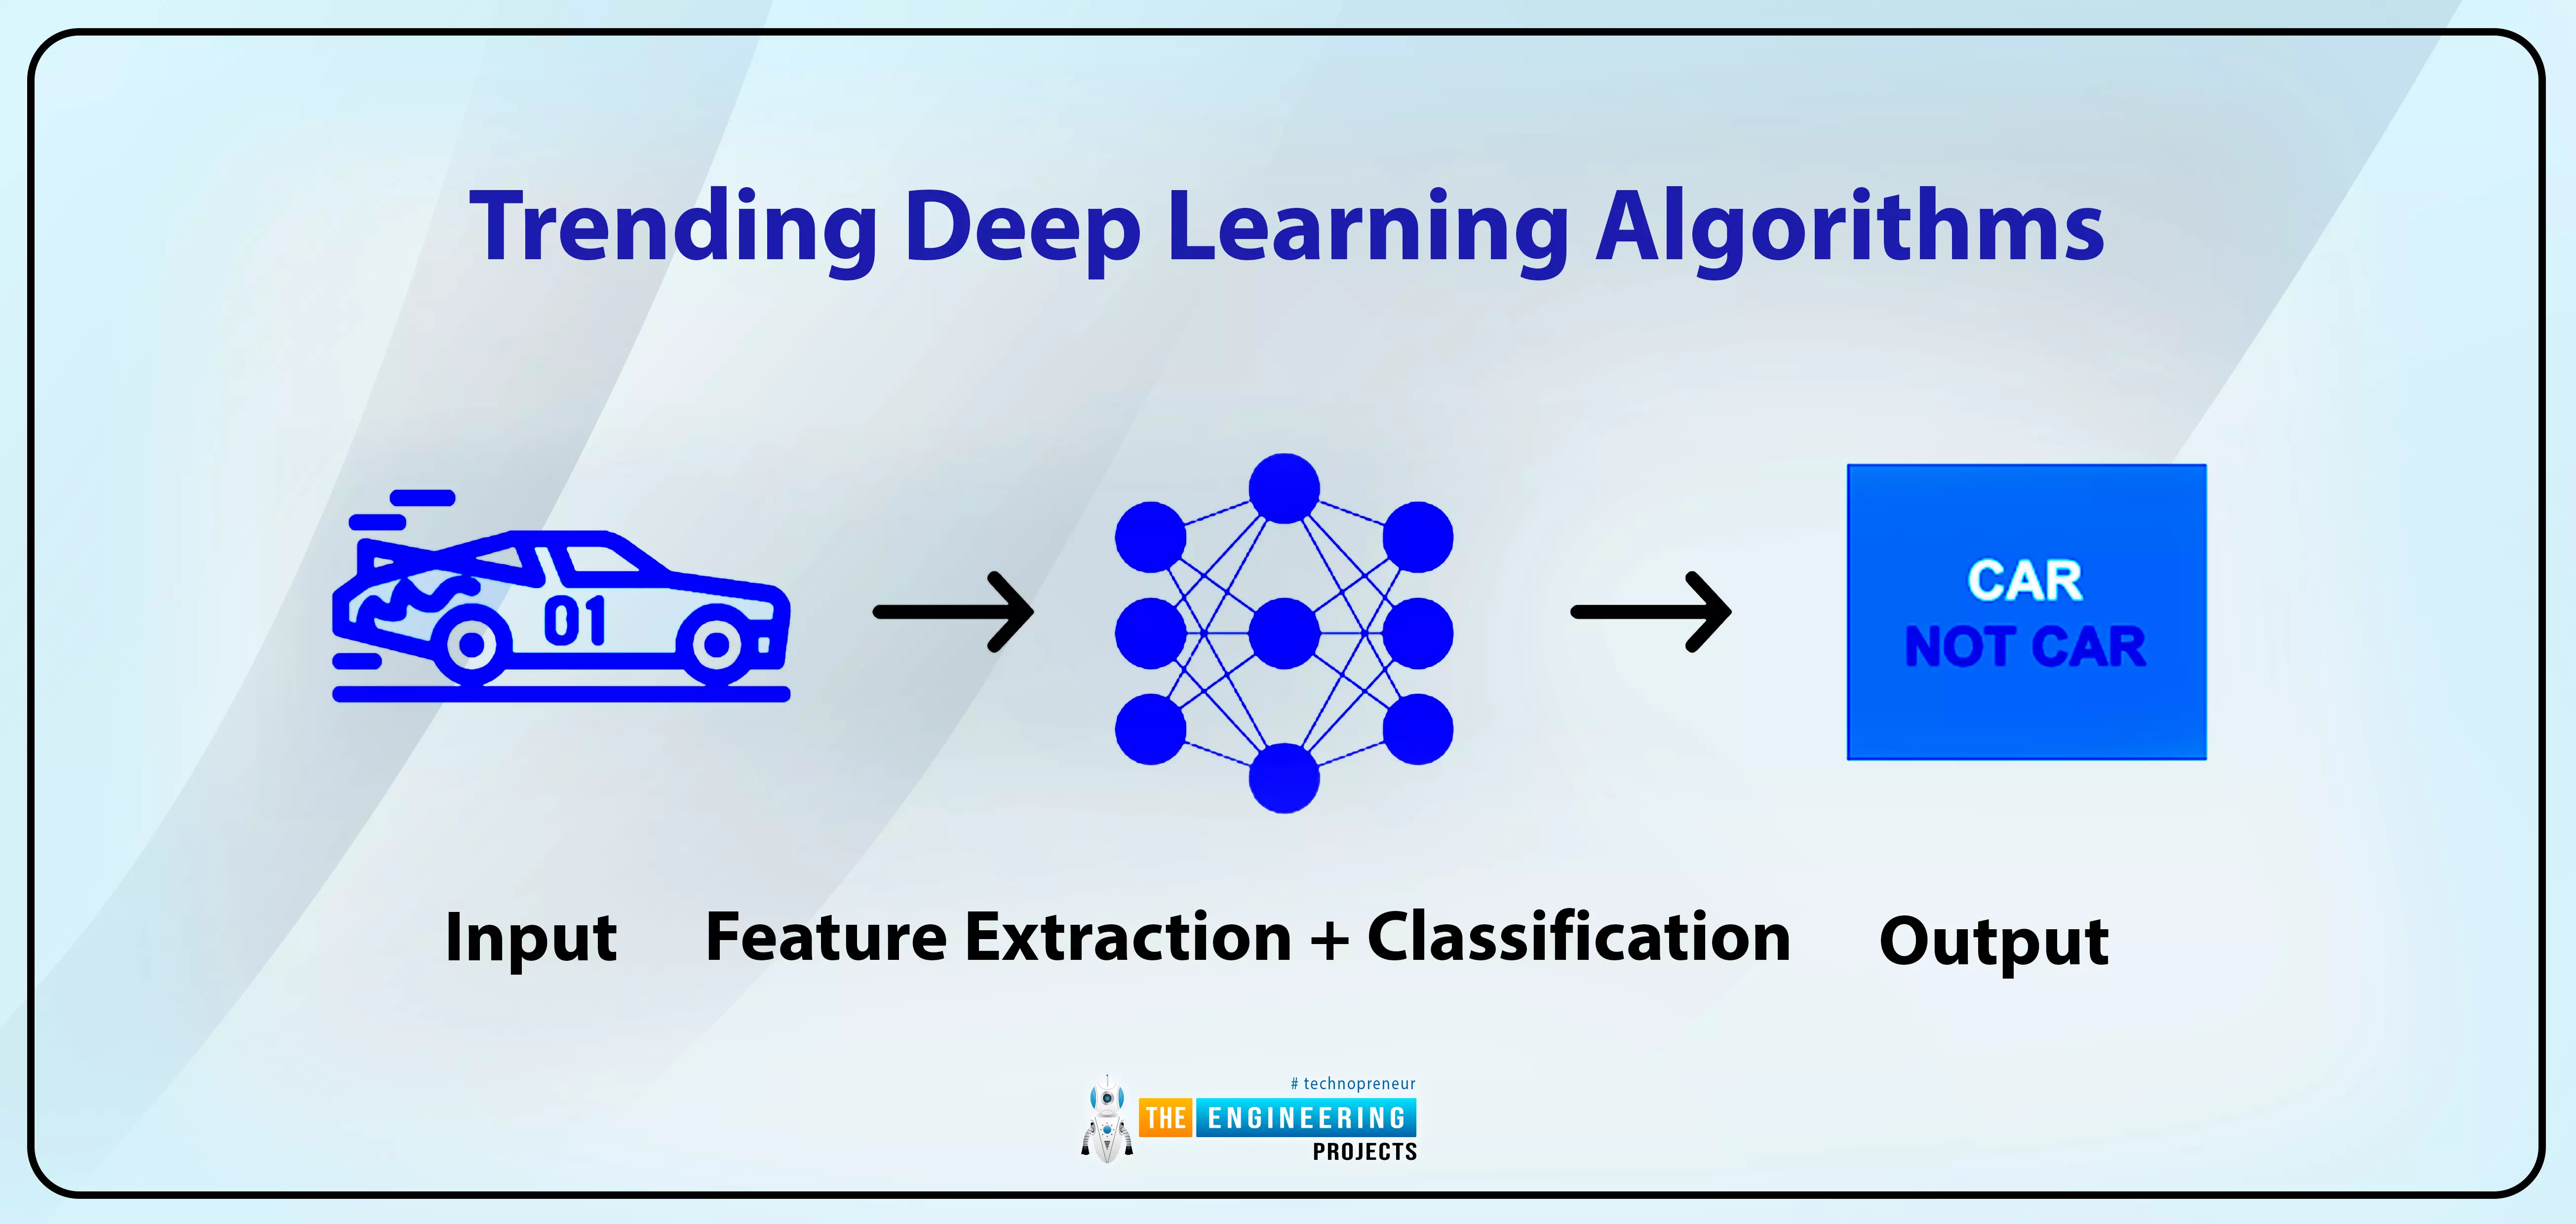
Hello pupils! Welcome to the following lecture on deep learning. As we move forward, we are learning about many of the latest and trendiest tools and techniques, and this course is becoming more interesting. In the previous lecture, you saw some important frameworks in deep learning, and this time, I am here to introduce you to some fantastic algorithms of deep learning that are not only important to understand before going into the practical implementation of the deep learning frameworks but are also interesting to understand the applications of deep learning and related fields. So, get ready to learn the magical algorithms that are making deep learning so effective and cool. Yet before going into details, let me discuss the questions for which we are trying to find answers.
How does dee ...
Greetings, and welcome to today's tutorial. In the last tutorial, we learned how to construct a system for tallying individuals using Raspberry Pi, astute subtraction, and blob tracking. We demonstrated the total number of building entrances and exits. Feature computation and HOG theory were also discussed. The tests proved that a device based on the raspberry pi could effectively function as a people counting station. One of the many benefits of the Pi 4 is its internet connectivity, which is especially useful for home automation projects due to its low price and ease of use. We're going to see if we can use a web page's buttons to manage our air conditioner today. With this Internet of Things (IoT) based home automation, you can command your home gadgets from the comfort of your couch. T ...
Metal fabrication
refers to the manufacturing of sheet metal and other types of metal to fit different shapes.
The metal fabrication industry is vital to a wide range of industries. That’s due to the reliance on metal fabrication for vehicle parts, train tracks, building equipment, electrical devices, etc. A metal fabrication shop has various pieces of equipment needed to design and fabricate a myriad of metals. So, what, then, is custom fabrication?
What is Custom Metal Fabrication?
Custom metal fabrication refers to the production or fabrication of a range of metals to meet unique specifications. Custom metal fabrication projects are carried out for a specific purpose. It involves cutting, bending, rolling, or joining metal to create custom complex shapes based on specific req ...
A lot of people took engineering for the love of math and machines. Most are introverts as well, diligently doing their project in workshops, plants, or computers. Unless you are in sales, academia, or managerial positions, you don’t meet a lot of people as much as a doctor or a lawyer.
However, this should not stop you from establishing your network. People networks may not be the most popular engineering tool. Albeit, you might be surprised by how useful and powerful it can be.
The good thing is that there are contact management apps nowadays. You can compartmentalize your contacts- suppliers, specialists, laborers, and so on. With the
right contact management app
, you can reap the following benefits.
1. Strategic Alliances
Referr ...
Welcome to the next tutorial on our raspberry pi four python programming. In the previous article, we built a system that recognizes when two people are in physical contact using OpenCV and a Raspberry Pi 4. We used the weights from the YOLO version 3 Object Recognition Algorithm to implement the Deep Neural Networks part. Regarding image processing, the Raspberry Pi consistently comes out on top compared to other controllers. A facial recognition program was among the earlier attempts to use Raspberry Pi for sophisticated picture processing. In today's world of cutting-edge technology, digital image processing has expanded rapidly to become an integral feature of many portable electronic gadgets.
Digital image processing is widely used for such t ...