How has the relentless pursuit of precision and efficiency in manufacturing reshaped our modern world? The global manufacturing sector has evolved dramatically, driven by continuous innovations in technology and processes. This evolution is highlighted by the significant growth of the advanced manufacturing market, which is projected to reach unprecedented values in the coming years. Its role in the production of high-quality, durable goods cannot be overstated.
We’re witnessing a transformation in the way products are made. Recent industry reports show that the global advanced manufacturing market size is expected to reach significant figures by the next decade. This growth is mainly driven by the demand for stronger, more resilient components capable of withstanding extreme condition ...
Hi readers! Hopefully, you are having a great day and want to know more about technology. Enter a world where robots think, walk, and even learn. Welcome to the magical world of robotics. Our topic for today is robotics.
Robotics involves creating, assembling, and controlling machines that carry out tasks either fully or partly without help from humans. It includes ideas from mechanics, electronics, computers, and artificial intelligence. Although the concept of robots has existed for centuries, actual development began in the 20th century with robots in factories, particularly automotive manufacturing. This is where the foundation of robotics started.
Generally, a robot includes parts that move, detect its surroundings, decide how to act and has fuel for operation. There are robots that ...
Hi readers! Welcome to a detailed exploration of the MQ gas sensor series where we are discussing the basic details of its members. This series was engineered using revolutionary technology to detect combustible and toxic gases with great efficiency. It uses the chemiresistor sensing element to detect the target gas and has a quick response time that makes it a reliable choice. These are used in multiple industries, domestic areas, offices, and other places where a chance of leakage of combustible gas occurs. This series might not be fancy, but it is designed for a long life and ensures minimal false detection for reliable output.
We are going to start the discussion with a basic introduction to this series, and then we’ll try to clear up some basic concepts in order to have the best unde ...
Asset tracking
is a crucial asset management element that helps organizations maintain a precise record of their possessions while enhancing asset visibility. It minimizes the risk of asset loss, theft, or misplacement, which helps save the money the company would have used to cater to unnecessary replacements.
Asset tracking makes it easier to determine the maintenance that has been done on your equipment and tools to ensure they remain in pristine working condition. With the right asset-tracking techniques, your company can make the most of its assets. Discussed below are five key asset-tracking tips.
Use a real-time location system (RTLS)
Knowing precisely where your assets are in real-time, with whom, and in what condition can help prevent costly issues and instances of last-min ...
Good day peeps! Welcome to another episode of the MQ gas sensor series and today, the topic is the MQ214 natural gas sensor. We know that natural gas is inflammable and is utilised widely for cooking and other purpose in domestic areas as well as a fuel in multiple industries. The leakage of natural gas can be the reason for the accidents and its accumulation may even result in the explosion. Moreover, continuous inhalation of this gas can cause health issues such as nausea, dizziness, and headaches therefore, instant detection of its leakage is crucial. For this, one of the best options is MQ214 because it has a fast response time, low power consumption and is easily available.
In this article, we are discussing the fundamental points about this sensor. We’ll see its basic introduction ...
The electrical grid is a part of our infrastructure that we often overlook. It provides the power needed to run our homes, businesses, and critical services shaping the society we live in. Have you ever stopped to think about the history and importance of this network? Let's delve into how it functions, from the energy sources that fuel it to the technological advancements, the challenges it confronts, and what lies ahead.
The Modern Energy Grid is a Very Sturdy System
When was the time you faced a power outage? When your lights flicker, or the power goes out, it's a reminder of how we depend on the grid. Our daily routines are closely connected to its operation powering everything, from our morning coffee makers to equipment in hospitals. Disruptions in the grid can have far-reachin ...
Hello learners! Welcome to the introduction of the round PCBs, where we are going to discuss the round PCBs in detail. This is specially designed for articles for beginners as well as for intermediate skills in printed circuit boards. PCBs are the backbone of any circuit, and it is crucial to understand the type and application of the circuit and its PCB in detail before starting to work on it.
If you are going to buy crucial products like PCBs, always choose the best option that has positive reviews and a great experience. The best option for this is PCBWay.com, which has a great variety of PCBs, electronic components, equipment, and services. They have a vast variety of PCB services that range from high-speed PCBs to optical module PCBs, semiconductor tests, aerospace PCB circuit boa ...
Hey students! Welcome to another episode of the MQ gas sensor series. Today, we are interested to learn about the high-performance sensor that is used to detect the presence of benzene gas. This is the MQ138 gas sensor and it instantly detects the target gas because it has tin dioxide as the sensing element. Usually, it can detect multiple gases and is considered as the Volatile organic compounds (VOC) sensor but the most significant target gas of this sensor is benzene therefore, we’ll pay attention towards the discussion of the benzene detection through this sensor. Many features of this sensor resemble other members of the MQ gas sensor series and we’ll read its basic features and specifications in detail.
In this article, we’ll initiate the discussion with the basic introduction of t ...
Hi readers! Welcome to the next article on the MQ series gas sensors. Today, our motto is to learn about the basic information of the MQ137 ammonia gas sensor. We know that ammonia gas is extensively used in industries, agricultural lands, Environmental Monitoring, Health and Public Safety, etc. In such areas, there are great chances of leakage that can be harmful and here, sensors like MQ137 are used for the instant detection of the Ammonia gas. It is a colorless gas with a distinct pungent smell and its inhalation may cause eyes, lungs, nose, and throat infections and irritation. So, the MQ137 is specialized for its detection and acts as a life savior in such cases.
In this article, we’ll commence our discussion with the basic introduction of the MQ137 ammonia gas sensor and will ...
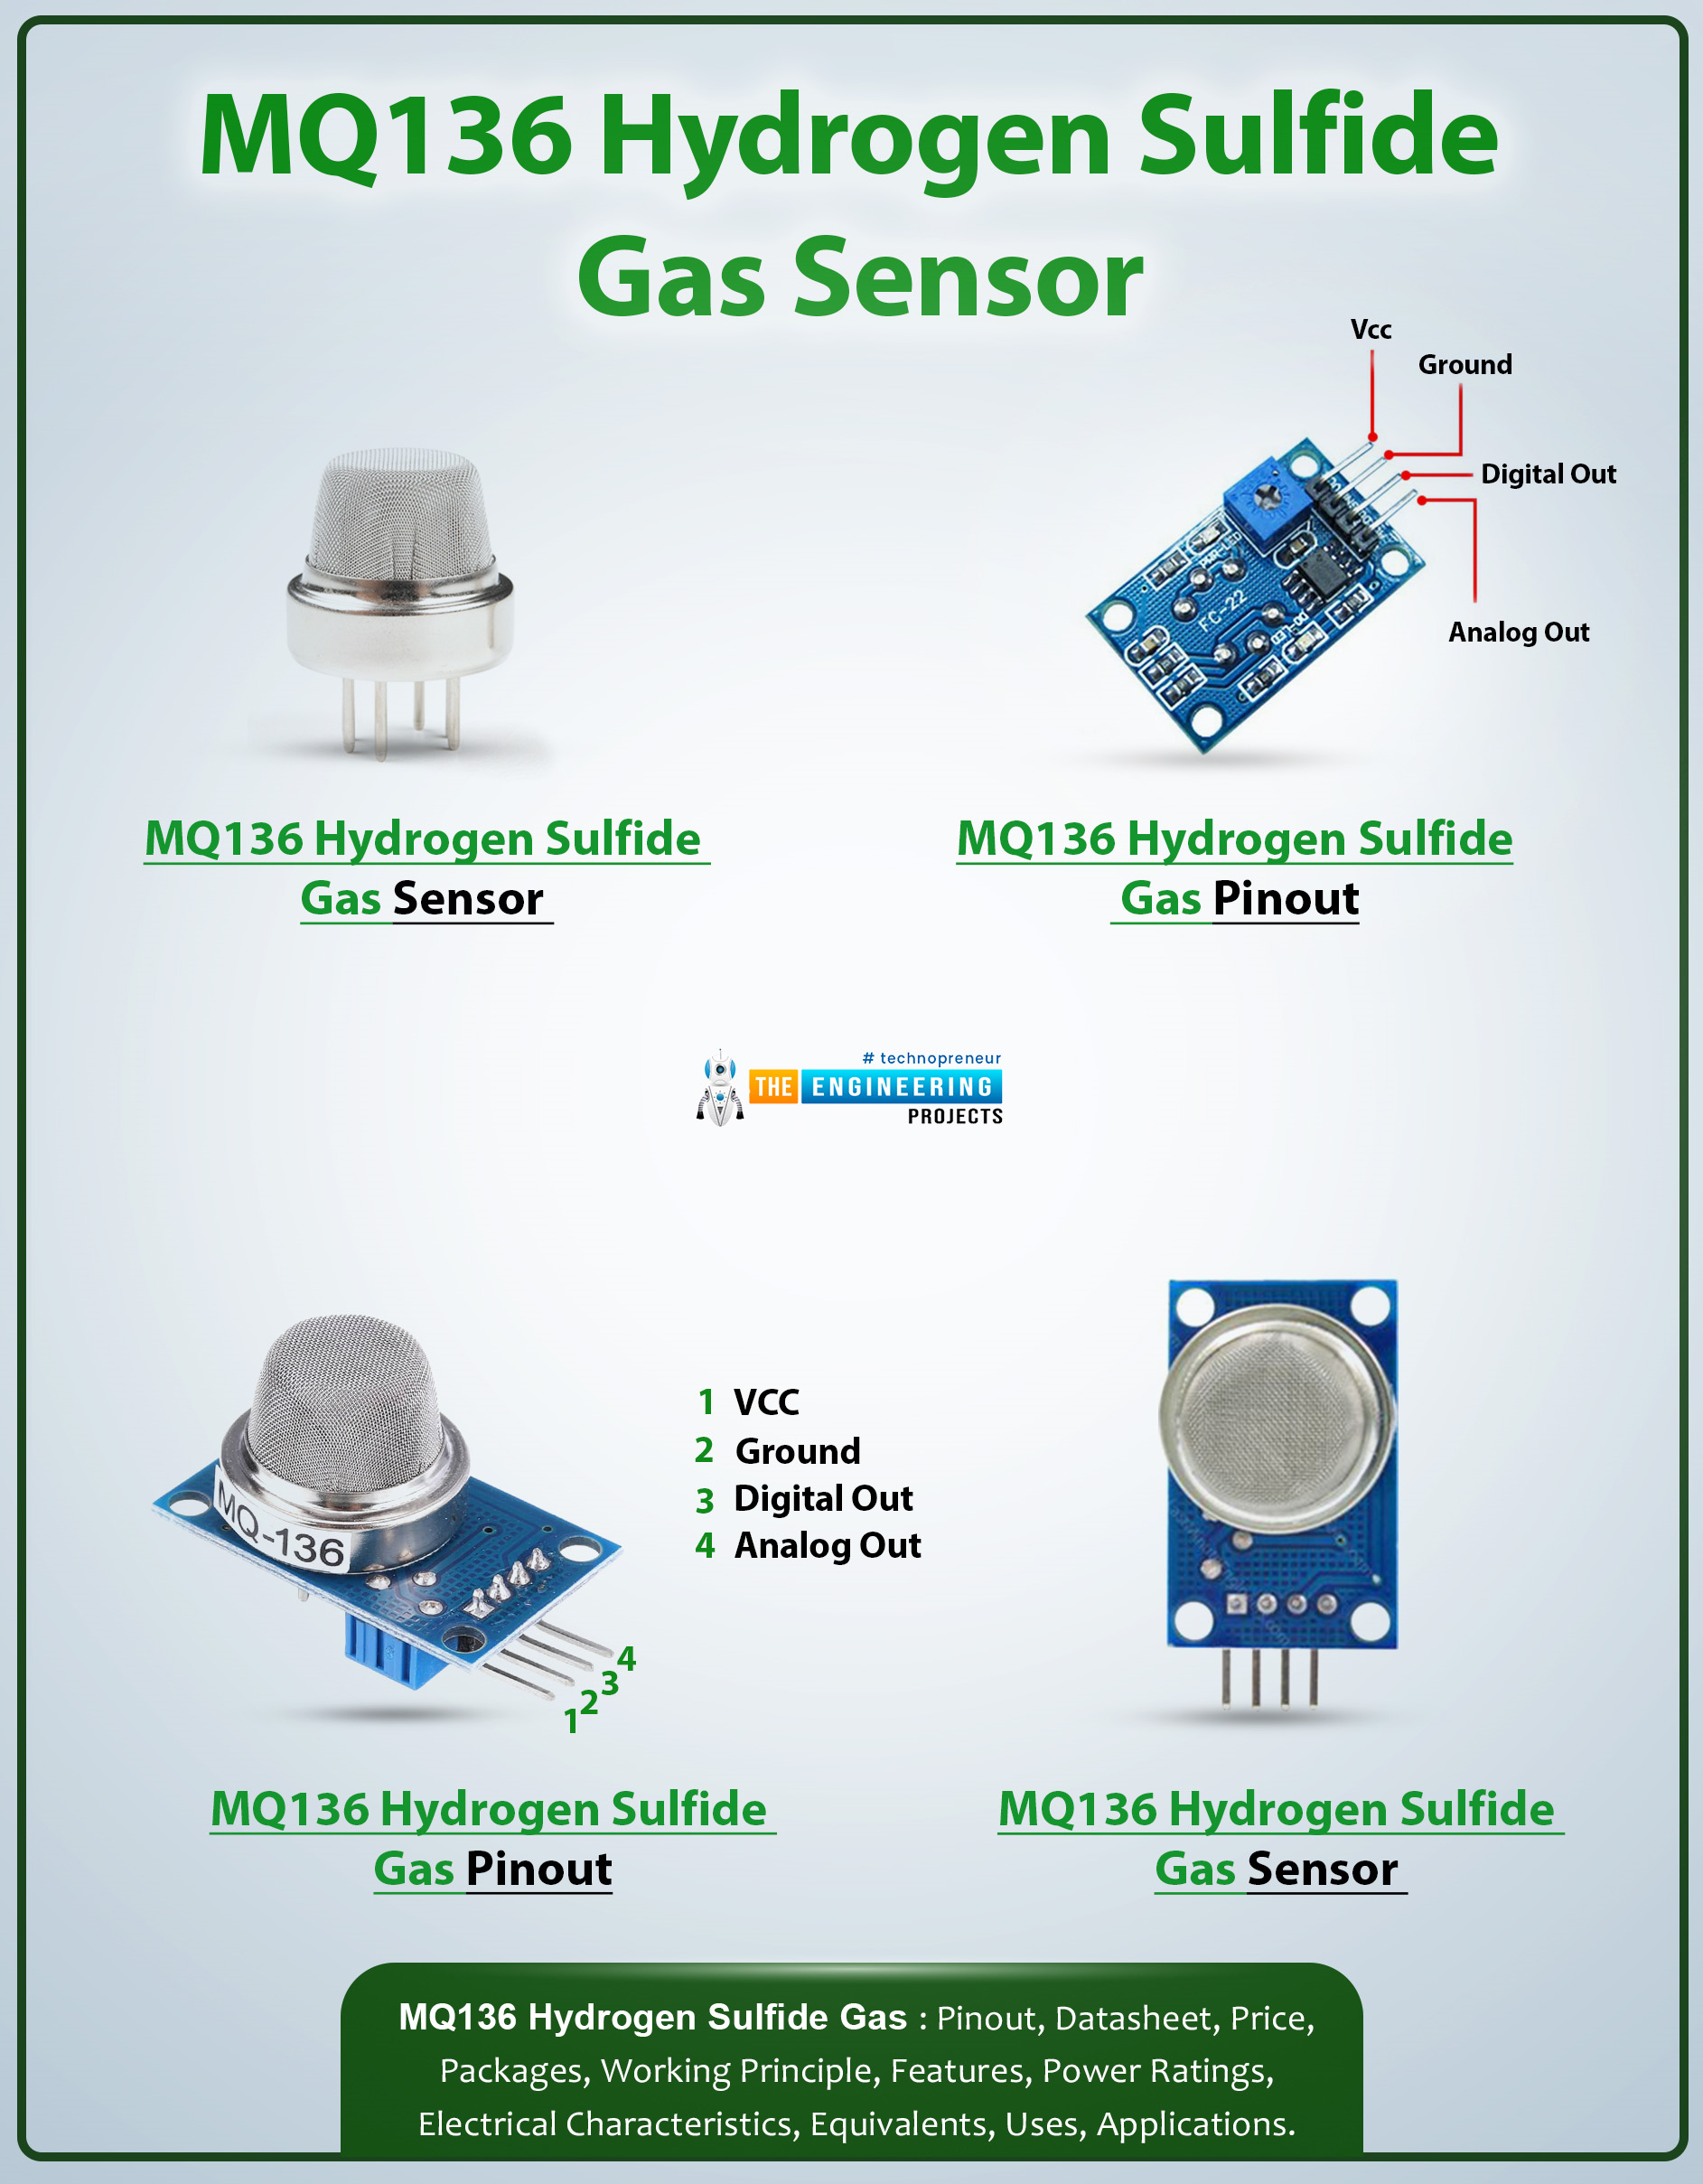
Hi friends! Welcome to another article in which we are highlighting the basic details of a gas sensor from the MQ sensor series. Today, our focus is on the MQ136 hydrogen sulfide gas sensor that instantly detects the presence of the sulfide gas and sends the signals through digital and analog pins to the output devices for timely indication.
Our mission is to understand the basic introduction of this sensor, so we’ll go through it and see the main points of its datasheet, such as its features and specifications. After that, we'll move towards the working principle and physical dimensions of MQ136, and consequently, there will be a discussion of the basic applications where this sensor is widely used. I am sure it is going to be a useful study for you, so let’s get started.
...