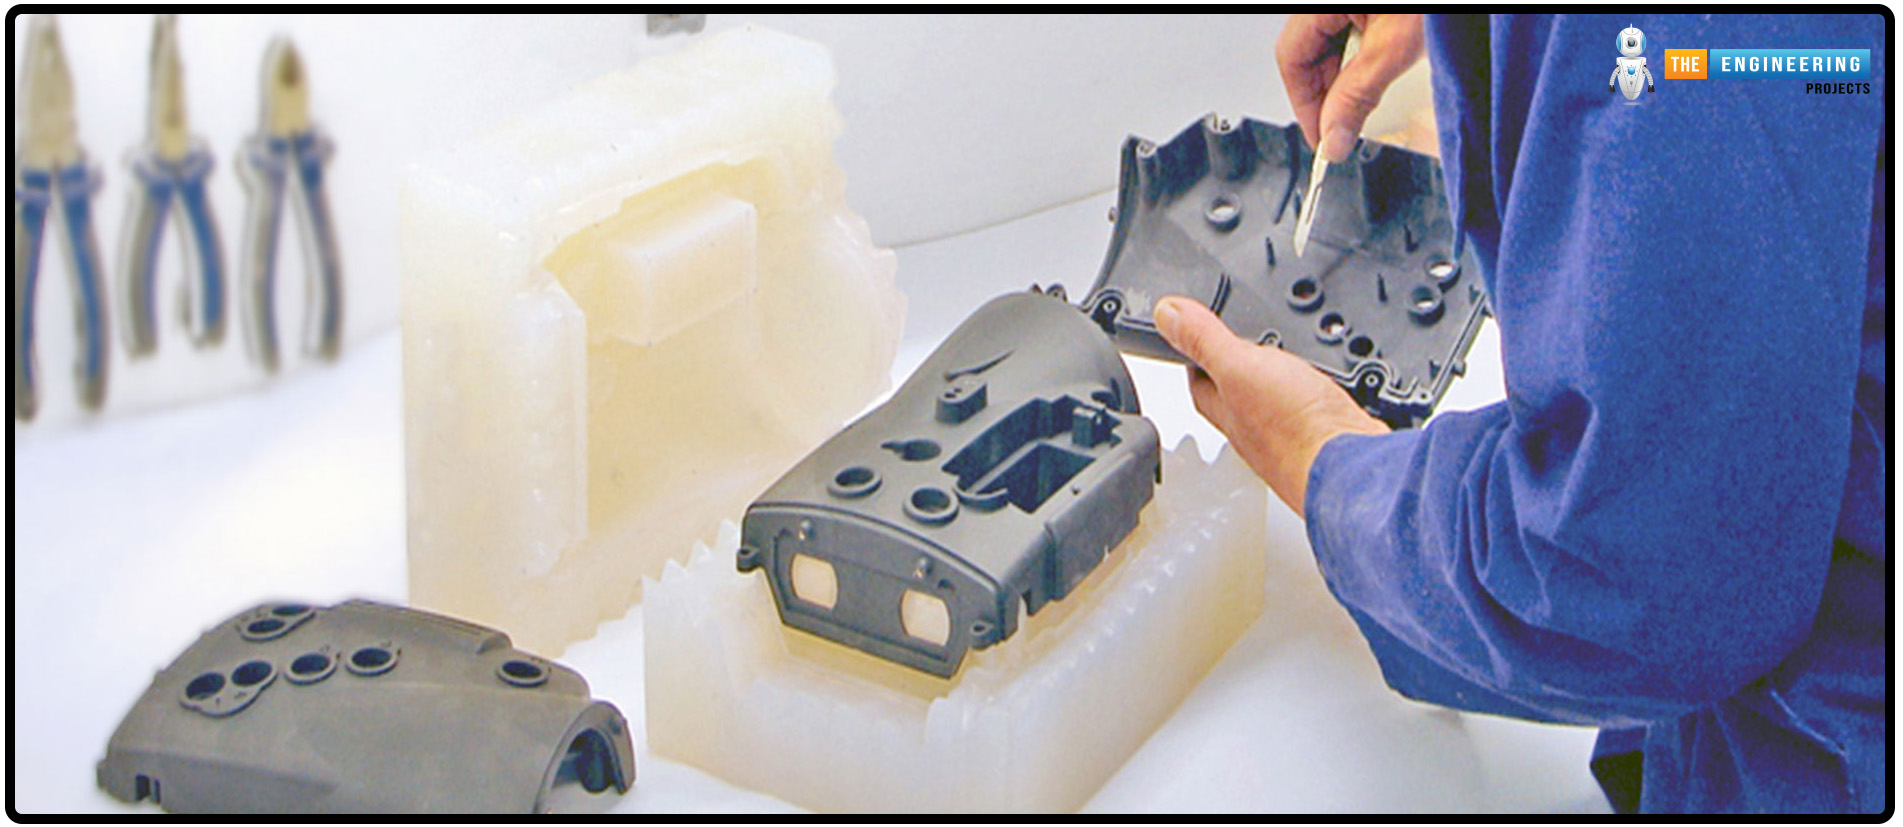
Vacuum casting is the key technique for plastic or rubber part fabrication using a vacuum and stands out as a premier method for small batches of polyurethane products. This method is particularly valuable for the creation of samples of products so the manufacturer can assess the trend, market response, customer feedback, and product performance before working on full-scale production.
Injection molding is another technique used for plastic model manufacturing, but vacuum casting is cost-effective and most suitable for small production. This article will shed light on the vacuum casting introduction, its working principles, pros and cons. Let’s discuss each point in detail.
Vacuum Casting Definition
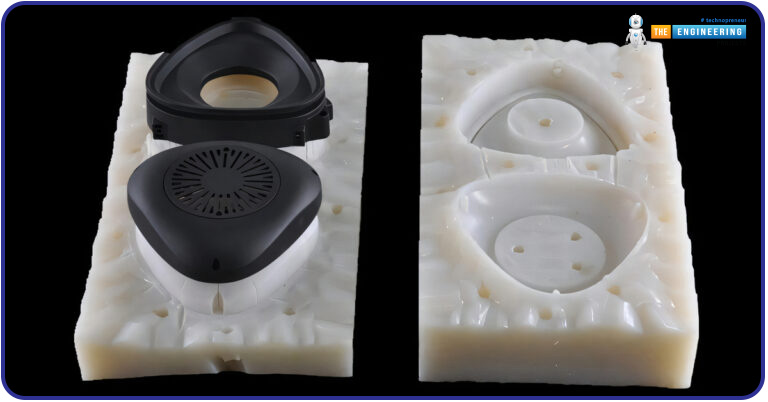
Vacuum casting, also termed polyurethane casting or urethane casting, is the process of creating plastic or rubber models utilizing silicon molds under vacuumed conditions. Here, the vacuum is primarily used to get the intricate parts, while the vacuum is used to eliminate any air bubbles and improve the material flow from the mold. This is particularly useful for small- to medium-sized production and results in rapid and clean prototyping.
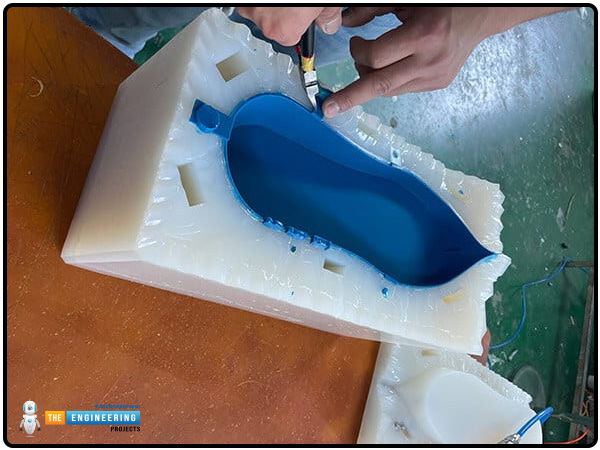
This process deserves consideration when choosing the plastic or rubber parts for easy prototyping. Unlike the traditional molding technique, which the metal molds, vacuum casting utilizes plastic or silicon molds that are lower in cost and can be molded in a short amount of time. The use of a vacuum is a game changer here because it is helpful to get the perfect mold with less material waste and boasts a smooth structure without any flaws.
Vacuum Casting Precautions
Just like all molding techniques, vacuum casting requires some precautions for safety, and before rushing towards its work, it is important to discuss some important points to be considered when starting to work on it.
- Always wear personal protective equipment (PPE), including gloves, dust masks, and goggles, for safety. This will protect you from the chemicals and other protective measures.
- Ensure that the place has proper ventilation in the casting area so that the fumes or vapors are eliminated continuously.
- Sometimes, the flammable material is also included in the vacuum casting process; therefore, it is crucial to have the fire safety kit with you all the time.
- Regularly inspecting the vacuum equipment, tools, and molds will help you have a safe procedure.
- When mixing the casting material, make sure you are measuring and combining the material well to get the best results.
- Keep an eye on the vacuum level to eliminate air bubbles or any other deformation without affecting the mold's health.
- Clean the mold after every batch to avoid any residue left behind.
- Allow sufficient curing time for the product before demolding so no product is damaged or deformed.
Vacuum casting is professional work and should always be done with great care, using all precautions. If you are confident and experienced, then you can do it yourself, but always get expert vacuum casting services for the best output and even the lowest cost.
Vacuum Casting Working
Vacuum casting’s work resembles the traditional casting method known as injection molding, as both of these methods utilize a cavity mold shaped according to the intended part. However, the vacuum casting distinguishes itself by conducting the whole procedure in the vacuum chamber. The controlled environment eliminates any bubbles or imperfections from the mold and results in high-quality product formation. The subsequent section outlines the step-by-step procedure to create the final product using vacuum casting:
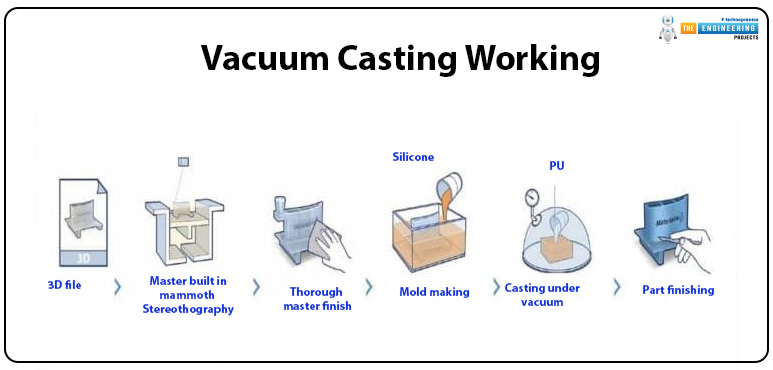
Step 1: 3D Design Creation in Vacuum Casting
The process begins with the creation of a 3D master model, keeping the intended component in mind. 3D designers or CAD software are considered ideal for this step, and the most common recommendations for these models are listed below:
SolidWorks
CATIA
AutoCAD
Autodesk Fusion 360
Rhinoceros (Rhino)
Before commencing the modeling procedure, it is important to make the calculations for the model to prevent any deformations or errors in the final product. These calculations are responsible for the perfect shape and professional finish. Moreover, this step is fundamental because the whole procedure is carried out on the basis of this step. Usually, the experts prefer to check the final 3D design through 3D laser scanning and create 3D files to be used further.
Step 2: Master Model Creation in Vacuum Casting
This step translates the 3D design and creates the master model. The master model is the prototype that the designers use for silicon mold development. This step enhances the model's security because the cast model is a replica of the master model, and any deformation in it can cause the same error in all the pieces. Therefore, high accuracy and care are required for the master model's creation.
Previously, the manufacturers used CNC machining for this process, but now they choose 3D printing technology, which plays the marker’s role as it is a quick and more affordable approach. Yet, it is important to mention that CNC machines offer more precision and professional output, and the choice depends on the product type.
Step 3: Silicon Rubber Mold Creation in Vacuum Casting
This step requires the master mold and the casting box. For convenience, I am dividing it into different phases:
Once the master mold is created and approved, it is experts fit the mold and the necessary components in the casting box. These components may be cores, inserters, casting gates, and some others. The risers are also included to ensure proper air escape during the molding process. As a result, the casting box is now fully packed with the master model in it.
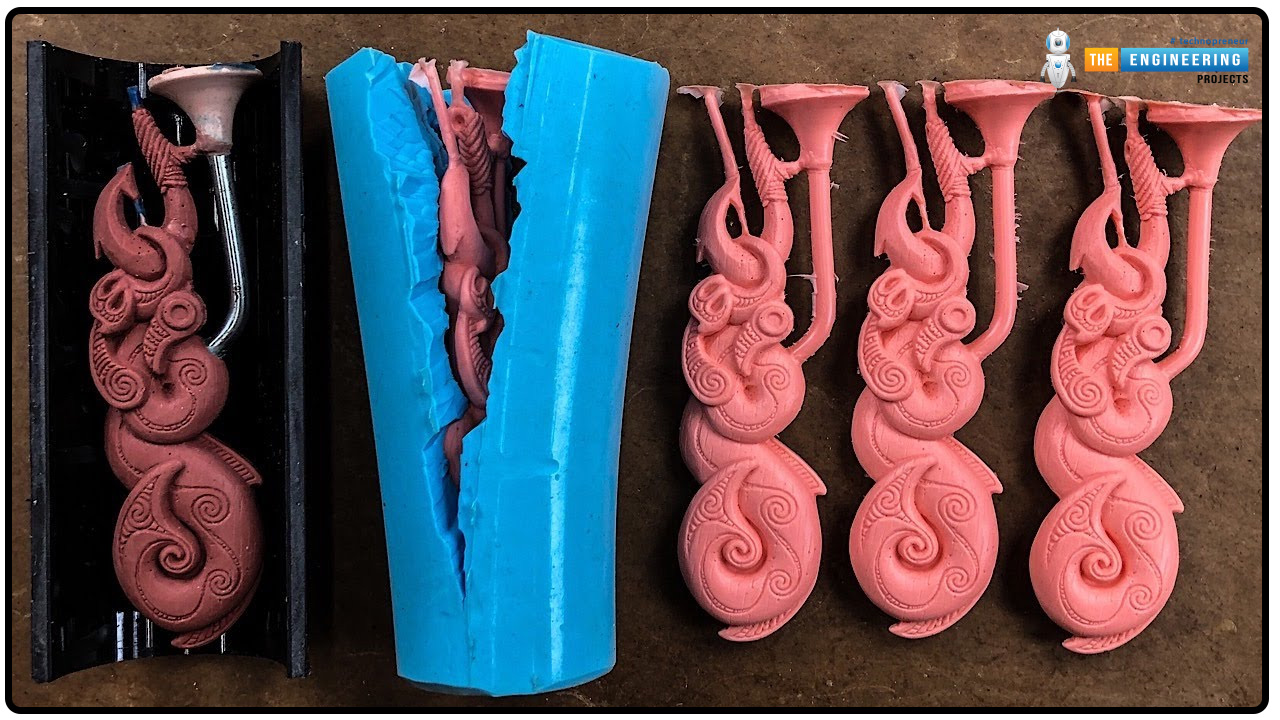
The molten silicon is then poured into the casting box and vacuumed around the master mold, allowing the silicon to be filled in every detail.
Now, the liquid silicon cures in the oven at around 40℃ for 8–16 hours, and the timing for this step varies depending on the silicon mold dimensions. After this, it's time to retrieve the risers and remove the casting box.
The mold is now split using the scalpel and to reveal the negative shapes part cavity. Different mold removal agents are suggested here for easy removal without any breakage.
Step 4: Polyurethane Resin Mixing
Multiple types of polyurethane resin are available, with varying structural properties relative to the manufacturing product. The mixing involves two phases:
Heating the polyurethane resin at 40℃
Combining the two components, casting resin with pigment
The amount of resin must be very precise according to the size of the casting product. The manufacturers then mix the required pigment with the resin in the machine and pour the mixture into the machine’s bowl for at least 50 to 60 seconds; this step is termed the auto-pouring process. Subsequently, they pour the resin into the molds under vacuum and pressure to avoid gaps or air bubbles. As a result, the gravity power creates a seamless and smooth filling of mold. The product formed in this way is crack-free and does not have any major breakable points, so the manufacturer gets a product with high quality and strength.
Step 5: Cure and Demold the Casting Part
This is the last step, and here, the manufacturers heat the resin in the curing room until the final product solidifies. Once the product is fully hard, they take the casting out of the molds, the gates and risers are removed, and the finishing treatments are performed if required. Resultantly, the required high-quality product is formed, and this process is preferred over others because of its reliability and fine finishing.
Pros and Cons of Vacuum Casting
This section elaborates on the merits and demerits of using vacuum casting for product manufacturing. Let’s commence the debate with the positive points:

Advantages of Vacuum Casting
The most prominent advantage is rapid prototyping using vacuum casting. These are made with intricate and finely detailed shapes in small batches. Hence, these are considered ideal for low-cost or low-scale prototypes and production parts.
Vacuum casting is popular because of the wide range of colors and designs available for a diverse range of product types. It provides 3D printing geometry flexibility and, therefore, can create products easily that are considered difficult in other types of production. The fine design with great details are major feature of products made with vacuum casting.
When comparing vacuum casting with other methods, such as a CNC machine as a prototyping method, we find vacuum casting cost-effective with a more detailed output. It involves the creation of reusable molds in just a few hours, therefore being the first choice for most manufacturers. The small parts created with this technique connect each other without any requirement of additional procedures such as drilling or sanding.
This process involves the 3D master molds; therefore, high quality and precision are expected. 3D printing involves intricate precision and accurate size and shape that beats other techniques.
A wide range of resins are suitable for vacuum casting; therefore, the manufacturer has more domains when using this technique.
It is a quick process as compared to other techniques, such as injection molding, so it yields high production in less time.
It provides the same quality of the product throughout the process, so the products made have uniform shapes and colors, no air bubbles, or any other issues.
When comparing it with other methods, the manufacturers always prefer vacuum casting because it requires less labor and less technical information.
This process has less waste as compared to some other techniques and, therefore, is considered more environmentally friendly.
Disadvantages of Vacuum Casting
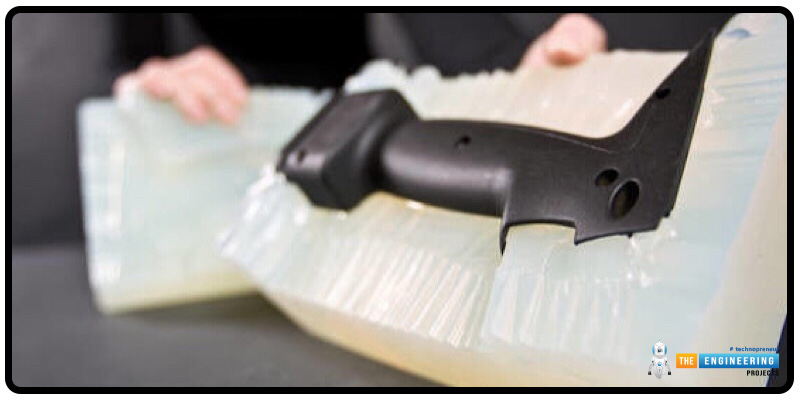
Vacuum casting involves the use of silicon molds that have less life span as compared to the molds used in other techniques. For instance, injection molding uses metal molds; hence, a longer life span is expected. Silicon molds wear and tear more frequently in vacuum casting.
Vacuum casting can create small-scale production because of the limiting size of the vacuum chamber and casting box. Hence, it is not a suitable process for mass production.
This method is not suitable for the production of high-temperature applications. The molds can be deformed or even break at high temperatures.
There is a regular requirement for cleaning and maintaining the molds; otherwise, the residue of a batch can affect the subsequent casting.
The production price of this method is low, but the setup has a high cost because it involves the vacuum chamber and necessary tools according to the product.
Vacuum casting has the risk of shrinking the product when working.
Vacuum Casting Technical Specifications
Before starting work on the vacuum casting, you must know the technical specifications to ensure minimal defects. The subsequent table is helpful for getting started with the information you must have while working on this technique.
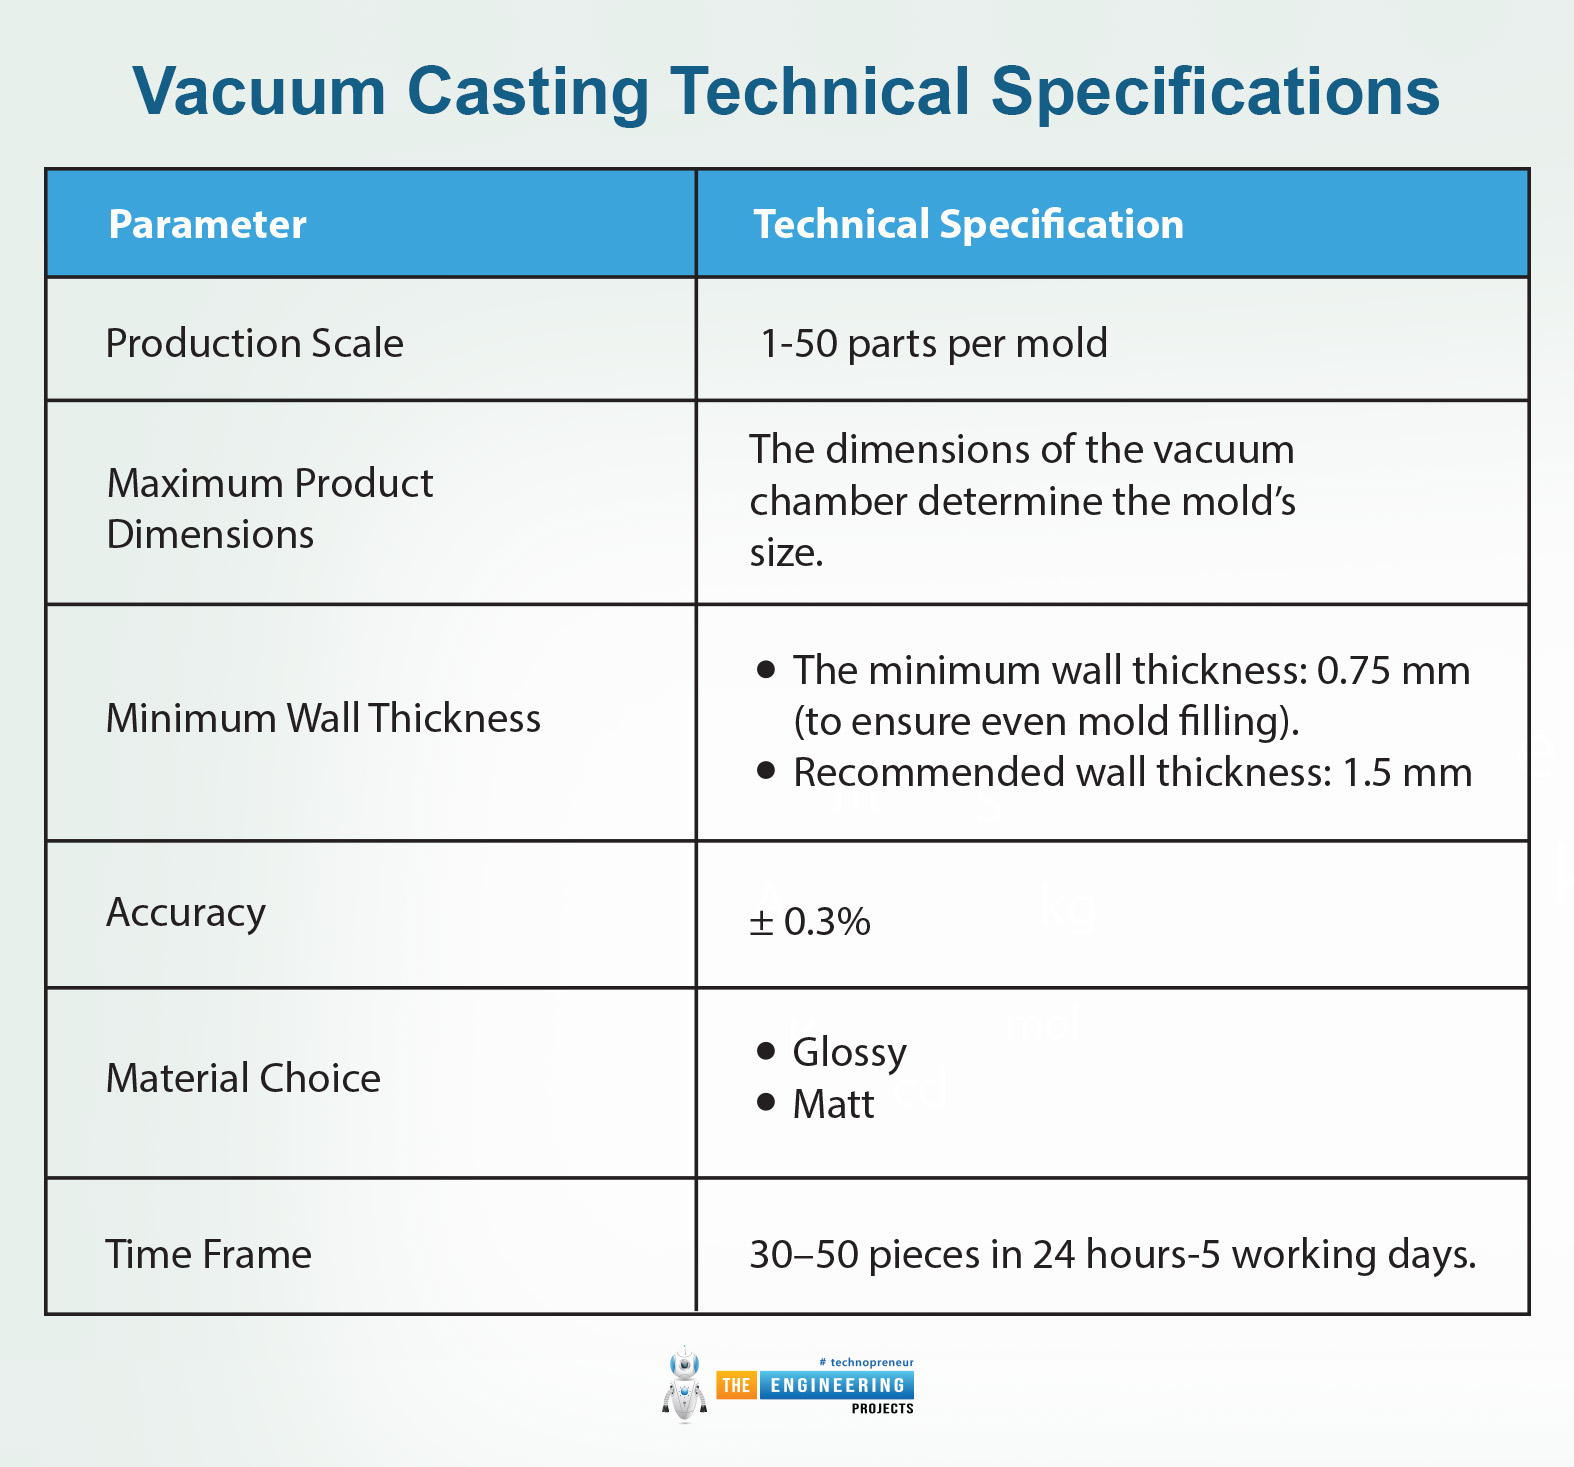
Parameter |
Technical Specification |
Production Scale |
1-50 parts per mold |
Maximum Product Dimensions |
The dimensions of the vacuum chamber determine the mold’s size. |
Minimum Wall Thickness |
|
Accuracy |
± 0.3% |
Material Choice |
Mostly rubber or plastic. |
Surface Structure |
|
Time Frame |
30–50 pieces in 24 hours-5 working days. |
Hence, today we have learned a lot about the vacuum casting technique for product formation. There are multiple other techniques, such as injection molding for the same output, but vacuum casting is preferred for small-scale production because it provides a smooth finish, quick product formation, and an easy procedure at a low cost. The working of these techniques starts with the 3D design creations, and then the master mold is formed, which acts as the heart of silicon rubber model formation. After that, the polyurethane and pigments are mixed and molded in the vacuum chamber, and after the product hardens, the curing and demolding process starts.
This is a quick and uncomplicated technique that is useful for small-scale production and has its merits and demerits that we discussed before. We also shed light on the precautions and technical specifications, so you may know the basis of this process, but always get the assistance of professional vacuum casting services to get your product safely and with the perfect finish. I hope you find this article useful.


