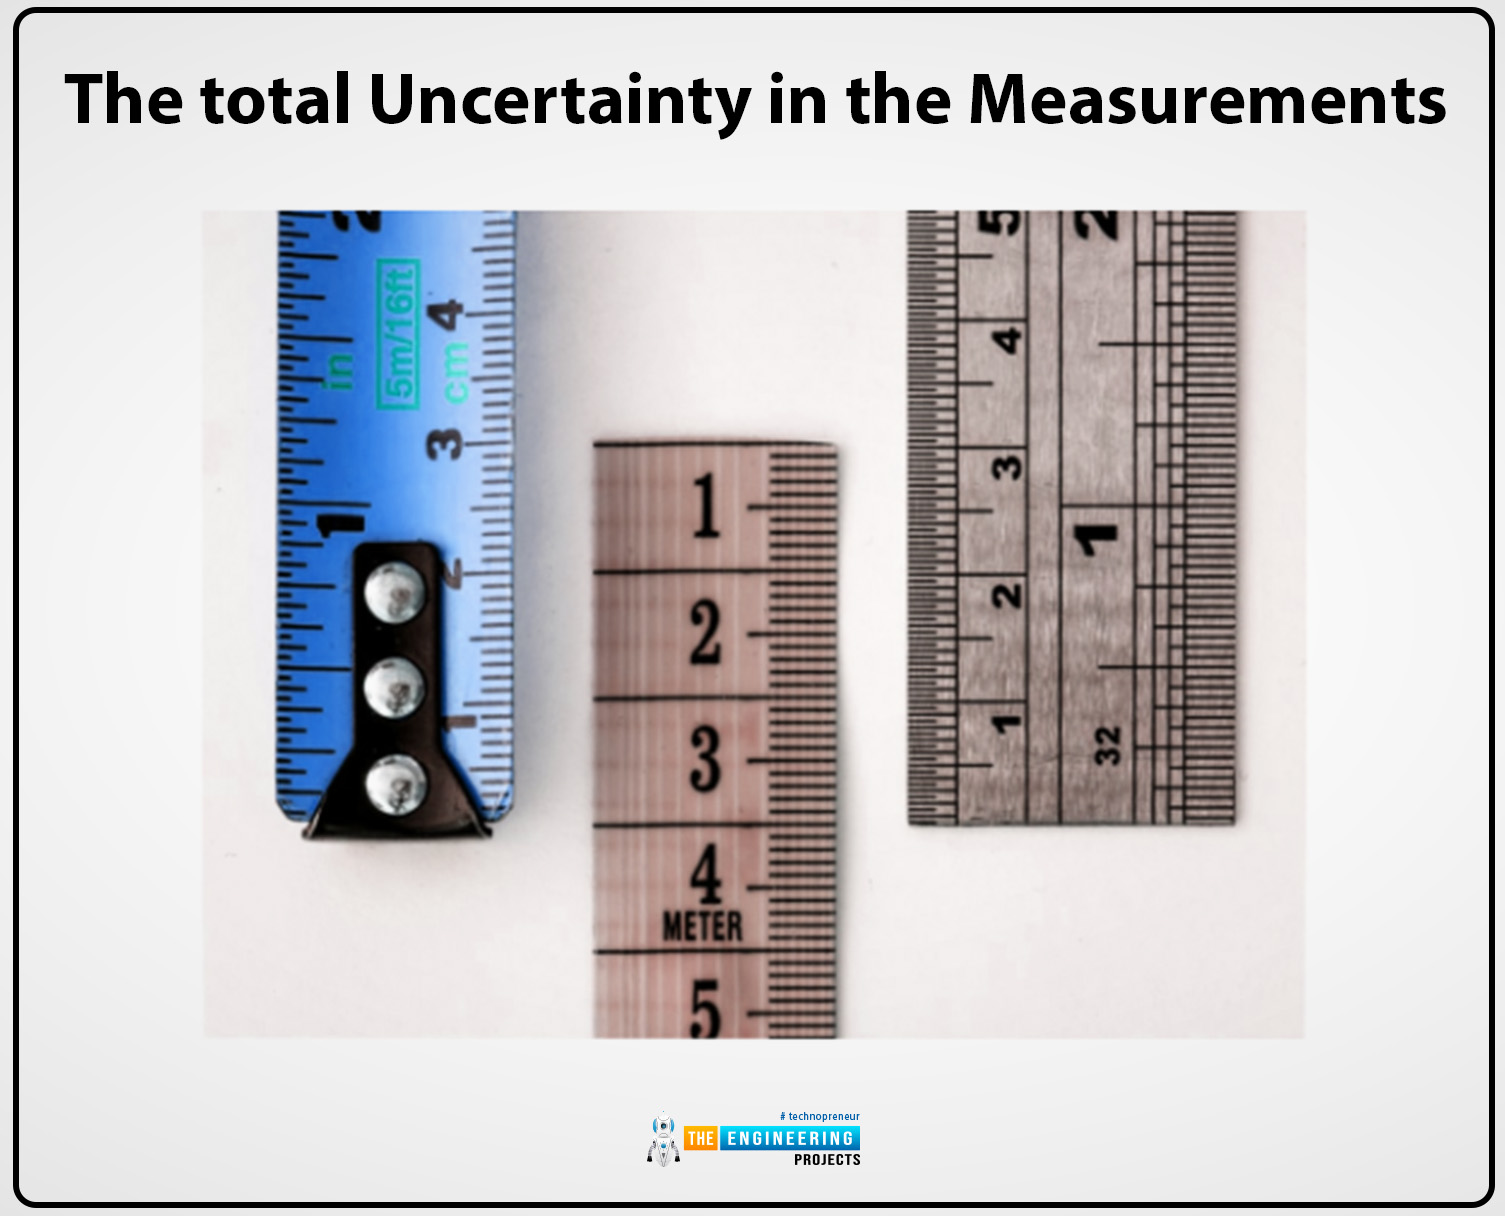
Hi friends, I hope you are all well. In this article, we can discuss the uncertainty in the measurements which can be measured. In the era of modern science and technology or modern physics, scientists can measure complex quantities and these measurements are not precise and accurate somehow doubt is present in these measurements, these doubts are suspicious known as uncertainty in the measurements. In physics or other fields of technology and engineering measurement is essential to measure or understand the quantity of a material or an object. Because every measurement is correct there are always some doubts or doubtful digits and they are called uncertainty in the measurements.
Now in this article, we can explore the history, definition, quantifying methods, and different techniques that can be used to minimize uncertainty and also explore their applications and significance in different fields of engineering and physics.

History:
All substantial National measurement institutes can research the uncertainty in the measurements and give detailed documents about the measurement which is known as GUM and stands for the “Guide of Uncertainty in the Measurements.” this document gives the details about the uncertainties in the measurements. In metrology measurements when we can take measurements of the object many times it is confirmed that somehow measurements are not correct and precise. Or the doubtful measurements are termed uncertainty. All the measurements are not always correct because the measurement results depend upon the instrument's efficiency and the skilled person who can take measurements That is why uncertainty comes into measurements due to many various factors that may depend upon the environmental factors also.
Measurements are essential to determine the quantity of the physical quantity or any objects. Measurements also play a vital role at the economic level. The quality of laboratories can also determined by their calibration results because the exact measurements help to understand the quantity of the object. So that's why the ASME which stands for the American Society of Mechanical Engineers can present different standards for the uncertainty in the measurements. According to their standards, the measurements are done and engineers and scientists in laboratories can also measure the quality of different measurements.
What is the uncertainty in the measurements:
Definition:
Uncertainty in the measurements is defined as:
"The measurement which can we measured have lack of certainty and they have a great difference between the true value and the measurement value which be measured."
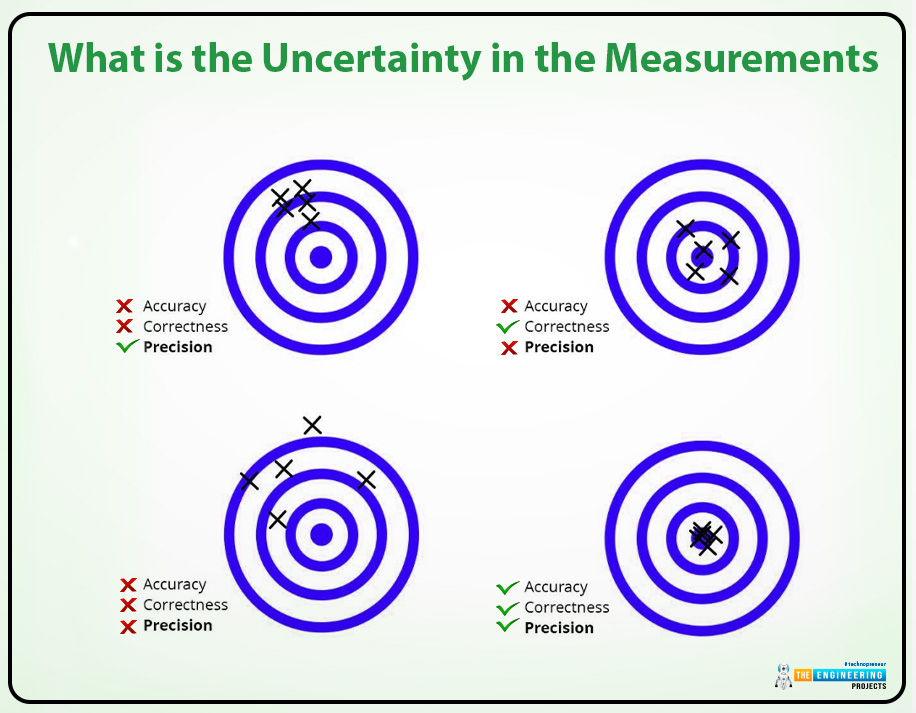
In simple words, the measurements we can measure have some doubts and their results do not according to the expectations and lack sureness are termed as uncertainty in the measurements. Uncertainty in the measurements is common because not every measurement is accurate or precise. For instance, we can measure the length which is about 6.7cm with a meter ruler but the true value range is about 6.62 or 6.75cm so the uncertainty in this measurement is approximately 0.05cm. Another example is if we measure the height of an object and the measurement which we can measure is 5.5m but the true value range is 5.3m or 5.7m so in this measurement the uncertainty is approximately equal to 0.02m.
Types of uncertainty in the measurements:
There are two major types of uncertainty in measurements which are given below:
Type A uncertainty
Type B uncertainty
Type A uncertainty in measurements:
Type A uncertainty is defined as:
"The uncertainty measurement which can be evaluated through the different methods of statical analysis are known as type A uncertainty measurements."
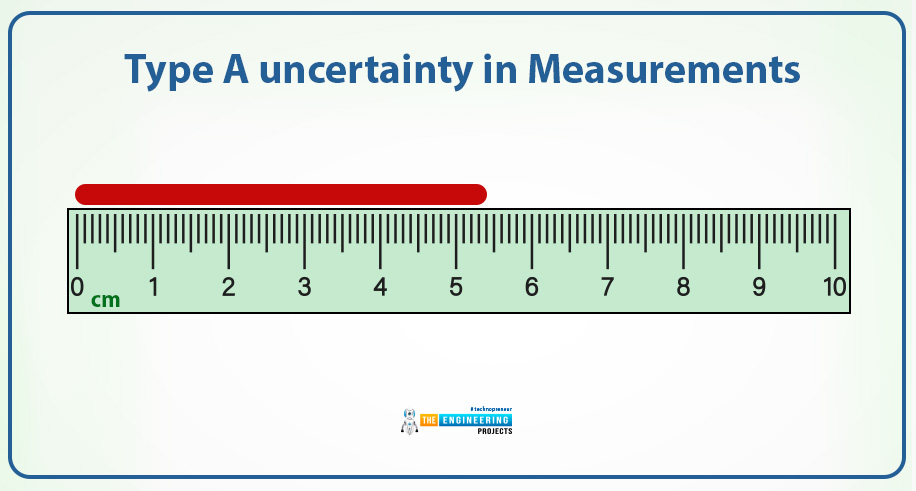
Generally, in type A uncertainty measurements we can measure or collect different data about the measurement and then observe the series of collected data, and then evaluate the uncertainty which are present in these measurements.
For example, we can take measurements of an object many times or maybe 20 times and then evaluate and observe the results of these measurements and then analyze the uncertainty in these measurements. from empirical data, we can directly identify or determine the type A uncertainty in the measurements. Another example is when we want precise and accurate measurements then we can measure the same measurements many times like if we can measure the length and the measurements range between 5.7cm to 14cm and in between different measurements occur after these measurements we can observe or estimate the average uncertainty.
Type A uncertainty evaluating methods:
Type A uncertainty can be measured by repeated measurements of the measuring object and evaluated through statistical methods or techniques. Some statistical methods that are included in the evaluation of type A uncertainty are given below:
Confidence intervals
Arithmetic means
Standard error of the mean
Degree of freedom
Standard deviation
Confidence intervals:
Confidence interval is defined as:
"The true and standard values that can be measured through the measurement of quantity, and confidence interval convey the range of accuracy with a confidence level of the true measured value."
Formula:
This formula can be used for a normal distribution which has a 95% confidence interval. The formula is given there:
μ z SEM
μ z SEM
There,
z is for the confidence level which can we desire and it is approximately equal to 1.96 for the normal distribution with a confidence level of 95%
Arithmetic mean:
Arithmetic means is defined as:
“The set of measured numbers, the all measured numbers are added and dived by the total numbers which are present in the set and the central number which is present in the set also added with the all measured numbers”.
To know an average of all measured measurements we can use the arithmetic formula because, through this statistical technique, we can evaluate the type A uncertainty in the measured sets.
Formula:
The formula which is used to calculate the average of the measured set is given there:
x = 1n i=1nxi
Standard error of the mean:
The standard error of the mean is defined as:
“ the uncertainty which is present in the average that can be calculated from the set of measurements with no of measurements and the standard deviation, these estimate can be conveyed by the standard error of the mean.”
Formula:
The formulas that are used for calculating the standard error of the mean are given there:
SEM= σN
there,
SEM = standard error of the mean
σ= standard deviation
N = no of measurements
Standard deviation:
Standard deviation can be defined as:
“The average can be measured from the dispersion of the set of collected measurements.”
Standard deviation can be used to measure the average variance which can be essential for evaluating the Type A uncertainty.
Formula:
The formula that can be used for the standard deviation or measure the average variances is given there:
σ= 1n-1i=1n(xi-x)2
Degree of freedom:
The degree of freedom can be defined as:
After the calculation of the standard deviation and the average the final numbers can be calculated freely for statistical analysis and the final values can help to understand the type A uncertainty and the degree of freedom.
Formula:
The formula that is used for the degree of freedom is given there:
v= n - 1
Sources of Type A uncertainty in the measurements:
The main causes and sources of the Type A uncertainty in the measurements are given there:
Environmental changes
Human factors
Instrumental fluctuations
Methods used to reduce type A uncertainty:
The methods that can reduce the uncertainty in the measurements are given below:
Advanced measurement techniques
Repeated numbers of measurements
Control environmental factors
Improving measurements techniques
Type B uncertainty in the measurements:
Type b uncertainty can be defined as:
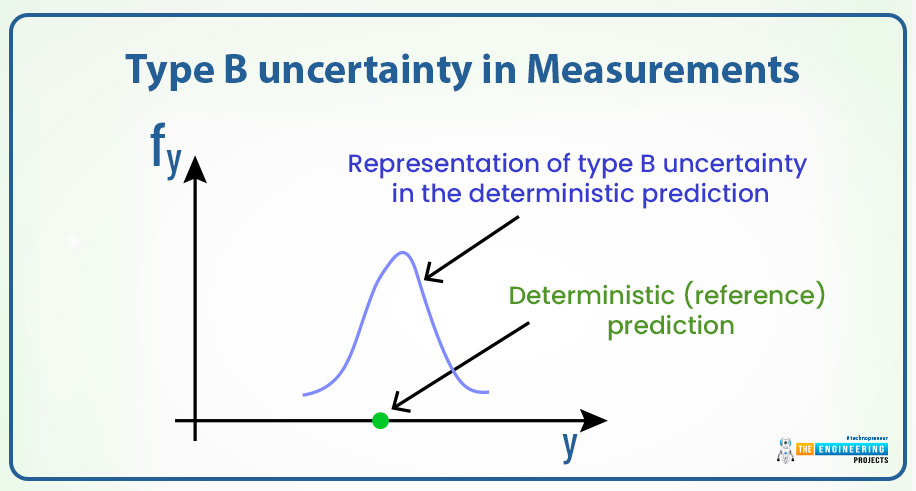
"the uncertainty which can be evaluated by using different methods except the statistical analysis of measurements. Type B uncertainty can't be evaluated through statistical analysis they can be evaluated through calibration certificates, scientists' judgment, and through the publishers."
Type B uncertainty can be measured differently from Type A uncertainty in the measurements because it is mostly evaluated through the collected information and through the publishers. This type of error is also common the main sources and the causes of these uncertainties can be explained below.
Type B uncertainty measurement evaluating methods:
The methods that can be used to evaluate the type B uncertainties in the measurements are given below:
Expert judgment
Manufacturer specification
Theoretical analysis
Reviews of calibration certificates
Reference material data
Chats of collected data information
Expert judgment:
When we can do measurements but do have not direct measurements and data then the uncertainty measurement is provided to the experts who have experienced and understand the limitations and uncertainties of the measurements. Then the judges understand the uncertainty and then identify the type of uncertainty and try to reduce these uncertainties. Some examples are given below:
The scientists who can do experiments and want to change into theory the council and the judges understand the experiment according to their experience and then allow them.
A well-experienced scientist or metrologist can measure the uncertainty in the measurements through their experience and knowledge.
Calibration certificates:
The type B uncertainty can be evaluated by using the calibration certificate because the calibration certificates convey information and details about the accuracy and precision of the measuring instruments. Calibration certificates also provide information about the correction of uncertainty in the measurements.
Example:
The uncertainty of the voltmeter is 0.05 provided in the calibration certificate and how to recover this uncertainty information is also present in it.
Reference material data:
The uncertain information and documents are provided through the reference material data. The information and values that are provided through these reference data help to improve the uncertainty in the measurements that can be calculated.
Example:
The certified uncertainty of the gas analyzer is approximately about 0.1% and the reference data is provided to minimize the uncertainty in the measurements.
Manufactures specification:
The instrument's specification accuracy, precision, and limits can only defined by the manufacturers because they understand the nature of their instruments and they also determine or estimate the uncertainty that can produced by their instrument during the measurements.
Example:
For the dimensional measurements the instruments we can use a digital micrometer and their accuracy is about 0.002 it can also budget the uncertainty measurement in it.
Theoretical analysis:
There are different theoretical models are present that can convey detailed information about the uncertainties in the measurements. Because these models are based on the assumptions and the practical experiences. By using these models we can also estimate and identify the uncertainties in the measurements which can be measured.
Example:
We can estimate the uncertainty and the precision in the vacuum of the speed of light and we can measure these uncertainties that are based on precision and we can calculate them.
Sources which can cause type B uncertainty:
The sources which can use the uncertainty in the measurements are given below:
Environmental conditions
Previous measurements
Manufactures specification
Theoretical models
Instrumental calibration
Previous measurements
The combining component of Type B uncertainty:
In the combination of different type b components, we can use the root sum square method to estimate and calculate the uncertainty in the measurements. The all components that are combined are independent but we can combine them to estimate the uncertainty in the measurements precisely.
Formula:
uc(y) = i=1nciu(xi)2
Methods to minimize the type B uncertainty:
We can reduce the type B uncertainty in the measurements if we can follow these given steps. Because it can help to reduce tp understanding of the uncertainties in the measurements. The methods and the steps are given below:
Used advanced measurement techniques
Improved calibration
Used high-quality reference data
Enhanced environmental controls.
Sources of uncertainty in the measurements:
Generally, uncertainty in the measurements occurs due to many sources but the major two are
Random error
Systematic error
The sources and details of these errors are given below:
Random error:
Random errors are common because they can caused by many different sources and they may be reduced by doing repeated measurements and by estimating the main cause of error. Some major sources which can cause this error are given there:
Observer variability
Environmental noise
Instrumental fluctuations
Systematic error:
This error occurs due to the imperfect instruments usage and the unskilled persons who can take measurements but the main sources and causes of systematic error are given there:
Methodological error
Instrumental error
Observer error
Environmental factors
Techniques and methods to reduce uncertainty:
The techniques and some methods that are used to reduce the uncertainty are given there:
Replicates and repeat measurements
Randomization
Calibration and standardization
Improved experimental designs
Control variables
Advanced measurement techniques:
To reduce the uncertainty in the measurements we can use many different advanced techniques some are given there:
Error-correcting algorithm
Automated data collection
High precision instruments
Skilled persons
In scientific research the significance of uncertainty:
In scientific research the measurement of uncertainty is essential and it is also essential to reduce it because the scientists try to make precise and accurate measurements according to the calibration certificates, the significance of uncertainty in scientific research is given there:
Reproducibility
Peer review
Validation
Transparent reporting
Application of uncertainty in the management:
In the field of modern technology and engineering, in measurements uncertainty and error are common but by using different techniques we can reduce them. Some applications of uncertainty in the management are given there:
Medical and biological research
Pollution monitoring
Quality control
Climate modeling
Safety standards
Drug efficacy
Diagnostic accuracy
Conclusion:
The uncertainty in the measurements is common but in modern science and technology or different fields of science and physics, we can reduce the uncertainty in the measurements using many different techniques because scientists and engineers want to measure the precise and accurate measured values. Because the experts can agree on the measurements which are according to the standard values of the calibration certificates. Because the national measuring institutes and the American Society of Measurements can present the standard suits for measurements that are used to reduce or estimate the uncertainty in the measurements.


