Hello friends! I hope you are doing great. Today, we are discussing the latest version of the Arduino Mega 1280 library for Proteus. This can be used in both versions (Proteus 7 and Proteus. We have shared the previous versions, which are the Arduino Mega 1280 library for Proteus and the Arduino Mega 1280 library for Proteus V2.0 with you. With the advancement in the version, these microcontrollers have a better structure and the design is closer to the real microcontrollers.
In this article, I will discuss the introduction of the Arduino Mega 1280 in detail. Here, you will learn the features and functions of this microcontroller. Then, we’ll see how to download and install this library in Proteus. In the end, we’ll see a mini project using the Arduino Mega 1280 V3.0. Let’s move towards our first topic:
| Where To Buy? | ||||
|---|---|---|---|---|
| No. | Components | Distributor | Link To Buy | |
| 1 | Battery 12V | Amazon | Buy Now | |
| 2 | Resistor | Amazon | Buy Now | |
| 3 | LCD 20x4 | Amazon | Buy Now | |
Introduction to the Arduino Mega 1280 V3.0
- The Arduino Mega is a microcontroller board that is based on the ATmega 1280. It has a large structure and provides more I/O pins.
- It has the following memory features:
- 128KB of flash memory to store the programs in it.
- 8KB of SRAM for dynamic memory allocation
- 4KB of EEPROM for data storage
- It has 54 digital pins, of which 14 are used as PWM outputs.
- It has 16 analogue input pins
- This microcontroller uses the ATmega16U2 microcontroller for USB-to-serial conversion
- It has compatibility with Arduino IDE where it is programmed with C++ just like other Arduino boards.
- One must know that the Arduino Mega 1280 V3.0 is an open-source microcontroller and it is a robust platform for building and experiencing a vast range of electronic projects.
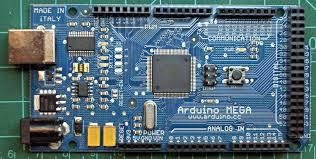
Now, let’s see the Arduino Mega 1280 library V3.0 in Porteus.
Arduino Mega 1280 V3.0 Library for Proteus
The download and installation process for Arduino Mega 1280 is easy. The Proteus software does not have this library by default. To use it, the first step is to download it from the link given below:
Arduino Mega 1280 V3.0 for Proteus
Adding Proteus Library File
The downloading does not take much time. Once it is complete, it can be seen in the download folder on your system.
You will see a zip file when it is extracted to a particular path of your choice.
There are two files in the folder named:
ArduinoMega3TEP.IDX
ArduinoMega3TEP.LIB
Copy these files and paste them into the folder with the following path:
C>Program files>Lab centre electronics>Proteus 7 Professional>Library
If you want more details on this process, you must see How to Add a New Library File in Proteus .
Note: The same process is applicable to Proteus 8 professional if you are using that.
Arduino Mega 2560 Library V3.0 in Proteus
- If all the above steps are completed successfully, the Proteus has to start/restart so that it may load all the files.
- The Arduino Mega 1280 V3.0 is present in the libraries so click on the “P” button at the left side of the screen to pick it from the libraries. It will open a search box in front of you.
- Type “Arduino Mega 1280” there and you will see the following options in front of you:

- Double-click on its name to pick it.
- Now, click on the picked Arduino Mega and place it on the working area to see its structure:
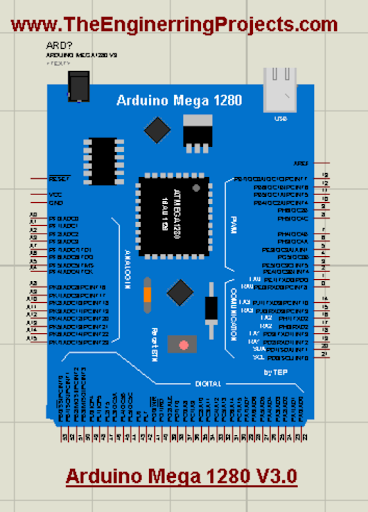
You can see it has many pins and the structure and design are closer to the real Arduino Mega. There is no link to the website on this microcontroller and it has more details about the pins on it. These points are different from the previous versions.
Arduino Mega 1280 V3.0 Simulation in Proteus
The Arduino Mega 1280 has many features and it is used in a great number of projects. But, as a beginner, we’ll check the work with the help of a simple project. In this project, we’ll use the LED with Arduino Mega 1280 V3.0 and print the message of our own choice. Follow the steps to perform this example:
- Go to the pick library once again and write “LCD 20X4 TEP” there. Pick it to use it.
- Similarly, pick the potentiometer by searching “POT-HG” in the search box.
- Now, get the “Button” from the same search box.
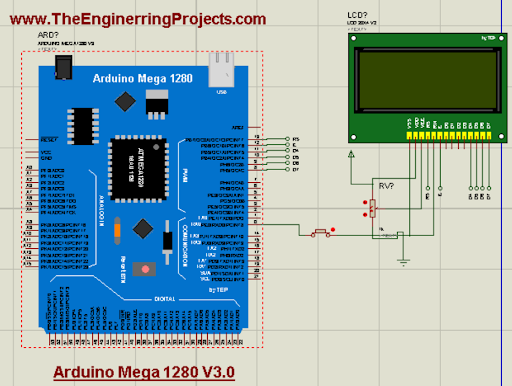
- Place the components of the project in the working area by following the pattern given here:
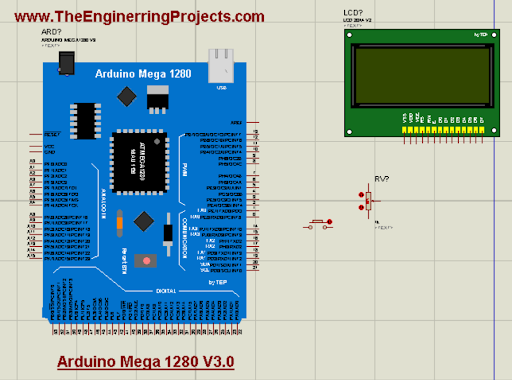
Go to the terminal mode from the left side of the screen, and then choose the default pins for the clean circuit.
Set and label the pins according to the image given here:

The circuit is fine but it can’t be run without coding.
Code for Arduino Mega 1280 V3.0
Fire up your Arduino IDE.
Create a new sketch for this project.
The upper side has a drop-down menu, choose Arduino from there.
Delete the default code.
Paste the following code into it:
#include
//Setting the LCD pins
LiquidCrystal lcd(13, 12, 11, 10, 9, 8);
const int buttonPin = 0;
boolean lastButtonState = LOW;
boolean displayMessage = false;
void setup() {
pinMode(buttonPin, INPUT);
//Printing the first message
lcd.begin(20, 4);
lcd.setCursor(1, 0);
lcd.print("Press the button to see the message");
}
void loop() {
int buttonState = digitalRead(buttonPin);
// Using if loop to create the condition
if (buttonState != lastButtonState) {
lastButtonState = buttonState;
if (buttonState == LOW) {
displayMessage = true;
lcd.clear();
lcd.setCursor(1, 0);
//Printing the message on screen when buttin is pressed
lcd.print("www.TheEngineering");
lcd.setCursor(4, 1);
lcd.print("Projects.com");
} else {
displayMessage = false;
lcd.clear();
lcd.setCursor(1, 0);
lcd.print("Press the button to see the message");
}
}
}
The same code is also present in the zip file of the Arduino Mega 1280 V3.0 library folder you have downloaded.
Click on the tick mark to run the code. It will take some moments to be loaded.
Once the loading is complete, click on the upload button to get the hex file address.
In the loading process, you have to search for the path to the hex file. In my case, it looks like the following image:

Add the Hex File in Proteus
Go to the proteus where we have created our project.
Double-click on the Arduino Mega 1280 V3.0 module. It will open its properties panel in front of you.
Paste the address of the hex file into the section named “Program File.".
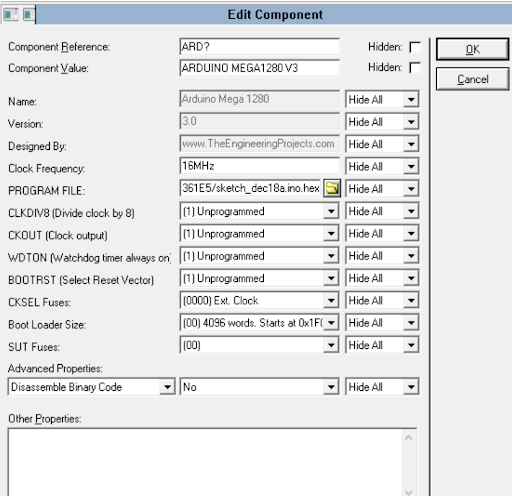
Hit the “OK” button and close the window.
Arduino Mega 1280 V3.0 Simulation Results
There are some buttons at the bottom left corner of the screen. Out of these, you have to click the play button to run the project.
If all the above procedures are completed successfully, you will see the output on the screen.
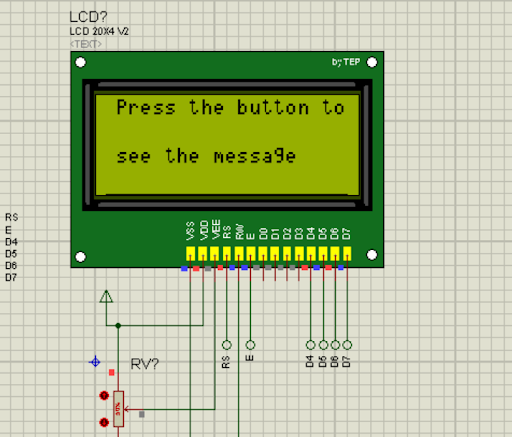
When the button is opened, the LCD shows the message that you have to push the button to see the message.
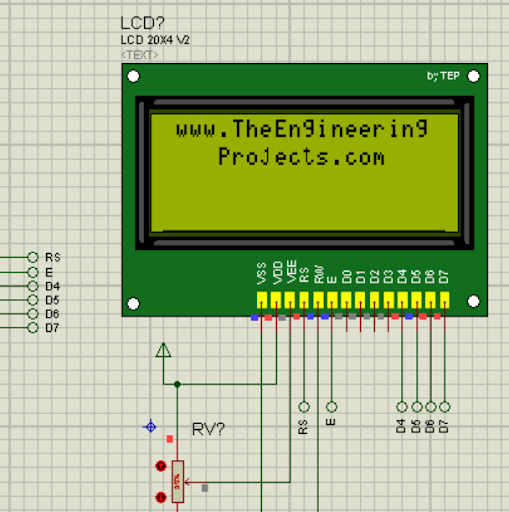
Click on the button, and now you can see the message on the LCD.
If all the above steps are completed successfully, you will see that you have used the Arduino Mega 1280 V3.0 to show the required message on the LCD. This microcontroller can be used in different complex projects and can provide the basic working according to the code. Now, you can try different projects on your Proteus. I hope you have installed the microcontroller successfully. Yet, if you are stuck at any point, you can ask in the comment section.


