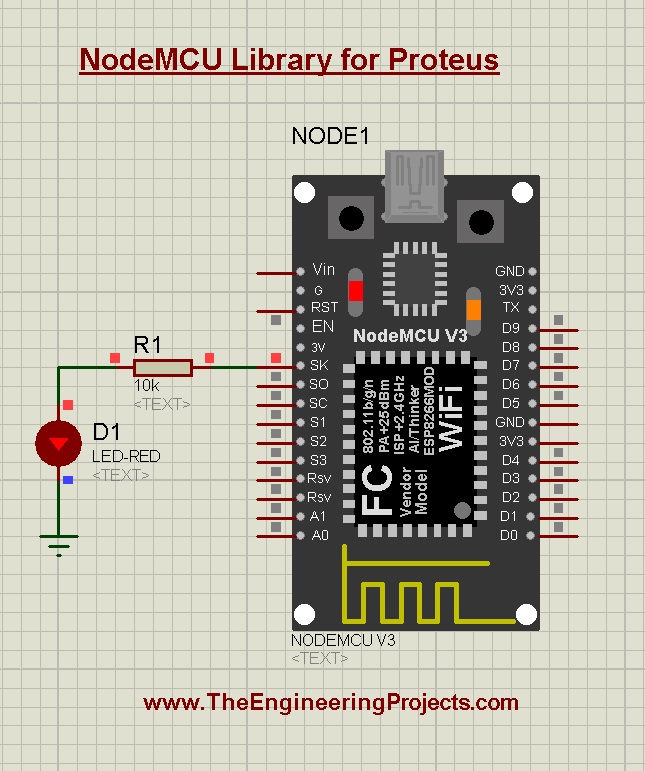
Hello friends, I hope you all are doing great. In today's tutorial, I will share a Proteus Library of another embedded module i.e. NodeMCU. NodeMCU is a microcontroller board and if you are new to this board, you should read Introduction to NodeMCU to get your hands dirty. NodeMCU is not present in the components library of Proteus and using this library you can easily simulate NodeMCU in Proteus.
We can't add WiFi and BLE capabilities to our module in the Proteus software, that's why it will just perform the basic functions i.e. sensors interfacing, PWM, I/O control etc. So, you can use it for simple code testing and can also use it to design circuit diagrams of your projects.
So, let's have a look at How to download NodeMCU Proteus Library and simulate it:
| Where To Buy? | ||||
|---|---|---|---|---|
| No. | Components | Distributor | Link To Buy | |
| 1 | Battery 12V | Amazon | Buy Now | |
| 2 | LEDs | Amazon | Buy Now | |
| 3 | Resistor | Amazon | Buy Now | |
| 4 | ESP8266 | Amazon | Buy Now | |
NodeMCU Library for Proteus
- First of all, download the Proteus Library zip file, by clicking the below button:
Add Library Files in Proteus
- Extract the zip file and open the "Proteus Library Files" folder.
- You will find two files in this folder, named:
- NodeMCUTEP.IDX
- NodeMCUTEP.LIB
- Place these two files in the Library Folder of your Proteus Software.
Note: Look at How to add new Library in Proteus 8, if you don't know already.
NodeMCU in Proteus
- After adding the NodeMCU files to the Library folder, open your Proteus software or restart it, if it's already running.
- In the components list, make a search for "NodeMCU".
- If you have added the Library files correctly, you will get the below result:
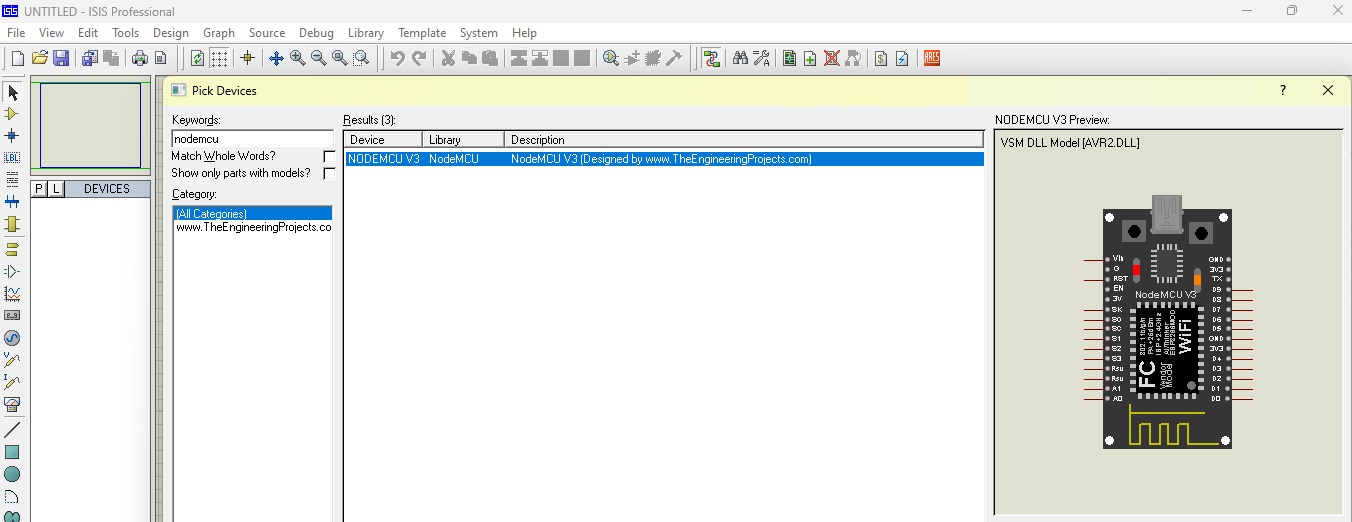
- Double-click on this NodeMCU module to add it in the list of your project components.
- Now place it in the Proteus workspace and it will look like:
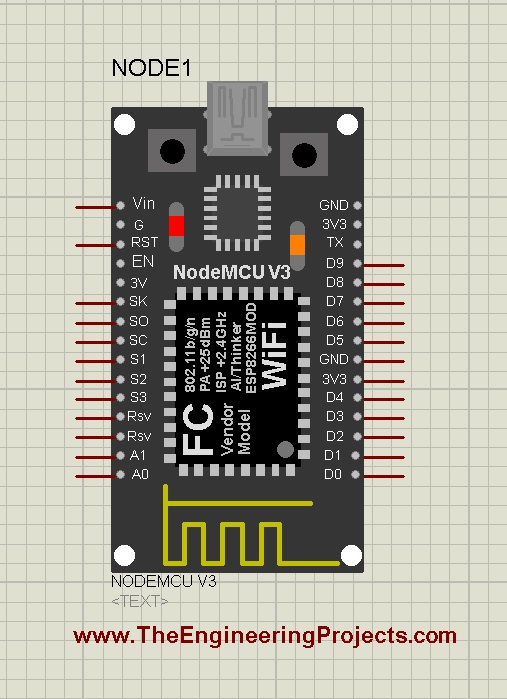
- We have kept its size small as we got a lot of requests after Arduino Library to reduce the boards' sizes. I hope you will like this one.
So, we have successfully added the NodeMCU module to our Proteus software. Now let's simulate NodeMCU and for that, I am going to use the blink example:
Simulate NodeMCU in Proteus
LED with NodeMCU
- First of all, we need to attach an LED with Pin # 13 of NodeMCU, as shown in the below figure:
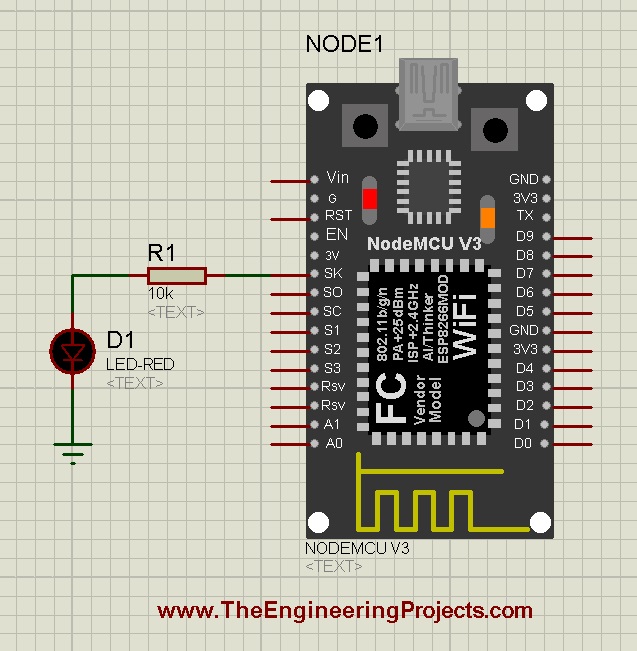
- Make sure to change the LED Model Type from analog to digital in its Properties Panel, otherwise, it won't work.
Code for NodeMCU LED Blinking
- Now it's time to get the NodeMCU LED Blinking code, given below:
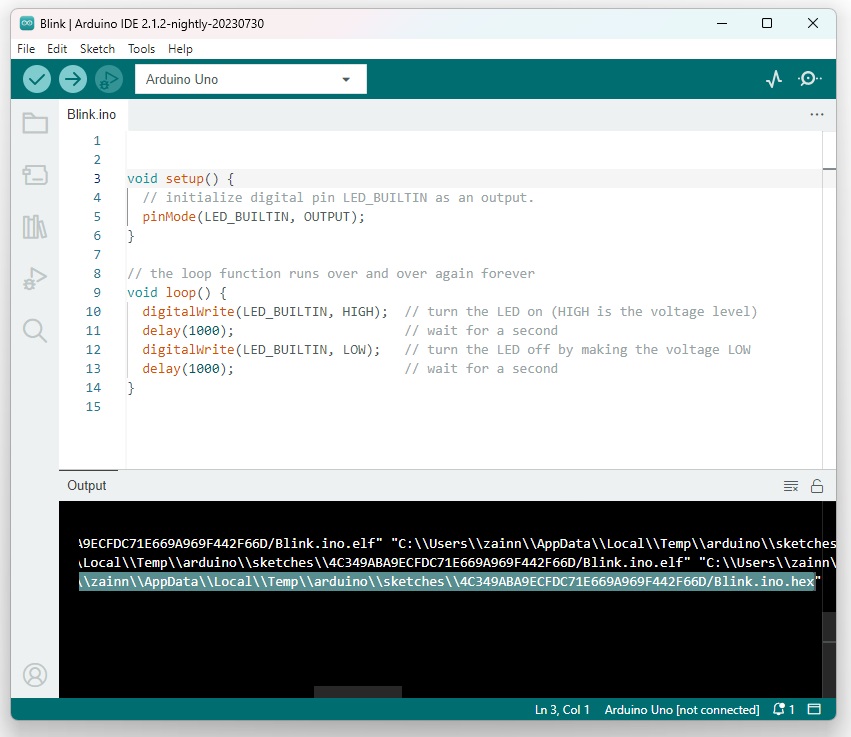
Note: As you can see in the above code, we have selected Arduino UNO in the boards' section. As I have told earlier, this NodeMCU module is only going to use its pins, we can't add WiFi or BLE capabilities in the Proteus software. So, while compiling the code, select Arduino UNO board. Something is better than nothing.
- After compiling the code, get its hex file from the output Panel. If you don't know about that, read How to Get the Hex File from Arduino IDE.
Adding Hex File in Proteus
- Double-click on the NodeMCU module in Proteus software to open its Properties Panel.
- Add the Hex file from Arduino IDE in the "Program File" section of the Properties Panel.
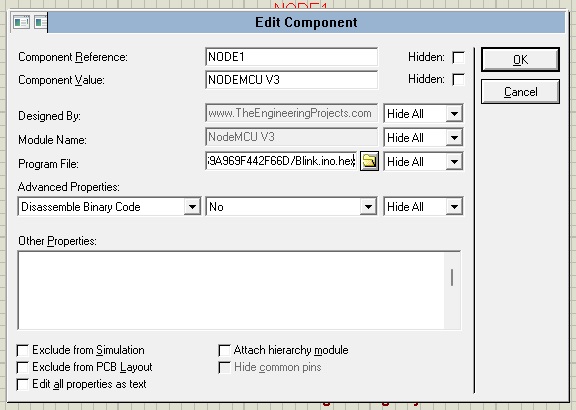
- Click OK to close the panel.
- Now run the Proteus simulation and if everything goes fine, you will get results as shown in the below figure:

So, that's how you can easily simulate NodeMCU in the Proteus software. If you have any questions, please ask in the comments. I will resolve them as soon as possible. In the next tutorial, we will share the ESP32 Library for Proteus. Till then take care and have fun!!!


