Welcome to the next tutorial on our raspberry pi four python programming. In the previous article, we built a system that recognizes when two people are in physical contact using OpenCV and a Raspberry Pi 4. We used the weights from the YOLO version 3 Object Recognition Algorithm to implement the Deep Neural Networks part. Regarding image processing, the Raspberry Pi consistently comes out on top compared to other controllers. A facial recognition program was among the earlier attempts to use Raspberry Pi for sophisticated picture processing. In today's world of cutting-edge technology, digital image processing has expanded rapidly to become an integral feature of many portable electronic gadgets.
Digital image processing is widely used for such tasks as item detection, facial recognition, and people counting. This guide will use a Raspberry Pi 4 and ThingSpeak to create a crowd-counting system based on OpenCV. In this case, we will utilize the pi camera module to take pictures in a continuous loop, and then we will run the images through the Histogram Based Object descriptor to find the things in the photos. Next, we'll compare these images to OpenCV's pre-trained model for facial recognition. The headcount may be seen by anybody, anywhere in the world, because of the public nature of the ThingSpeak channel.
Knowing how many people show up to an event or purchase a newly released product is vital for event management and retail shop owners. Still, it's even more critical that they can use that information to improve future events. To their relief, modern crowd-counting technology has made it simpler for event planners and business owners to acquire actionable data on event attendance that can be used to improve ROI.
| Where To Buy? | ||||
|---|---|---|---|---|
| No. | Components | Distributor | Link To Buy | |
| 1 | Raspberry Pi 4 | Amazon | Buy Now | |
Components
Hardware
Raspberry Pi 4
Pi Camera
Software & Online Services
ThingSpeak
Python3
OpenCV3
Instructions for Setting Up OpenCV on a Raspberry Pi
In this case, the OpenCV framework will make people count. You must first upgrade your Raspberry Pi before you can install OpenCV.
sudo apt-get update
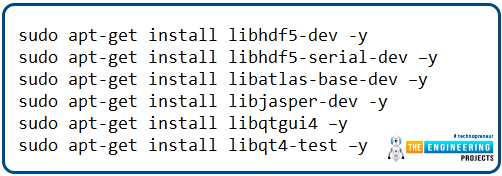
Then, get OpenCV ready for your Raspberry Pi by installing its prerequisites.
sudo apt-get install libhdf5-dev -y
sudo apt-get install libhdf5-serial-dev –y
sudo apt-get install libatlas-base-dev –y
sudo apt-get install libjasper-dev -y
sudo apt-get install libqtgui4 –y
sudo apt-get install libqt4-test –y
Once that is done, use the following command to install OpenCV on your Raspberry Pi.
pip3 install OpenCV-contrib-python==4.1.0.25
Additional Package Installation Necessary
We need to get some additional packages on the Raspberry Pi before we can begin writing the code for the Crowd Counting app.
Installing imutils: To perform basic image processing tasks like translating, rotating, resizing, skeletonizing, and displaying Matplotlib images more efficiently in OpenCV, imutils are used. So, run the following command to set up imutils:
pip3 install imutils
matplotlib: The matplotlib library should then be installed. When it comes to Python visualizations, Matplotlib is your one-stop shop for everything from static to animated to interactive.
pip3 install matplotlib
Configuring Thingspeak for Headcounting
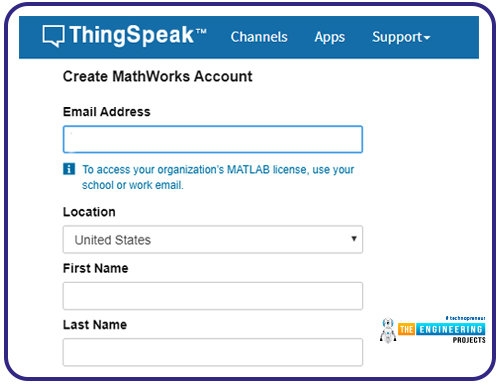
One of the most widely used IoT platforms, ThingSpeak allows us to keep tabs on our data from any location with an Internet connection. The system can also be controlled remotely by using the Channels and web pages provided by ThingSpeak. You must first register for an account on ThingSpeak to create a channel. If you have a ThingSpeak account, please log in with your username and password.
Select Sign up and fill out the required fields.
Double-check your email address and press the "Next" button when you're done. Now that you're logged in, click the "New Channel" button to make a brand-new channel.
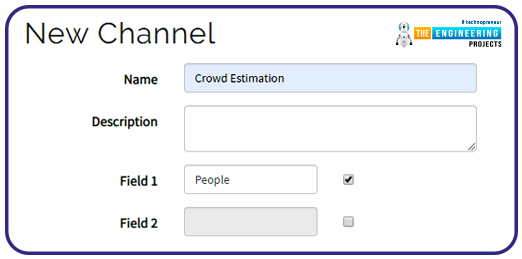
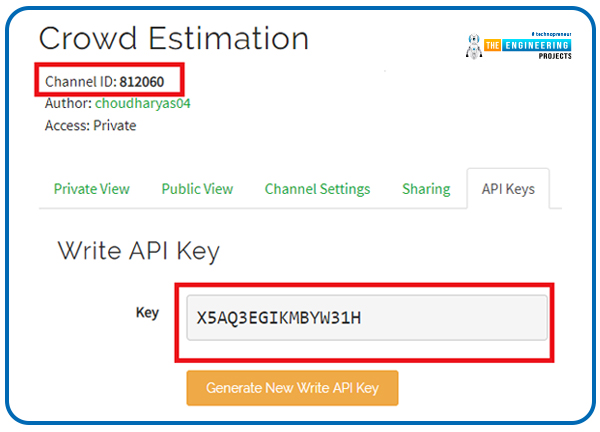
When you're ready to begin uploading information, select "New Channel" and give it a descriptive name and brief explanation. One new field, "People," has been added. Any number of areas may be made, as needed. Then, click the "Save Channel" button after entering the necessary information. You'll need to pass your API and channel ID into a Python script whenever you want to submit data to ThingSpeak.
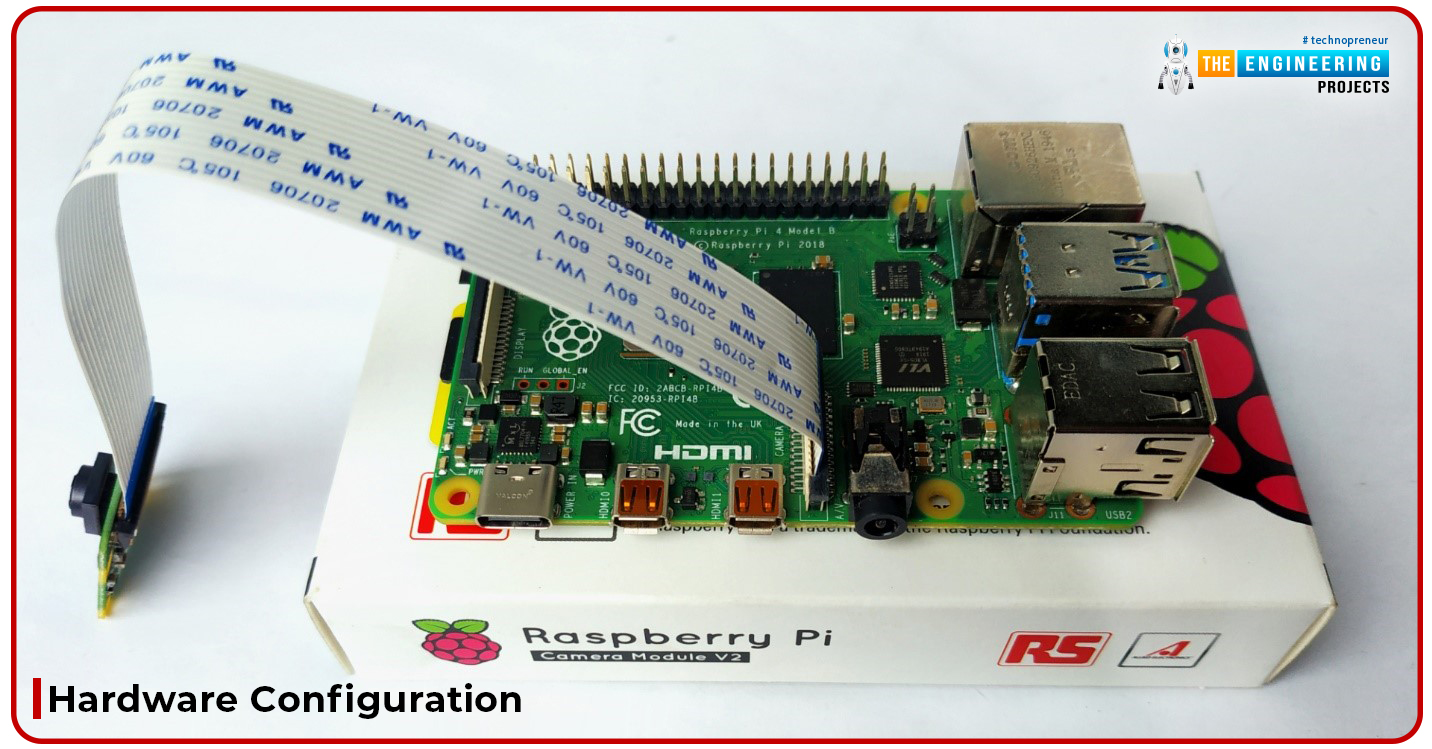
Hardware Configuration
For this OpenCV people-countering project, all you need is a Raspberry Pi and a Pi camera; to get started, plug the camera's ribbon connector into the Raspberry pi's designated camera slot.
The Pi 4 Camera board is a purpose-built expansion board for the Raspberry Pi computer. The Raspberry Pi hardware is connected via a specialized CSI interface. In its native still-capture mode, the sensor's resolution is 5 megapixels. Capturing at up to 1080p and 30 frames/second in video mode is possible. Because of its portability and compact size, this camera module is fantastic for handheld applications.
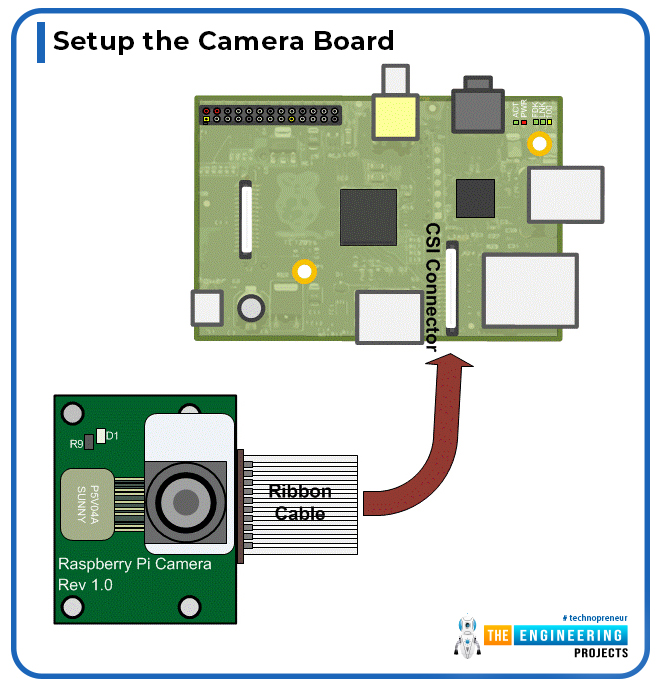
Setup the Camera Board
A ribbon cable connects the camera board to the Raspberry Pi. Camera PCB and Raspberry Pi hardware are associated with a ribbon cable. If you join the ribbon cables correctly, the camera will work. The camera PCB's blue backing must face away from the PCB, while the Raspberry Pi hardware's blue backing must face the Ethernet port.
Histogram of Oriented Gradients
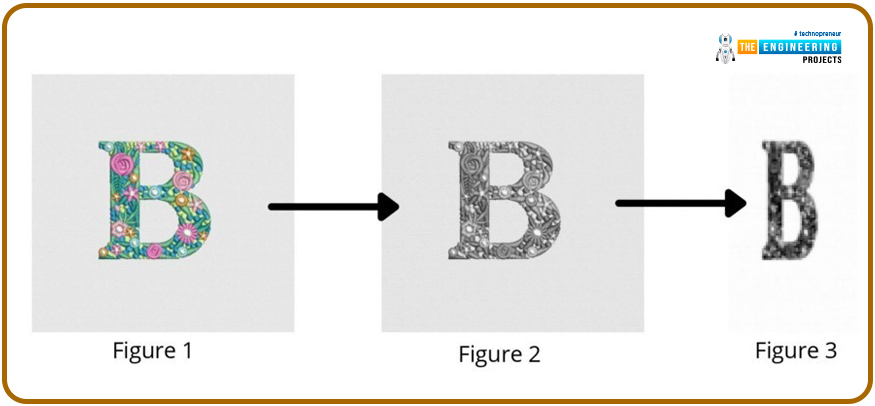
One example of a feature descriptor is the HOG, similar to the Canny Edge Detector algorithm. Object detection is a typical application of this technique in image processing and computer vision applications. This method uses a count of gradient orientation occurrences in the limited region of an image. There are a lot of similarities between this approach and Scale Invariant Feature Transformation. The HOG descriptor highlights object structure or form. This method of computing features is superior to other edge descriptors because it considers both the magnitude and the angle of the gradient. Histograms are created for the image's regions based on the gradient's intensity and direction.
How do we calculate the histogram of oriented gradient features?
First, load the image that will serve as the basis for the HOG feature calculation into the system. Reduce the size of the image to 128 by 64 pixels. The research authors utilized and recommended this dimension because improving detection outcomes for pedestrians was their primary goal. After achieving near-perfect scores on the MIT pedestrian's database, the authors of this study opted to create a new, more difficult dataset: the 'INRIA' dataset (http://pascal.inrialpes.fr/data/human/), which includes 1805 (128x64) photographs of individuals cut from a wide range of personal photos.
In this step, we compute the image's gradient. The gradient can be calculated using the image's magnitude and angle. First, we determine Gx and Gy for every pixel in a 3x3 grid. As a first step, we determine the Gx and Gy values for each pixel by plugging their respective values into the following formulas.
Each pixel's magnitude and angle are computed using the following formulae after Gx and are determined.
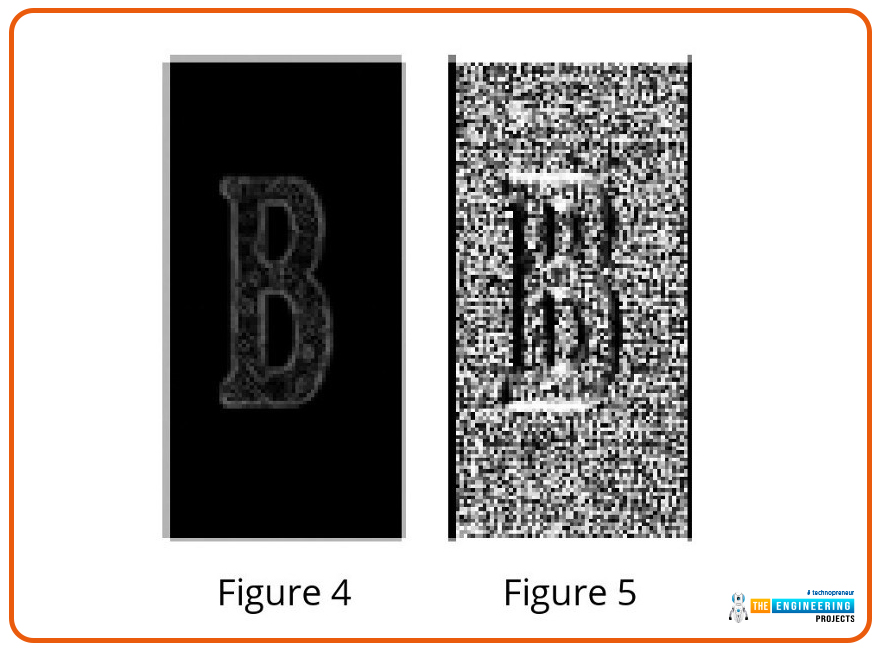
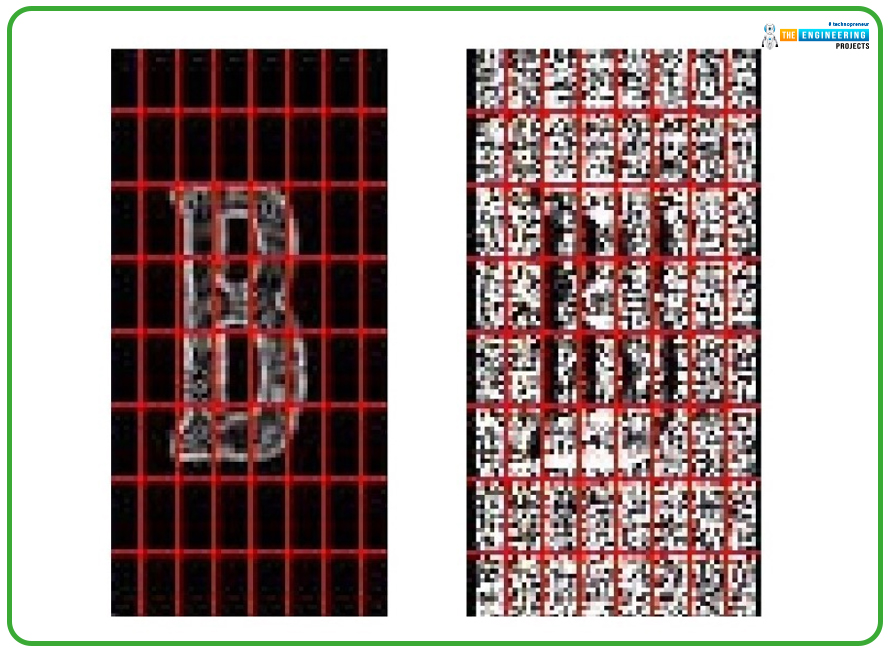
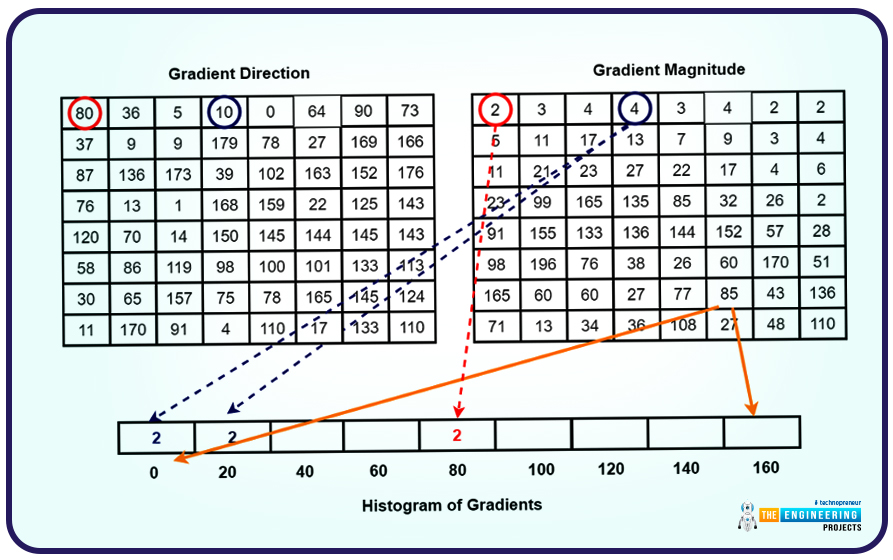
Once the gradient for each pixel has been calculated, the resulting gradient matrices are each partitioned into eight 8x8 cells that form a block. Each block is assigned a 9-point histogram. Each bin in a 9-point histogram has a 20-degree range, so the resulting histogram has nine bins total. The numbers in Figure 8 are assigned to a 9-bin histogram graphically depicting the results of the calculations. Each of these 9-point graphs can be represented graphically as a histogram whose bins output the relative strength of the gradient across the corresponding intervals. Since a block can have 64 distinct values, the calculation below is carried out for each of the 64 possible combinations of magnitude and gradient. Because 9-point histograms are being used, therefore:
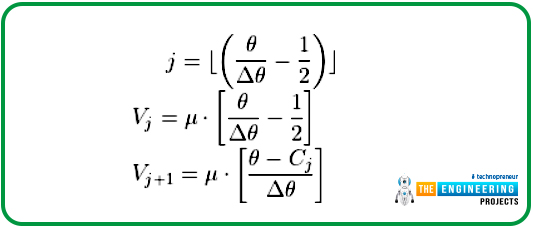
The following terms will define the limits of each jth bin:
The average value of each bucket will be:
Illustration of a histogram with nine discrete bins. For a particular 8x8 block of 64 cells, there will be only one possible histogram. Each of the sixty-four cells will contribute their Vj and Vj+1 values to the array's indices at the jth and (j+1) positions.
When determining the value assigned to cell j in block I, we first determine which bin j will be assigned to it. The following equations will provide the value:
Each pixel's value, Vj, is calculated and stored in the set at the jth and (j+1)the indexes of the bin that serves as the block's bin. Upon completing the preceding steps, the resulting matrix will have dimensions 16 by eight by 9. When the histograms for all blocks have been computed, a new block is formed by joining together four cells of the 9-by-9 histogram matrix (2x2). This chopping is carried out overlappingly, with an 8-pixel stride. We create a 36-feature vector by concatenating the 9-point histograms of each of the four cells that make up the block.
A combined FBI is created from four blocks by traversing a 2x2 grid around the image.
The L2 norm is used to standardize FB values across blocks.
The value of k for normalization is found by applying the following formulae:
Normalizing is performed to lessen the impact of variations in the contrast between photographs of the same object—each section. Data is collected in the form of a 36-point feature vector. Seven blocks line up across the bottom and fifteen at the top. Therefore, the entire length of all histogram-oriented gradient features will be 3780 (7 x 15 x 36). The image's HOG characteristics are extracted.
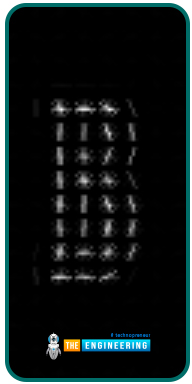
HOG features are seen parallelly on a single image with the image library.
Explanation of the People Counting Python Program
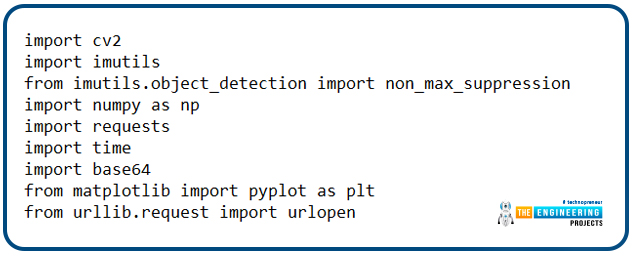
This page includes the complete Python code for an OpenCV project that counts the people in a crowd. Here, we break down the code's crucial parts so you can understand them better—first, import all the necessary libraries that will be used later in the code.
import cv2
import imutils
from imutils.object_detection import non_max_suppression
import numpy as np
import requests
import time
import base64
from matplotlib import pyplot as plt
from urllib.request import urlopen
Imutils:
For use with OpenCV and either version of Python, this package provides a set of helper functions for everyday image processing tasks such as scaling, cropping, skeletonizing, showing Matplotlib pictures, grouping contours, identifying edges, and more.
Numpy:
You can manipulate arrays in Python with the help of the NumPy library. Matrix operations, the Fourier transform, and linear algebra are all within their purview. Because it is freely available to the public, anyone can use it. That's why it's called "Numerical Python," or "NumPy" for short.
Python's list data structure can replace arrays, but it could be faster. NumPy's intended benefit is an array object up to 50 times quicker than standard Python lists. To make working with NumPy's array object, ndarray, as simple as possible, the library provides several helpful utilities. Data science makes heavy use of arrays because of the importance placed on speed and efficiency.
Requests:
You should use the requests package if you need to send an HTTP request from Python. It hides the difficulties of requests making behind a lovely, straightforward API, freeing you to focus on the application's interactions with services and data consumption.
Time:
In Python, the time module has a built-in method called local time that may be used to determine the current time in a given location depending on the time in seconds that have passed since the epoch (). tm isdst will range from 0 to 1 to indicate whether or not daylight saving time applies to the current time in the region.
Base64:
If you need to store or transmit binary data over a medium better suited for text, you should look into using a Base64 encoding technique. There is less risk of data corruption or loss thanks to this encoding method. Base64 is widely used for many purposes, such as MIME-enabled email storing complicated data in XML and JSON.
Matplotlib:
When it comes to Python visualizations, Matplotlib is your one-stop shop for everything from static to animated to interactive. Matplotlib facilitates both straightforward and challenging tasks. Design graphs worthy of publication. Create movable, updatable, and zoomable figures.
urllib.request:
If you need to make HTTP requests with Python, you may be directed to the brilliant requests library. Though it's a great library, you may have noticed that it needs to be a built-in part of Python. If you prefer, for whatever reason, to limit your dependencies and stick to standard-library Python, then you can reach for urllib.request!
Then, after the libraries have been imported, you can paste in the channel ID and API key for the ThingSpeak account you previously copied.
channel_id = 812060 # PUT CHANNEL ID HERE
WRITE_API = 'X5AQ3EGIKMBYW31H' # PUT YOUR WRITE KEY HERE
BASE_URL = "https://api.thingspeak.com/update?api_key= {}".format(WRITE_API)
Set the default values for the HOG descriptor. Several other uses have been found for HOG, making it one of the most often implemented methods for object detection. In the past, an OpenCV pre-trained model for people detection could be accessed through cv2.HOGDescriptor getDefaultPeopleDetector().
hog = cv2.HOGDescriptor()
hog.setSVMDetector(cv2.HOGDescriptor_getDefaultPeopleDetector())
Raspberry PI is provided with a three-channel color image inside the detector() function. It then uses imutils to scale the image down to the appropriate size. The SVM classification result is then used to inform the detectMultiScale() method, which examines the image to determine the presence or absence of a human.
def detector(image):
image = imutils.resize(image, width=min(400, image.shape[1]))
clone = image.copy()
rects, weights = hog.detectMultiScale(image, winStride=(4, 4), padding=(8, 8), scale=1.05)
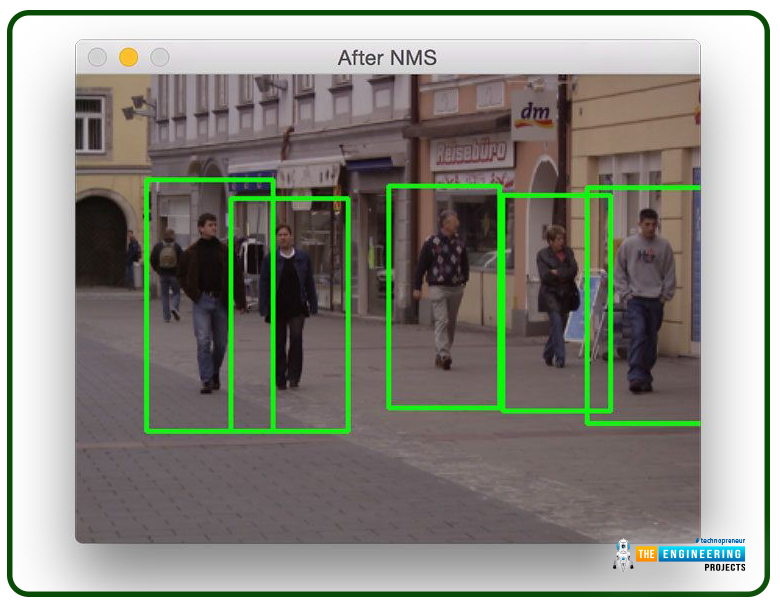
If you're getting false positive results or detection failures due to capture-box overlap, try running the below code, which uses non-max suppressing capability from imutils to activate overlapping regions.
for (x, y, w, h) in rects:
cv2.rectangle(image, (x, y), (x + w, y + h), (0, 0, 255), 2)
rects = np.array([[x, y, x + w, y + h] for (x, y, w, h) in rects])
result = non_max_suppression(rects, probs=None, overlapThresh=0.7)
return result
With the help of OpenCV's VideoCapture() method, the image is retrieved from the Pi camera within the record() function, where it is resized with the imultis before being sent to ThingSpeak.
def record(sample_time=5):
camera = cv2.VideoCapture(0)
frame = imutils.resize(frame, width=min(400, frame.shape[1]))
result = detector(frame.copy())
thingspeakHttp = BASE_URL + "&field1={}".format(result1)
OpenCV's People Counting Tool: A Quick Test
Now that everything is hooked up and ready to go, let's put it through its paces. Launch the program by extracting it to a new folder. You'll need to give Python a few seconds to load all the necessary modules. Start the program. A new window will pop up, showing the camera's output after a few seconds. Make sure your Raspberry Pi camera is operational before running the python script. The following command is used to activate the python script after a review of the camera has been completed:
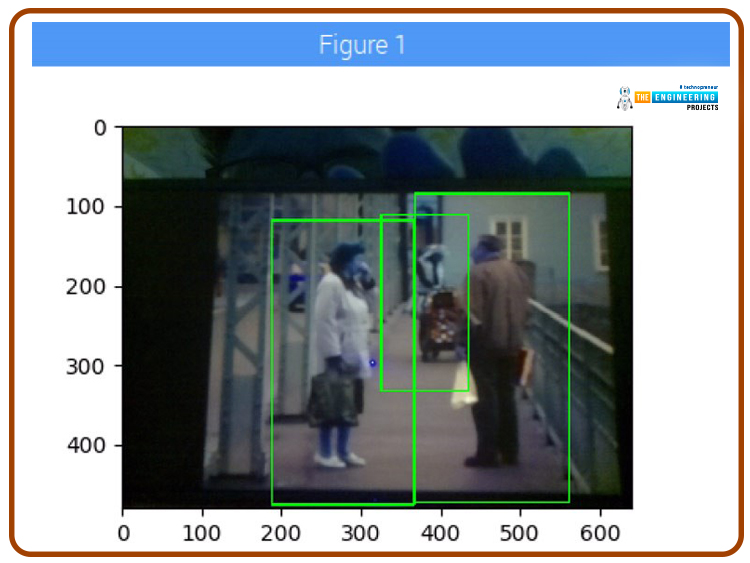
At that point, a new window will appear with your live video feed inside of it. OpenCV will count the number of persons in the first frame that Pi processes. The appearance of a box will indicate the detection of humans:
Output
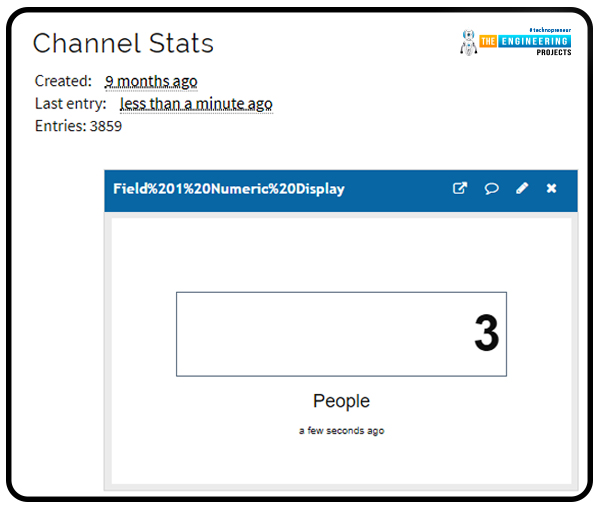
Now that you know how many people are expected to show up, you can check the crowd size from the comfort of your own home via your ThingSpeak channel.
You can now efficiently conduct crowd counts with OpenCV and a Raspberry Pi. This technology helps with guaranteeing the safety of those attending large-scale events, which is a top priority for event planners. Knowing how people will flow through a venue or store is crucial for offering effective crowd management services. It will also improve efficiency and customer service because it is helpful for event and store managers to track the number of people entering and leaving their establishments at any one time. Additionally, it is important for event planners to understand dwell time in order to ascertain which parts of the venue are popular with attendees and which are completely bypassed. This gives them information about how the guest felt, which lets them better use the space they have.
Complete code
import cv2
import imutils
from imutils.object_detection import non_max_suppression
import numpy as np
import requests
import time
import base64
from matplotlib import pyplot as plt
from urllib.request import urlopen
channel_id = 812060 # PUT CHANNEL ID HERE
WRITE_API = 'X5AQ3EGIKMBYW31H' # PUT YOUR WRITE KEY HERE
BASE_URL = "https://api.thingspeak.com/update?api_key={}".format(WRITE_API)
hog = cv2.HOGDescriptor()
hog.setSVMDetector(cv2.HOGDescriptor_getDefaultPeopleDetector())
# In[3]:
def detector(image):
image = imutils.resize(image, width=min(400, image.shape[1]))
clone = image.copy()
rects, weights = hog.detectMultiScale(image, winStride=(4, 4), padding=(8, 8), scale=1.05)
for (x, y, w, h) in rects:
cv2.rectangle(image, (x, y), (x + w, y + h), (0, 0, 255), 2)
rects = np.array([[x, y, x + w, y + h] for (x, y, w, h) in rects])
result = non_max_suppression(rects, probs=None, overlapThresh=0.7)
return result
def record(sample_time=5):
print("recording")
camera = cv2.VideoCapture(0)
init = time.time()
# ubidots sample limit
if sample_time < 3:
sample_time = 1
while(True):
print("cap frames")
ret, frame = camera.read()
frame = imutils.resize(frame, width=min(400, frame.shape[1]))
result = detector(frame.copy())
result1 = len(result)
print (result1)
for (xA, yA, xB, yB) in result:
cv2.rectangle(frame, (xA, yA), (xB, yB), (0, 255, 0), 2)
plt.imshow(frame)
plt.show()
# sends results
if time.time() - init >= sample_time:
thingspeakHttp = BASE_URL + "&field1={}".format(result1)
print(thingspeakHttp)
conn = urlopen(thingspeakHttp)
print("sending result")
init = time.time()
camera.release()
cv2.destroyAllWindows()
# In[7]:
def main():
record()
# In[8]:
if __name__ == '__main__':
main()
Conclusion
Crowd dynamics can be affected by several things, such as the passage of time, the layout of the venue, the amount of information provided to visitors, and the overall enthusiasm of the gathering. Managers of large crowds need to be flexible and responsive in case of sudden changes in the environment that affect the situation's dynamics in real-time. Trampling events, mob crushes, and acts of violence can break out without proper crowd management.
The complexity and uncertainty of large-scale events emphasize the importance of providing timely, relevant information to crowd managers. Occupancy control technology helps event planners anticipate how many people will show up to their event, so they can prepare appropriately by ensuring adequate security guards, exits, etc.
Using Raspberry Pi and some smart subtractions and blob tracking, this article describes a system for counting individuals. We show how many people have entered and left a building. The principles of HOG and the calculation of features have also been covered. The testing outcomes demonstrate the viability of using this raspberry pi based device as an essential people-counting station. In the following tutorial, we'll learn how to assemble an intelligent energy monitor based on the Internet of Things and a Raspberry Pi 4.


