| Where To Buy? | ||||
|---|---|---|---|---|
| No. | Components | Distributor | Link To Buy | |
| 1 | Raspberry Pi 4 | Amazon | Buy Now | |
Introduction
Greetings, and welcome to the next section of our Raspberry Pi 4 tutorials. In the last section, we discovered how to set up and run our self-host bitwarden on our Raspberry Pi. We learned how to set up admin panels and perform a wide range of actions, such as limiting the creation of new accounts and users for security purposes. However, in this guide, we will discover how to configure a PS3 or PS4 joystick with our raspberry pi and set up and run Xbox cloud gaming on our Pi 4.
Components
Raspberry pi 4
SD card
Power supply
Ethernet cable or wifi
Xbox controller
Xbox game pass ultimate subscription
USB keyboard
USB mouse
HDMI cable
Through a service called Xbox Cloud Gaming, users may play a wide variety of games without having to download any software onto their devices. Here, we'll use Microsoft's Xbox Internet Gaming service to transmit these programs to your Pi 4. A membership to Xbox Gaming Pass Ultimate is required to use this feature. Xbox Gaming Pass is required for this streaming service, but the subscription unlocks a wealth of video game apps.
Incorporating Xbox internet Game streaming on Pi 4 is a breeze with the help of the Chromium internet browser. Remember that there will be some delay in responding to your inputs, but don't let that deter you from playing most games. As a bonus, this guide will show you how to convert your Raspberry Pi running the "light" version of the Xbox One operating system into a dedicated cloud gaming computer for the Xbox One.
Regarding game streaming services, Xbox internet Gaming isn't the only option for your Pi 4. Games can also be streamed to your Pi 4 using Google's Stadia program. Alternatively, you can use a streaming service like Steam to play your games on the go. To play games via Xbox Cloud, you'll need to be in a region where it's available.
Get your Raspberry Pi ready for setup.
You must fulfill a few prerequisites before you can begin using Xbox internet Gaming on your Pi 4. Here, you'll learn how to update your Raspberry Pi and set up the Chrome internet browser we'll need to connect to the cloud game platform. These instructions have been designed with Pi OS Lite compatibility in mind. The "Lite" version of Xbox internet Gaming will require additional effort.
To move on, we must ensure that our Raspberry Pi is up-to-date with the latest software. The software has to be updated so that we get the most incredible possible performance with the Xbox internet Gaming platform. You can upgrade your Pi's software to the most recent version using the following two instructions.
sudo apt update
sudo apt upgrade -y
After the update is finished, we can add any other software to our pi four that is required for Xbox internet Gaming. We'll primarily be using the Chrome internet browser, which can be obtained by running the instruction below.
sudo apt install chromium-browser xserver-xorg x11-xserver-utils xinit openbox bluealsa unclutter
We'll install just the bare minimum of software to get Chromium up and running on pi 4 OS Lite. Having a controller linked to your pi 4 is the next step. Most Xbox Cloud Gaming titles necessitate the usage of a controller. Despite the inclusion of third-party controller functionality, the Xbox joystick remains the superior option. And if you want to know which controllers work with their internet gaming platform, you can find that information in their official docs. Another option is to use a PlayStation joystick with Pi 4, and we will show you how to do just that.
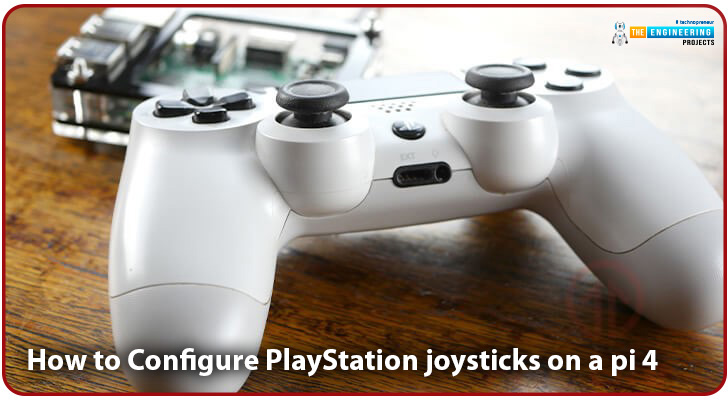
How to Configure PlayStation joysticks on a pi 4
You may have discovered that using a PlayStation joystick with a Raspberry Pi is not a walk in the park. This tutorial is written in the hopes of making the whole thing easier.
Here at the pi 4 Wiki, we have a comprehensive tutorial for connecting and setting up Ps controllers of all generations. We walk you through installing the six-pair program for PS3 controllers and configuring your joystick to work with your pi four and any Bluetooth-enabled device. The procedure of connecting a PlayStation 4 joystick to a Raspberry Pi via Bluetooth is detailed here, and alternate methods are provided in case your joystick is incompatible with the default implementation of Bluetooth. The pi 4 is compatible with various game controllers, including Xbox joysticks.
Configure a PlayStation 3 Controller for Use with a pi 4
It's not easy to get a Ps3 controller working with a pi 4. If you want to use it wirelessly, we'll walk you through the setup process from start to finish. The wired PS3 joystick should function as simply a plug-and-play accessory. When using a PlayStation 3 controller, all of its functions must work correctly, and Sixad does just that. If you want to use a USB micro cable to connect the joystick to the pi 4, you should get one before you start this part of the pi 4 PlayStation tutorial. The configuration of the PS3 joystick for communicating with Wireless controllers is necessary for this.
Setup of the PlayStation 3 Joystick with the pi 4
The first step is to install a library, which will allow us to compile the six-pair code. The libusb-dev library enables the software to communicate with USB storage devices.
sudo apt install libusb-dev
Now that we have the necessary package loaded, we can get the six-pair script and set up a folder to store it.
mkdir ~/sixpair
cd ~/sixpair
wget http://www.pabr.org/sixlinux/sixpair.c
Now that we have the six pair code on our pi 4, we can build it with the help of the command below. Use this command to initiate a compilation using the GCC compiler.
GCC -o sixpair sixpair.c -lusb
Now that Sixpair has been compiled on our pi 4, we can connect our PS3 joystick to the RPi through its USB micro port. After connecting the joystick, use the following command to start six pair. So that our Wireless device can communicate with the joystick, Six pair will modify its settings.
sudo ~/sixpair/sixpair
If the six-pair program has successfully re-paired your PS3 joystick with your RPi's Wireless dongle, you will see the output in the terminal interface that looks like the example below.
After these modifications, you can disconnect the Playstation 3 joystick from the Pi 4; we won't need it plugged in through USB again unless you upgrade your Wireless adapter. You can either use the bluetoothctl program to communicate to the Playstation 3 joystick or compile and install sixad to manage the connection. We think you should give Wireless a shot because it works well with other wireless devices. Read on to learn more about utilizing Bluetooth to link your PlayStation 3 joystick. If you'd rather learn how to connect the joystick with SIXAD, you can do so below.
Getting your Playstation 3 joystick set up with bluetoothctl
Now that the Playstation 3 joystick has been prepped for use with the Pi 4, we can proceed to pair the two devices. The first step is launching the Bluetooth setup tool on pi four by entering the command below.
sudo bluetoothctl
Our Bluetooth setup tool is now active, and we can turn on the agent and tell it to use the default agent. To do so, simply enter the two instructions below.
agent on
default-agent
Following the successful execution of the preceding command, the program will begin scanning for new wireless devices, allowing us to locate them.
scan on
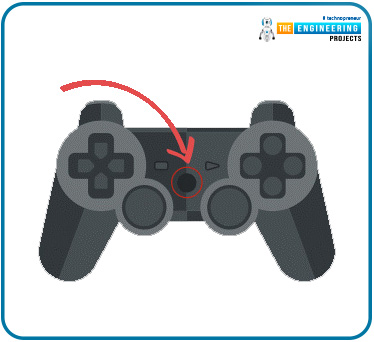
Any nearby wireless device will immediately become visible in the command prompt. Put these out of your mind for the time being and focus only on the Playstation 3 controller. The controller may now communicate with the pi four by holding the Ps button. The terminal's command line will begin to fill up shortly.
The MAC address will show in a format similar to the following; be sure to write it down. It's the string of words delineated by colons.
A MAC address has just become available, so write it down. Now that you have the MAC address, you may put it to use in the subsequent command. By issuing the command below, we hope to establish communication with the gadget and retrieve its unique identifier. You may need to retry this command several times before it works if you've tracked down a MAC address, substitute "YOUR MAC ADDRESS" with it.
connect YOUR_MAC_ADDRESS
If your Ps3 joystick stops attempting to connect, please check the status and hit the Playstation key again. If the following text shows in the cli, the connection was established successfully. We can go on to the next phase now that we have the UUIDs.
We need the MAC address to add the device to our Bluetooth-approved approved list. This enables the controller to connect with the Raspberry Pi without human intervention. We can accomplish this by inputting this command into our Pi 4. Be sure to change "YOUR MAC ADDRESS" to the address you uncovered.
trust YOUR_MAC_ADDRESS
After adding your Playstation 3 controller to the authorized list, the terminal should read as follows.
We may now exit the Bluetooth settings tool on the Pi 4 since the Playstation 3 joystick has been successfully paired with the Pi 4. Type the following commands or press CTRL + D to exit the program.
Quit
The RPi can be restarted at this point. This is done to verify that our system performs as expected during testing. To force the Raspberry to restart, type the command below.
sudo reboot
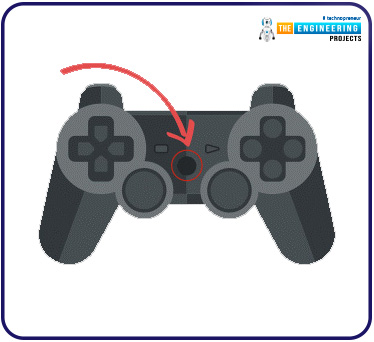
After rebooting the Pi 4, you can verify that your joystick appropriately communicates with the device by pressing the Playstation button. The controller's lights will momentarily blink when it connects, but subsequently, assuming everything went smoothly, only one morning will stay on.
Getting Your Playstation 3 Controller to Work with SIXAD
We need to install some prerequisite software on our RPi before we can begin compiling and configuring SIXAD. libusb-dev and libbluetooth-dev are required for compiling the sixad program and are essential libraries. Libusb-dev is a collection of source code that enables us to communicate with USB devices connected to a computer. To communicate with the Wireless stack in an OS, Libbluetooth-dev supplies the necessary code. In sixad's setup, this is what monitors for the presence of a Playstation 3 controller when it is plugged into the Pi 4.
sudo apt install git libbluetooth-dev check install libusb-dev
sudo apt install joystick pkg-config
Since we have everything we need, we can download the SIXAD repo from Retropie. We're using Retropie's fork because it includes some bug fixes and has been validated on the Pi 4. You can download the GIT repo onto our Pi 4 using the two commands below.
cd ~
git clone https://github.com/RetroPie/sixad.git
Now that we have the repo downloaded to our Pi 4, we can begin compiling. The following two instructions are all that are needed to compile SIXAD. The first line of code changes directories, and the second line of code builds the program by executing the makefile.
cd ~/sixad
make
Compiling the sixad code was the first step, but there are still a few things to accomplish before we can put it to use. The first step is creating a directory in which sixad stores all its user profiles. Create a new folder by running the command below.
sudo mkdir -p /var/lib/sixad/profiles
Let's finish by launching the checkinstall package we set up in the previous section. This program just verifies the current installation and, if necessary, executes the "make install" commands.
sudo checkinstall
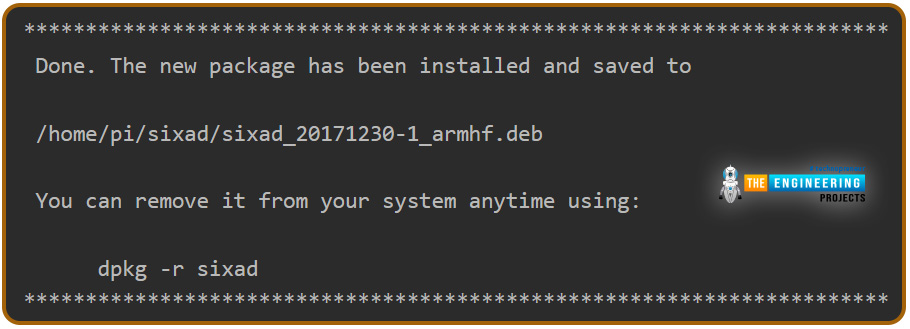
During installation, you may be prompted to provide information or confirm selections; however, you can safely skip them and hit ENTER to proceed. Following completion of the installation, the following lines should show at your terminal.
The command below will launch sixad on your Raspberry Pi after completing the installation process.
sudo sixad --start
You should be prompted to push the Playstation key on your joystick to ensure proper operation. Connect the joystick to the Pi immediately.
Since we have sixad functioning, we need to set it the default loader at startup so we can always use our Playstation 3 joystick. The command below will insert sixad into the RPi's boot procedure.
sudo update-RC.d sixad defaults
How to Configure a PS4 Controller for Use With a Pi 4
The Ps4 controller can be used with the Pi 4 in various ways. There are a few of these that are easier to handle than others.
Wireless USB Adapter from Sony
To connect your PlayStation 4 joystick to your Pi 4, the Sony Bluetooth Adapter is your best bet. Especially considering that, in theory, the dongle should work immediately upon removal from its packaging and connect with any of the approved Playstation 4 controllers.
Bluetooth
To use Bluetooth, you'll need a Pi 4 or a USB wireless adapter in addition to the certified Sony Wireless adaptor. Although this solution should work for most Playstation 4 controllers, some users have reported success with a userspace gamepad driver named ds4drv. If you have already installed the SIXAD utility, you will need to remove it before you can use your Playstation 4 joystick with the Pi 4.
Universal Serial Bus Cable
To use your Playstation 4 joystick, simply plug it into a USB port on your computer using the same USB connection you used to connect to your Playstation 4. The Playstation 4 joystick should automatically connect via USB and work without additional setup.
Setting up BluetoothCTL for your Playstation 4 Controller
The next instructions are only necessary if you have followed the tutorial on pairing a Playstation 3 controller with a Pi 4 via Bluetooth. In that case, you can skip this part of the process to uninstall SIXAD.
The PS4 controllers cannot pair or function appropriately with SIXAD installed, so they must be deleted. Simply running the command below on Pi 4 will remove the compiled and configured sixad program we discussed in the PS3 part.
sudo dpkg -r sixad
Before setting up the rest of the system, let's double-check that our Pi 4 has the most recent updates by issuing the instructions below.
We will now start connecting our Playstation 4 controller to the Pi 4. The Bluetooth CLI utility will be used throughout this tutorial. Start up your RPi by entering the command below.
sudo bluetoothctl
After starting the bluetoothctl utility, we may activate the client and return it to its default settings by entering the commands below.
agent on
default-agent
We may now begin scanning for devices after activating the agent. Scanning must be started so that our controller appears when we initiate synchronization.
scan on
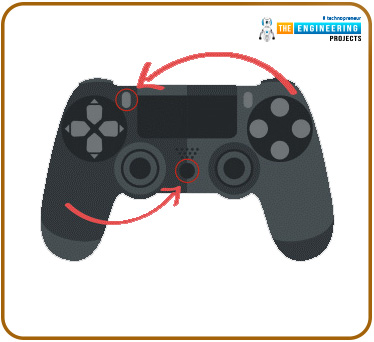
Now is the moment to simultaneously hit the "Share" key and the Playstation button, as depicted in the following diagram. Continue holding them until the joystick's light begins blinking.
If you see the output in the cli similar to what is shown below, jot down the MAC address. If you take the hex value after the ':' symbol, you have the MAC address.
If your joystick is still blinking, enter this command as soon as possible. When entering the MAC address, ensure to replace "YOUR MAC ADDRESS" with the actual value. It establishes communication with your Playstation 4 controller when you enter this instruction. Press the "Share" and "PS" keys to make the joystick stop blinking.
connect YOUR_MAC_ADDRESS
The following will display in the terminal window if the connection is successful.
So that the PlayStation 4 controller may instantly link to the Pi 4, we must now include our MAC address in the authorized list.
trust YOUR_MAC_ADDRESS
Now that the Wireless dongle on the Raspberry Pi recognizes the Playstation 4 joystick, we can exit the program by typing "quit." The next step is to verify the joystick's functionality.
Even though the joystick feature may already be present in your Raspbian distribution, let's install it. This set has the software we need to ensure our joystick is functioning correctly. You may get the program installed on your RPi by executing the following Unix command.
sudo apt install joystick
Once the joystick library is installed on your Pi 4, you can check js0 and retrieve its values by using the command below.
sudo jstest /dev/input/js0
Changing values whenever you move and push buttons on the joystick indicates that your Playstation 4 joystick is ready to use. However, you may need to resort to the userspace drivers if your joystick stubbornly refuses to function. Finally, after getting the joystick set up, we can move on to installing the cloud on the pi four os Desktop.
Online Xbox Play with Raspberry Pi Desktop OS
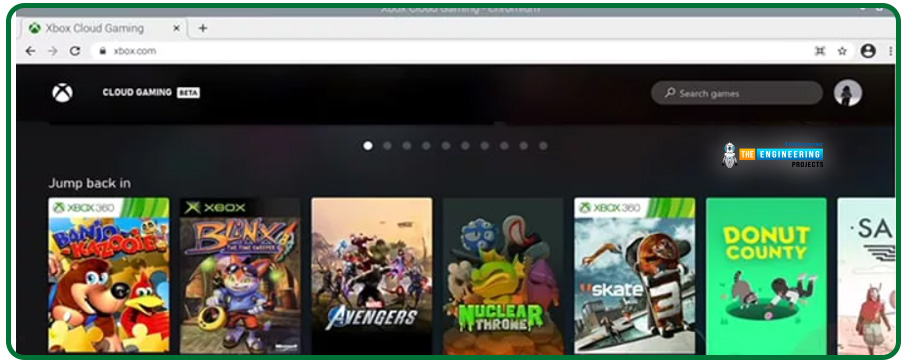
Gaming on the go with Xbox internet Gaming is a breeze with the Pi 4 OS Desktop and Microsoft's cloud service. Instead of devoting your computer solely to Xbox internet Gaming, you can use the desktop OS of pi 4. Chromium and iCloud can be accessed with the click of an icon and by entering the relevant URL, as shown below.
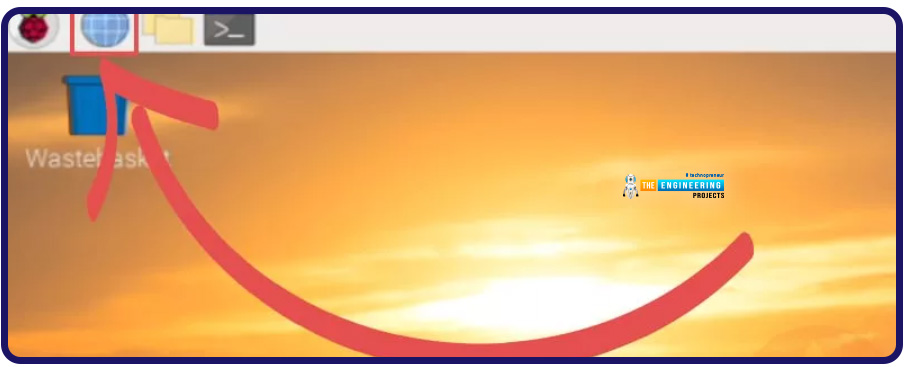
To access the internet with your RPi, launch the Chrome browser on the desktop. To access this, select the globe icon in your screen's upper right corner.
Open your internet browser and head to the Xbox internet Gaming website. To access this in Chrome, enter the following URL into the URL bar.
https://xbox.com/play
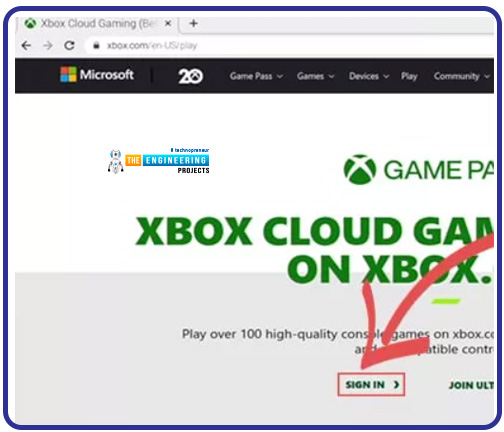
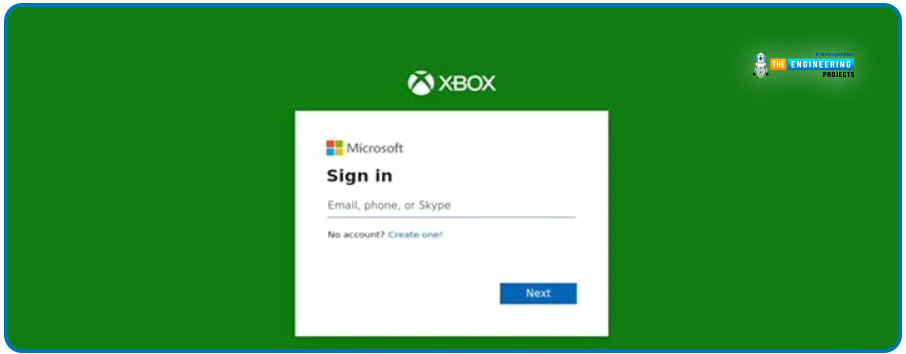
You'll need to sign in with your Xbox credentials if you haven't already done so from your Pi 4. You can access the login page by clicking the "Sign in" button.
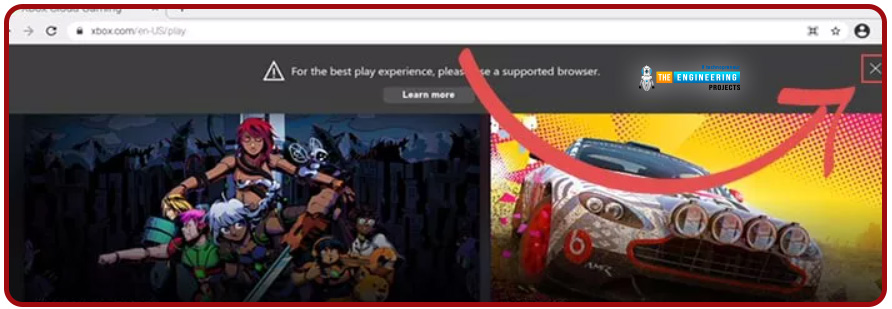
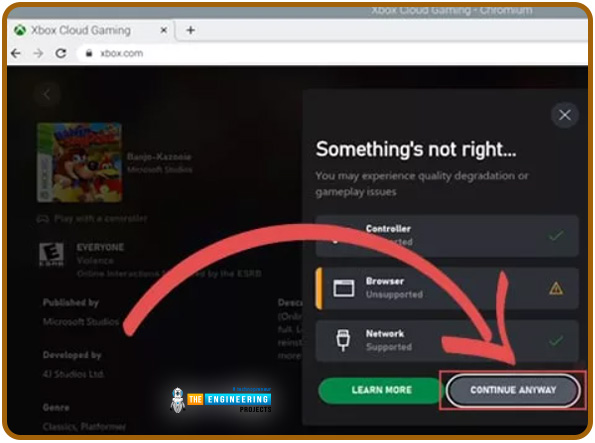
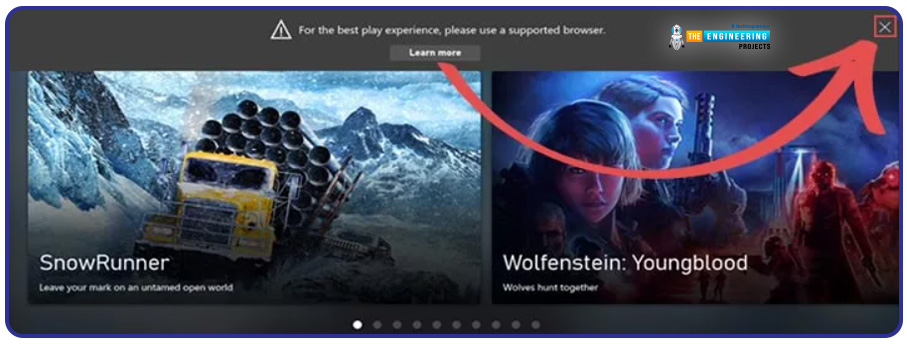
You may see a "your browser is not supported" message after signing in. No need to panic; the XCloud server is compatible with the Chromium internet browser we are using on our Pi 4, so there's no need to switch browsers. To close this panel, click the "X" in its upper right corner.
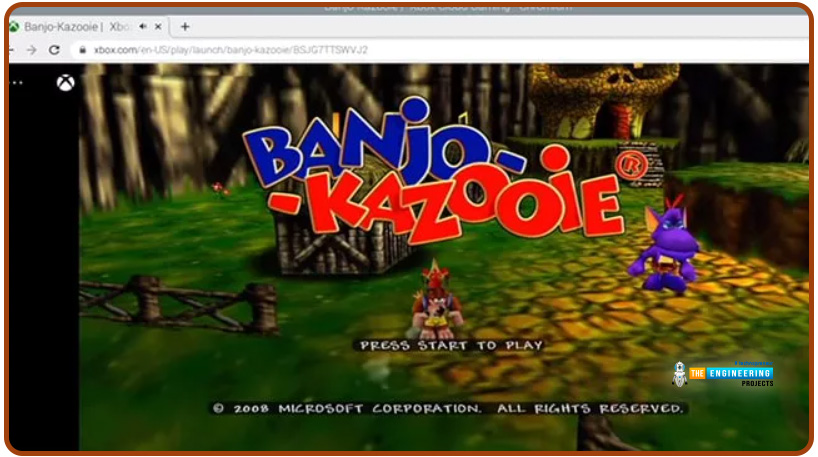
Simply clicking on an Xbox game will begin streaming it to your Pi 4. Any gamepad, keyboard, or joystick can be used to navigate this interface.
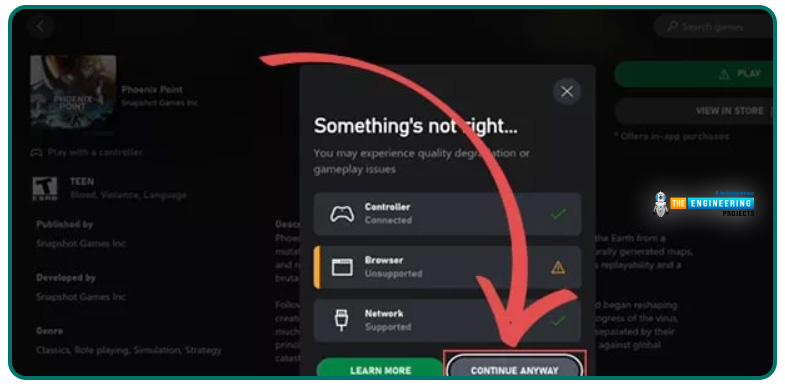
There is a notice on the XCloud platform that says your streaming experience might not be ideal. Once you've selected a game for streaming to your Pi 4, you can keep playing by selecting the "CONTINUE ANYWAY" option.
You have now installed and configured the Xbox Internet Gaming platform to run on your Pi 4. Now that you know how to handle the joystick, you can have a blast playing the video game.
Playing Games over the cloud on an Xbox using the Pi 4 OS Lite
There are a few extra hoops to jump through to get the Xbox Internet Gaming platform working on a Pi 4 OS Lite device. After completing these procedures, your Raspberry Pi will automatically log you in and begin running Chromium.
Configuring Pi 4 for Automatic Login
If you wish to access Xbox Internet Gaming as soon as you turn on your Pi 4, you'll need to take the following settings. Skipping these will result in a login prompt for the "pi" user before you can use the internet browser.
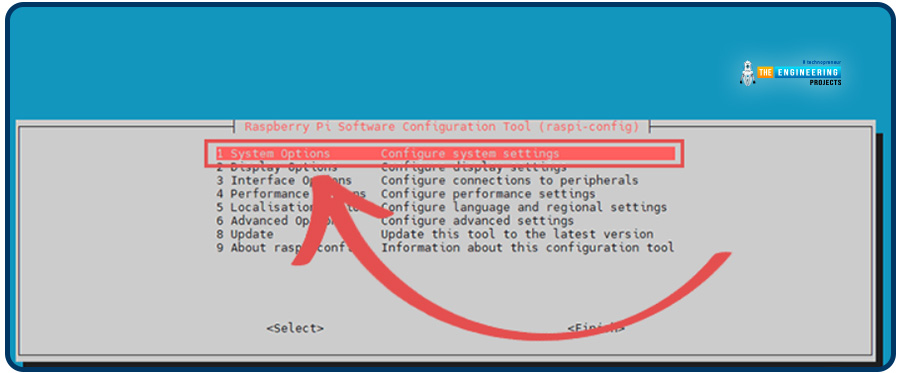
We utilize the "Pi 4 Config tool" to set up our RPi so that it automatically enters the console at bootup, skipping the usual login process. The following command can be used to activate this utility on your gadget.
sudo raspi-config
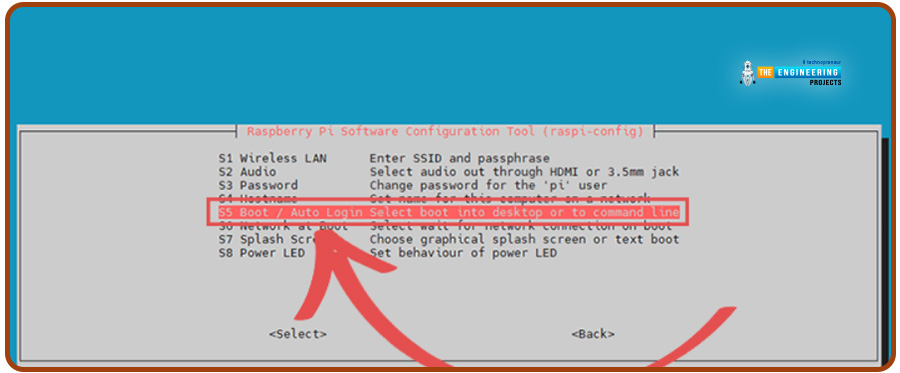
Use the ARROW keys to move around the available options. To choose the highlighted item, use the Enter button. Starting with the raspi-config utility, select "System Options" from the drop-down menu. Select it by pressing the Enter button since it is the first choice.
You'll find "Boot / Auto Login" under "System Options" in the panel. Selecting this menu item may instruct the OS to log us into the console automatically.
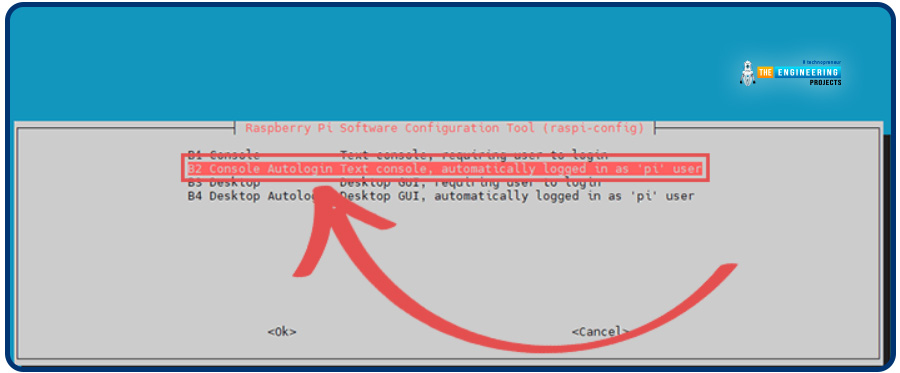
The "Console Autologin" option comes next and must be chosen. If you select this, the Pi 4 will bypass the login screen and go straight to the console, where you can utilize the "pi" account.
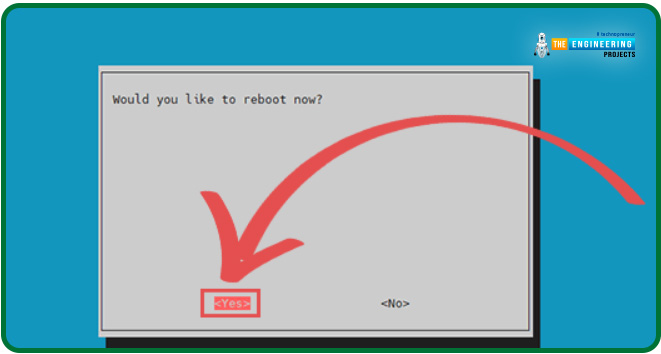
Having made this selection, the RPi Config Wizard can be exited with the ESC key. When prompted, choose "Yes>," and then click the Enter button to restart the computer.
Setting up Chromium such that it launches alongside X-Server
Once the RPi is set up to enter the console at startup, the "autostart" file can be edited to initiate the Chrome internet browser. In addition, we need to edit the ".bashrc" file by adding a single line to ensure that the window utility Chromium needs to run launched automatically after the operating system has loaded.
So, let's begin by editing the "autostart" script in the "/etc/xdg/Openbox" folder. We'll use the nano editor to make the necessary changes to this script.
sudo nano /etc/xdg/openbox/autostart
Please copy and paste the lines below at the very end of this script.
xset s off
xset s noblank
xset -dpms
unclutter &
sed -i 's/"exited_cleanly":false/"exited_cleanly":true/' ~/.config/chromium/'Local State'
sed -i 's/"exited_cleanly":false/"exited_cleanly":true/; s/"exit_type":"[^"]\+"/"exit_type":"Normal"/' ~/.config/chromium/Default/Preferences
chromium-browser --disable-infobars --enable-features=OverlayScrollbar --kiosk 'https://xbox.com/play'
Our screensaver disable commands are located on the first three lines. We employ unclutter to conceal it merely as an alternative to entirely deactivating the mouse. This is helpful because we'll frequently use the mouse for things like logging in. Finally, we start Chrome on the RPi in kiosk mode, redirecting the browser to the Xbox Internet Gaming site.
After you've added these commands, save and exit the file. The final step is setting the Pi user's bash account so that the terminal automatically launches the window manager.
nano ~/.bash_profile
This line has to be added at the very end of this document. This line will check whether it is the first time starting the terminal and if so, it will set the "$DISPLAY" property. When these prerequisites are met, the "startx" statement will be executed to launch the window manager.
[[ -z $DISPLAY && $XDG_VTNR -eq 1 ]] && startx
When you're finished adding that line, save and exit the file. If we want to use Chromium immediately, rather than after an RPi reboots, we can launch the window manager directly. When you launch the window manager now, Chrome will also launch because you modified the "autoboot" script earlier.
Startx
Be sure you're typing this command into the terminal of your Pi 4 itself. If you try to use it with SSH, you will be disappointed. If you choose, you can force a restart of your RPi by executing the command below.
sudo reboot
Utilizing Pi 4 OS Lite for Xbox Live Cloud Gaming
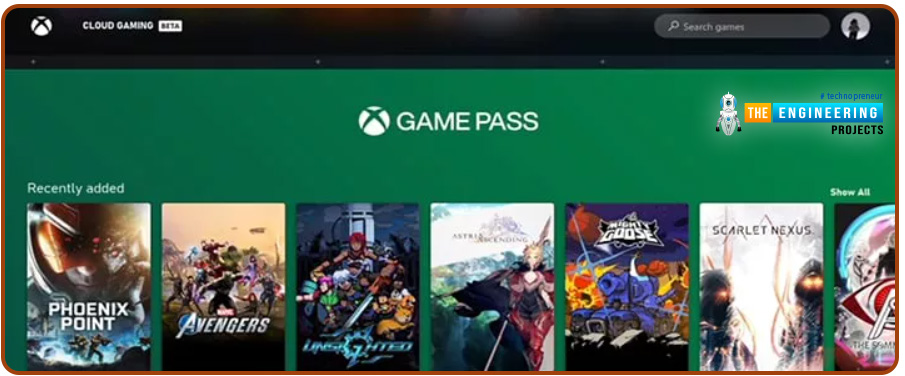
Once the RPi and Chrome have been set up, Xbox Live Games can be accessed. Your Pi's internet browser should automatically launch to the Xbox Game Pass portal.
To use Xbox Internet Gaming for the first time, you'll need to sign in using your Xbox credentials. To access the login page, please click the image below. In any case, the "Sign In" button on this page will get you started with the login procedure if you didn't notice it before.
After logging in, you may notice a message indicating that your browser isn't supported. Since this is a Chromium-based internet browser, the "X" in the corner can be used to close the current window.
We can now play games on our Pi 4 by streaming them through Microsoft's Live service with Xbox Game Pass. Make sure the controller is plugged into the Pi before choosing a game. Xbox Cloud platform also allows you to use your controller for menu navigation.
Here's a notification to let you know that the internet browser you're using isn't supported, which will appear whenever you try to play a video game that requires it. Selecting "CONTINUE ANYWAY" will allow you to disregard this notice safely.
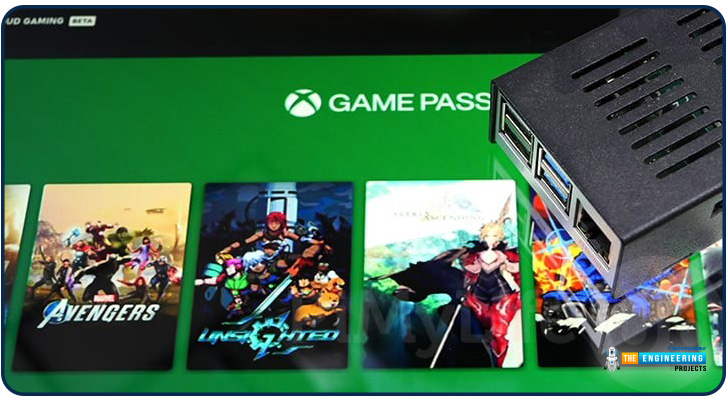
We can play "Phoenix Point" through the Xbox Internet Gaming service, broadcast directly to our Pi 4 in the image below. The stream may not appear where you expect it to when it first begins. However, once play begins, things should correct themselves.
Conclusion
Now you should be able to play Xbox games through the internet on your Pi 4. Because it is included with Xbox Game Pass, Xbox internet Gaming allows you access to various games. To a large extent, this video game streaming platform runs smoothly on the Raspberry Pi 4. There may be spikes in latency now and then, but if you play video games that don't necessitate pinpoint controls, you can probably overlook them. The following tutorial will teach how to utilize Raspberry Pi 4 as a radio streaming and broadcasting device.


