Our next step in the Raspberry Pi training program is to get zero tiers up and run on a Raspberry Pi 4. How to utilize a Raspberry Pi to measure internet speed and store the results in Grafana or Onedrive was the topic of the last piece. During the project, you will discover how to install ZeroTier on a Raspberry Pi and get it up and running. We will also learn how to set up a firewall to secure our network.
| Where To Buy? | ||||
|---|---|---|---|---|
| No. | Components | Distributor | Link To Buy | |
| 1 | Raspberry Pi 4 | Amazon | Buy Now | |
Components
Raspberry pi 4
Power supply
Ethernet or wifi
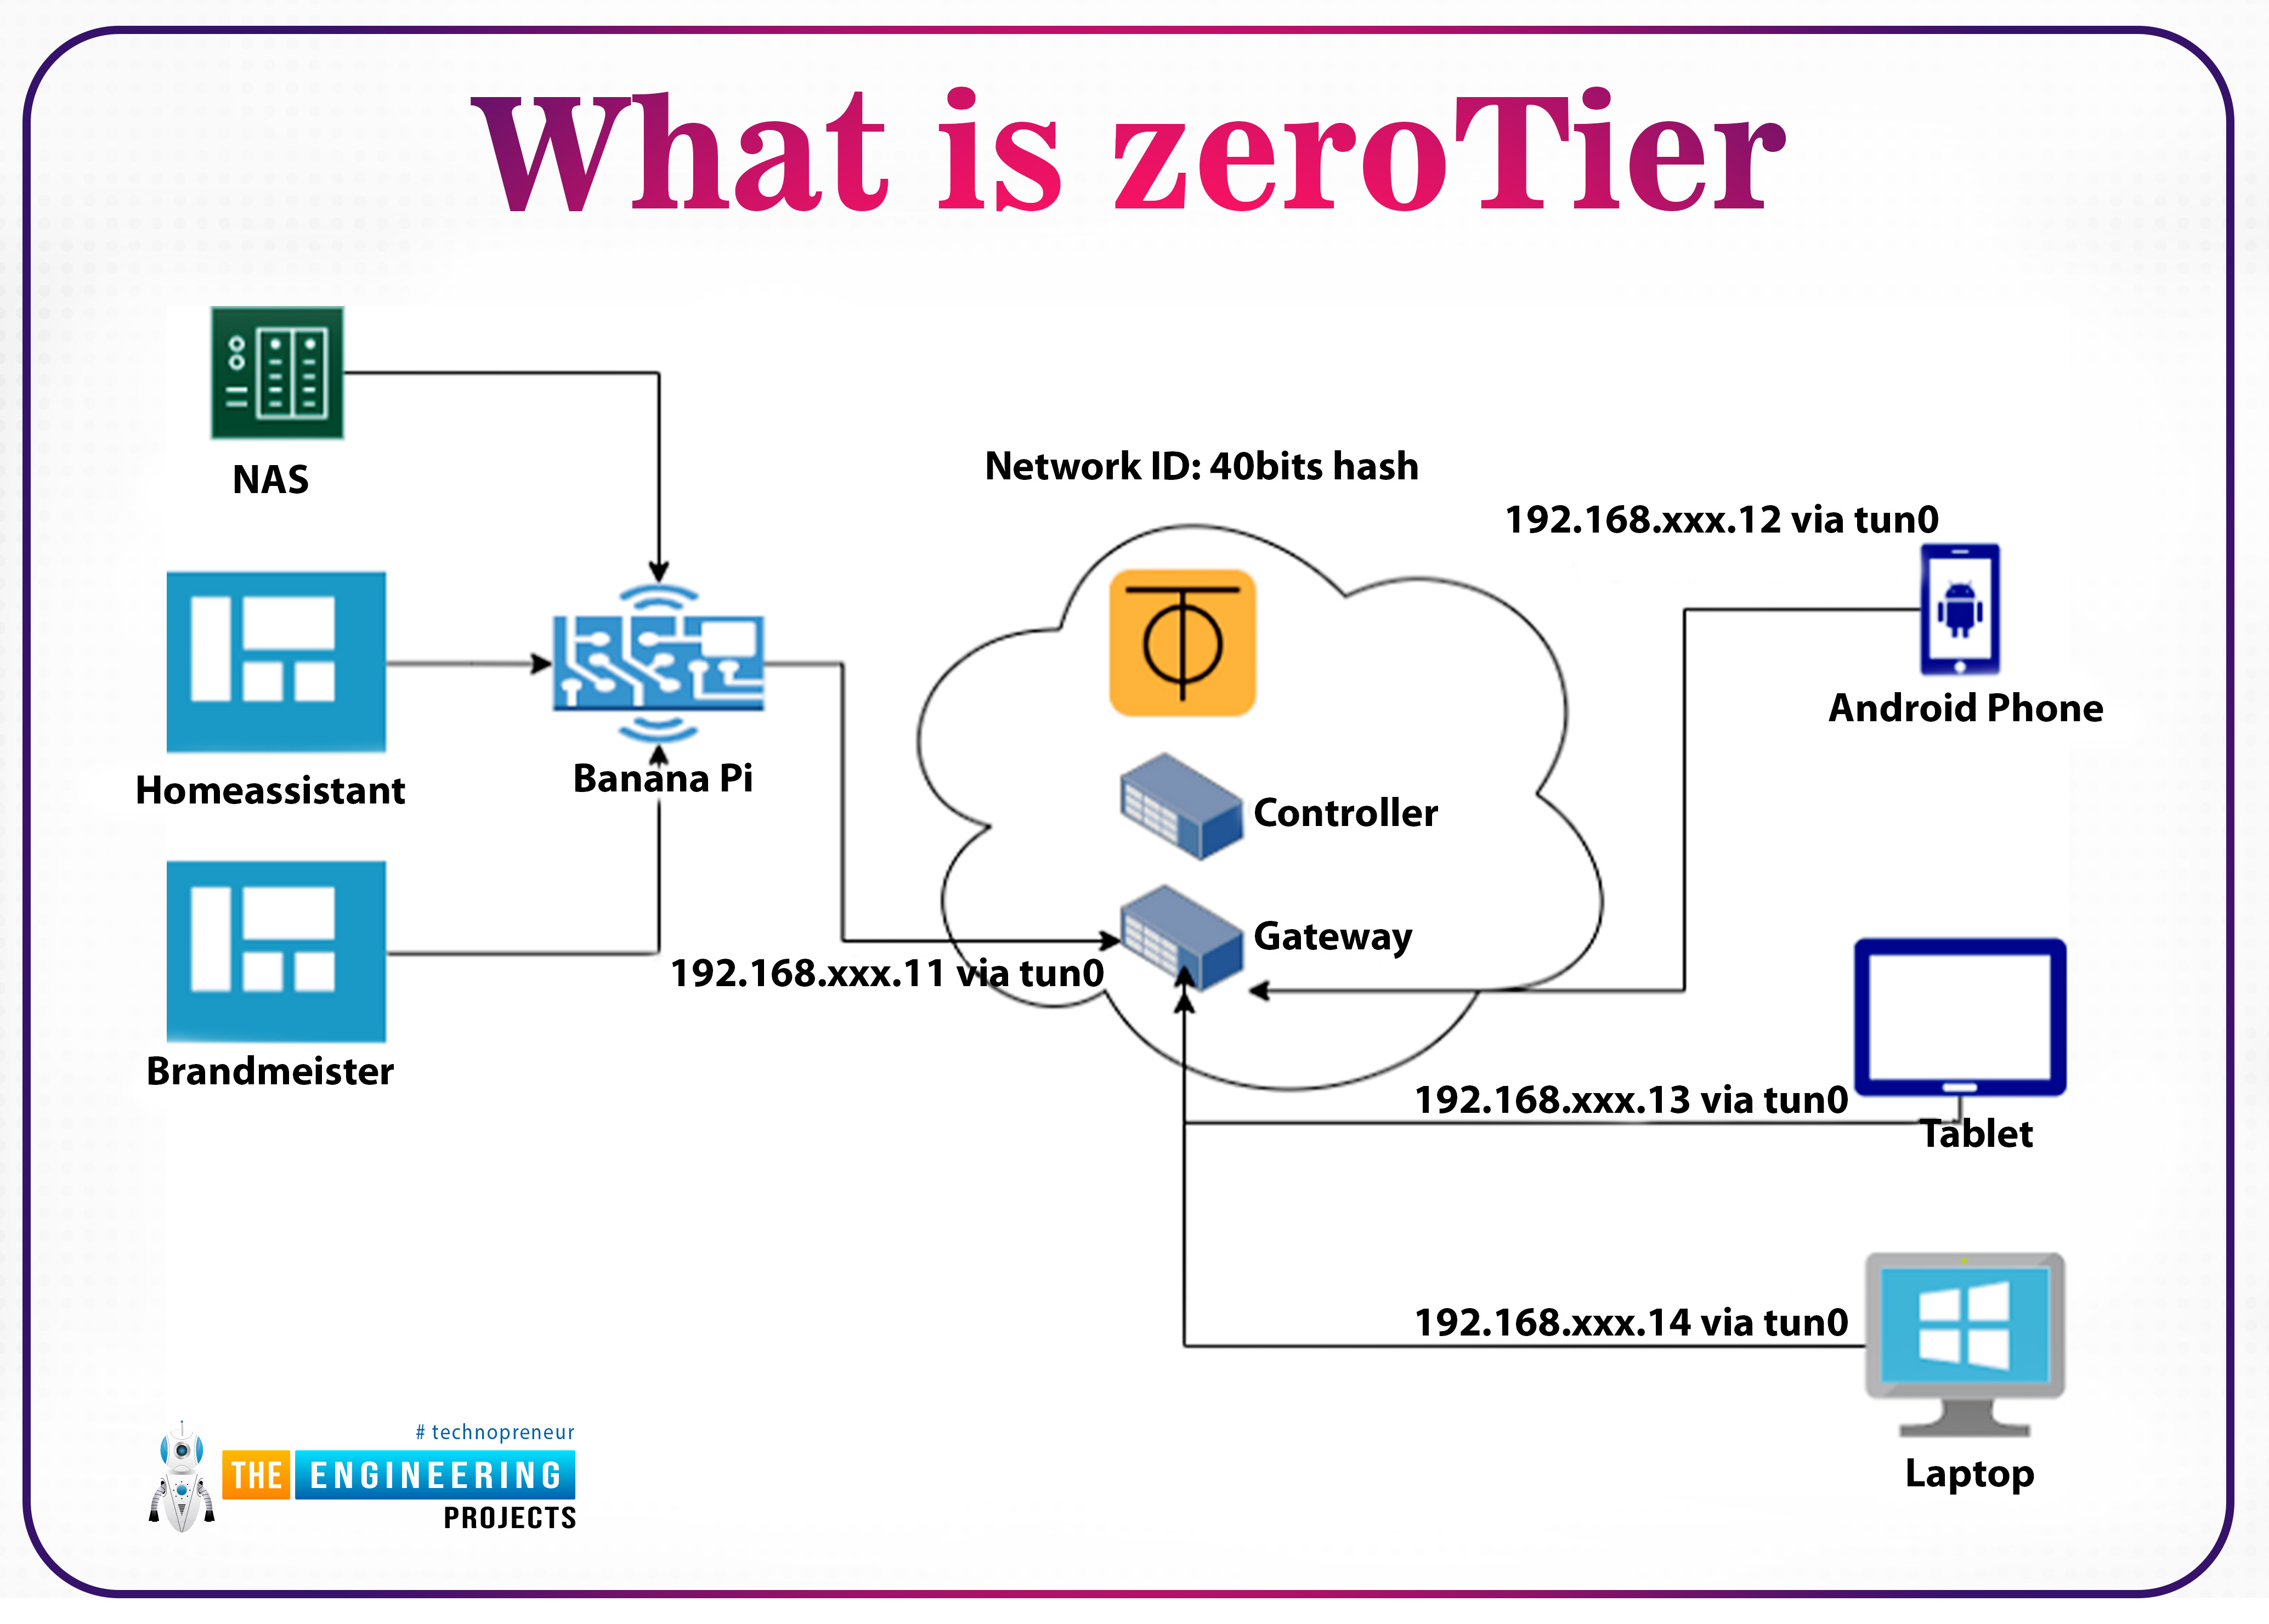
What is zeroTier
ZeroTier is a software that provides a streamlined web-based interface for constructing virtual networks connecting various gadgets. Somewhat akin to configuring a virtual private network on a Raspberry Pi, these networks exist only in cyberspace. The process of provisioning, however, is much easier, especially when dealing with several devices.

ZeroTier can be used on various platforms, from computers to mobile phones. Its cross-platform compatibility with Unix, Microsoft, and macintosh means you can set up a virtual connection without worrying about whether or not your hardware will be able to connect to it.
The ZeroTier business model is "freemium." Using our free plan, you can connect up to 50 approved devices to the virtual network.
Retrieving your ZeroTier Network ID
You need to create an account on the ZeroTier website before you can use the program on your Raspberry Pi. This is because virtual network administration is performed through their website.
You may manage your entire virtual network from one central web-based console, including assigning permanent IP addresses to individual devices.
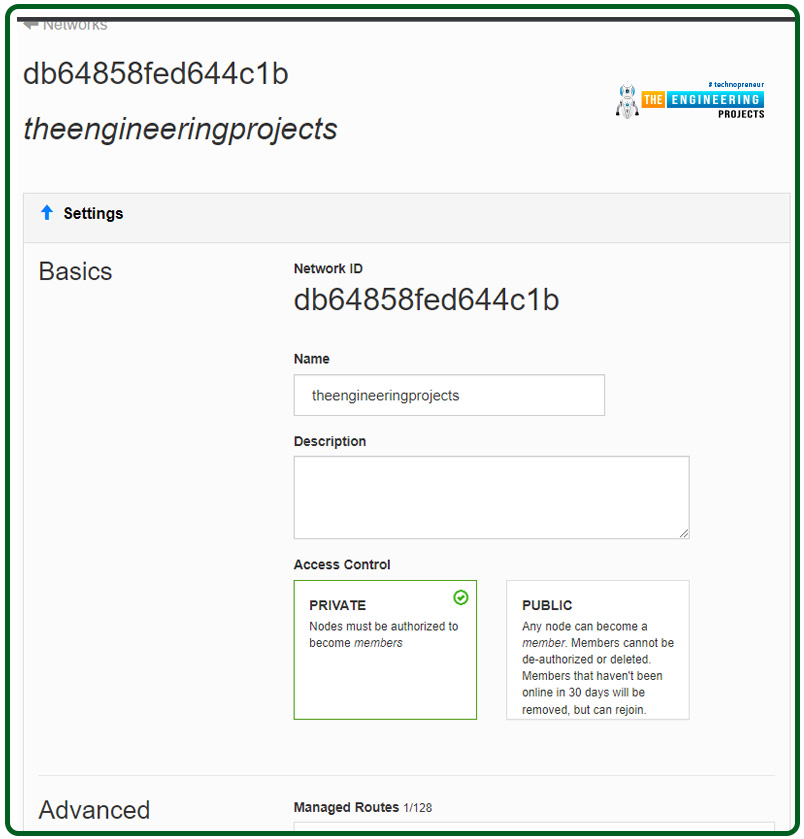
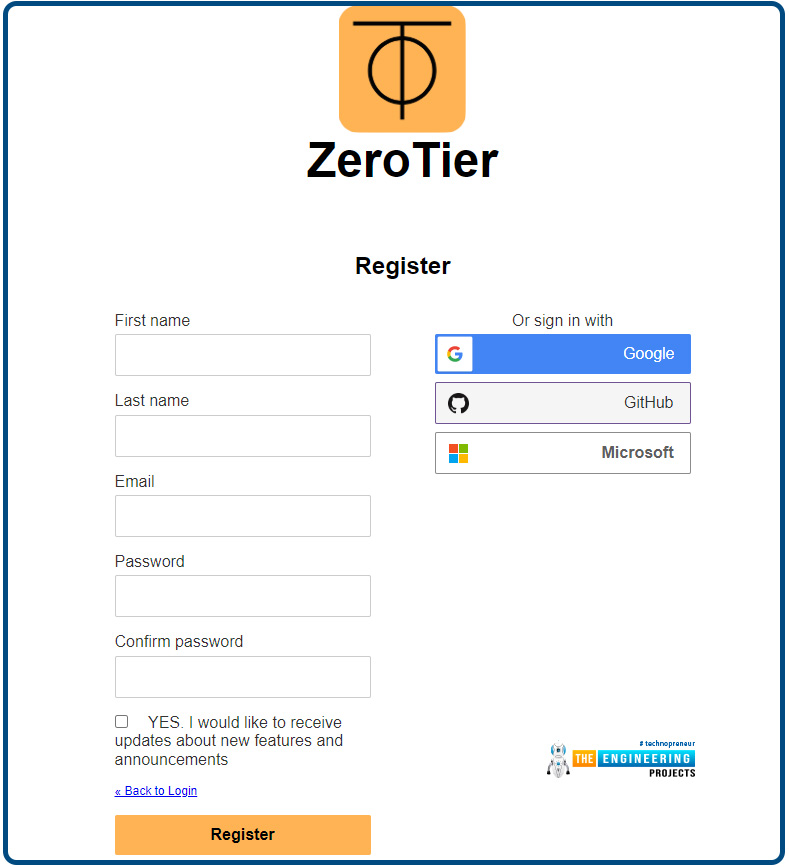
Registration on the ZeroTier hub website is required before a network ID can be generated. Access your virtual networks with this web-based interface. Go to ZeroTier Central on whichever browser you like. When you go to the site, look for the "Register" button so you can start the account creation process.
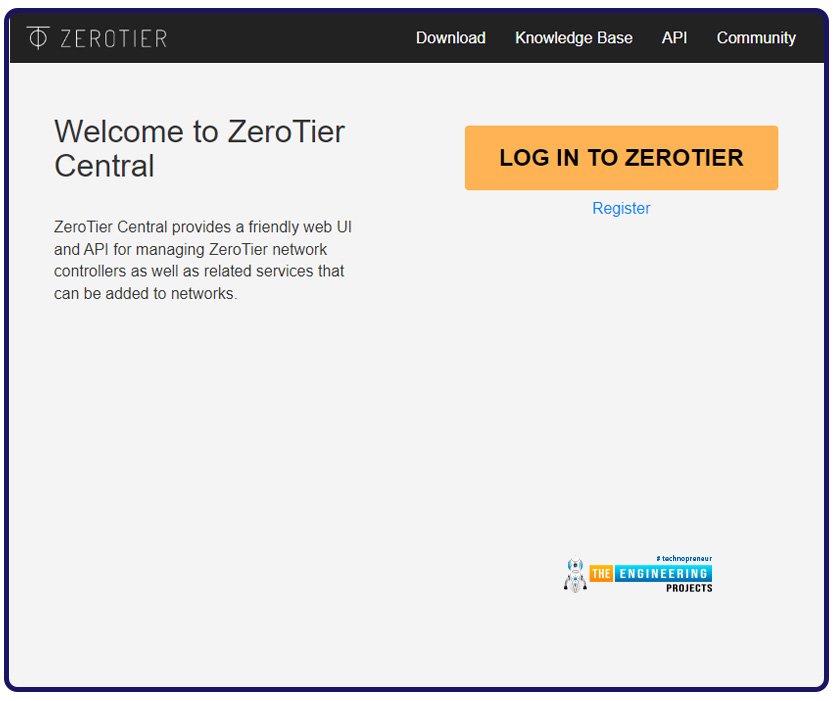
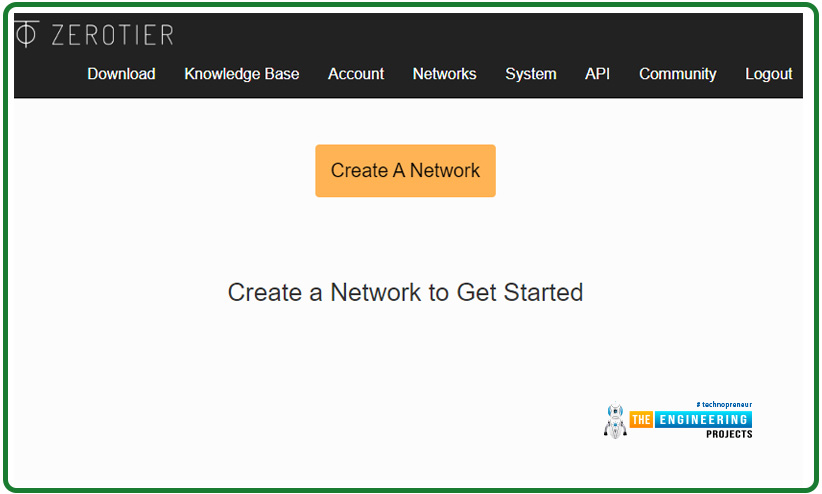
The following window will appear once you've created an account and logged into the web interface. Hit the "Create A Network" button in the screen's center to get started.

Installing ZeroTier to the Raspberry Pi
We can move on now that you've joined ZeroTier and have your network ID. In this part, you'll learn how to download and install ZeroTier on your pi device.
First, let's check that the software on your pi Device is up to date.
To be up-to-date, we need to run the following two instructions for the item list and all installed modules.
sudo apt upgrade
After adding the GPG key, we can install ZeroTier via their installation repository on our pi Device. With this key, we can ensure that the tools we're installing are directly from ZeroTier and don't include any malicious code. To obtain the GPG key via their repo, type the following code and store the contents of the "de-armored" file in the "/usr/share/keyrings/" folder.

Now that the GPG key has been inserted, a source list containing the ZeroTier repository must be compiled. First, we need to create a shell variable named "RELEASE" and assign it the operating system's internal codename. To construct the proper URLs for the ZeroTier repo in the subsequent steps, we will execute the following command.
Once we have the shell variable configured, we can utilize it to construct the relevant ZeroTier repo Urls for the Operating system. We finally save this string in the "/etc/apt/sources.list.d/" folder under the name "zerotier.list."

The next time you refresh the Raspberry Pi's packages lists, it will pull ZeroTier directly from this location.
Since we have modified the Rpi's source code, we must revise the list of installed packages. Using the command line, you could change your system's component list.
After updating, we can use the command beforehand to download the ZeroTier package onto our RPi.

ZeroTier can be set up to automatically launch on system startup as part of the setup procedure.
Running ZeroTier on Raspberry Pi 4
Having finished the ZeroTier installation on our RPi, we can now link to the networking we created in the introduction. First, make sure you get the network's identifier handy.
To connect the RPi to the network, we must use the ZeroTier Command line. You can utilize the following code to accomplish this. As a first step, swap out "[NETWORKID]" for the ID you gathered previously in this tutorial.

So after this message, your RPi should've just joined the ZeroTier channel.


The "Members" portion is located toward the bottom of the managerial section for the ZeroTier system on the RPi.
You'll need to select the "Auth" box to tick here after identifying the machine you added. As a result, your RPi can communicate with other gadgets on the same network.
A machine through your ZeroTier channel can be located using the information in the "Address" column. The "sudo zerotier-cli status" prompt will cause the RPi to display this data.
The Name/Description field can be used to assign a memorable label to this innovative gadget for future reference.
Lastly, take a peek at the "Managed IPs" section.
If an IP address has been assigned to the gadget, it will appear in this column. These IP addresses will allow you to gain access to that machine. This column can specify which device will receive the IP address. If you're trying to get an Internet address for a newly approved source, be patient; it could take a few minutes.


Whenever your RPi successfully connects to the ZeroTier networks, you must see something similar to what is shown below. The last number is Pi's Internet protocol address within the VPN connection.

Connecting to other gadgets on the VPN connection is now possible. Having the device's Internet protocol is all that's required. The ZeroTier management console is the quickest way to learn which IP addresses are assigned to particular gadgets.
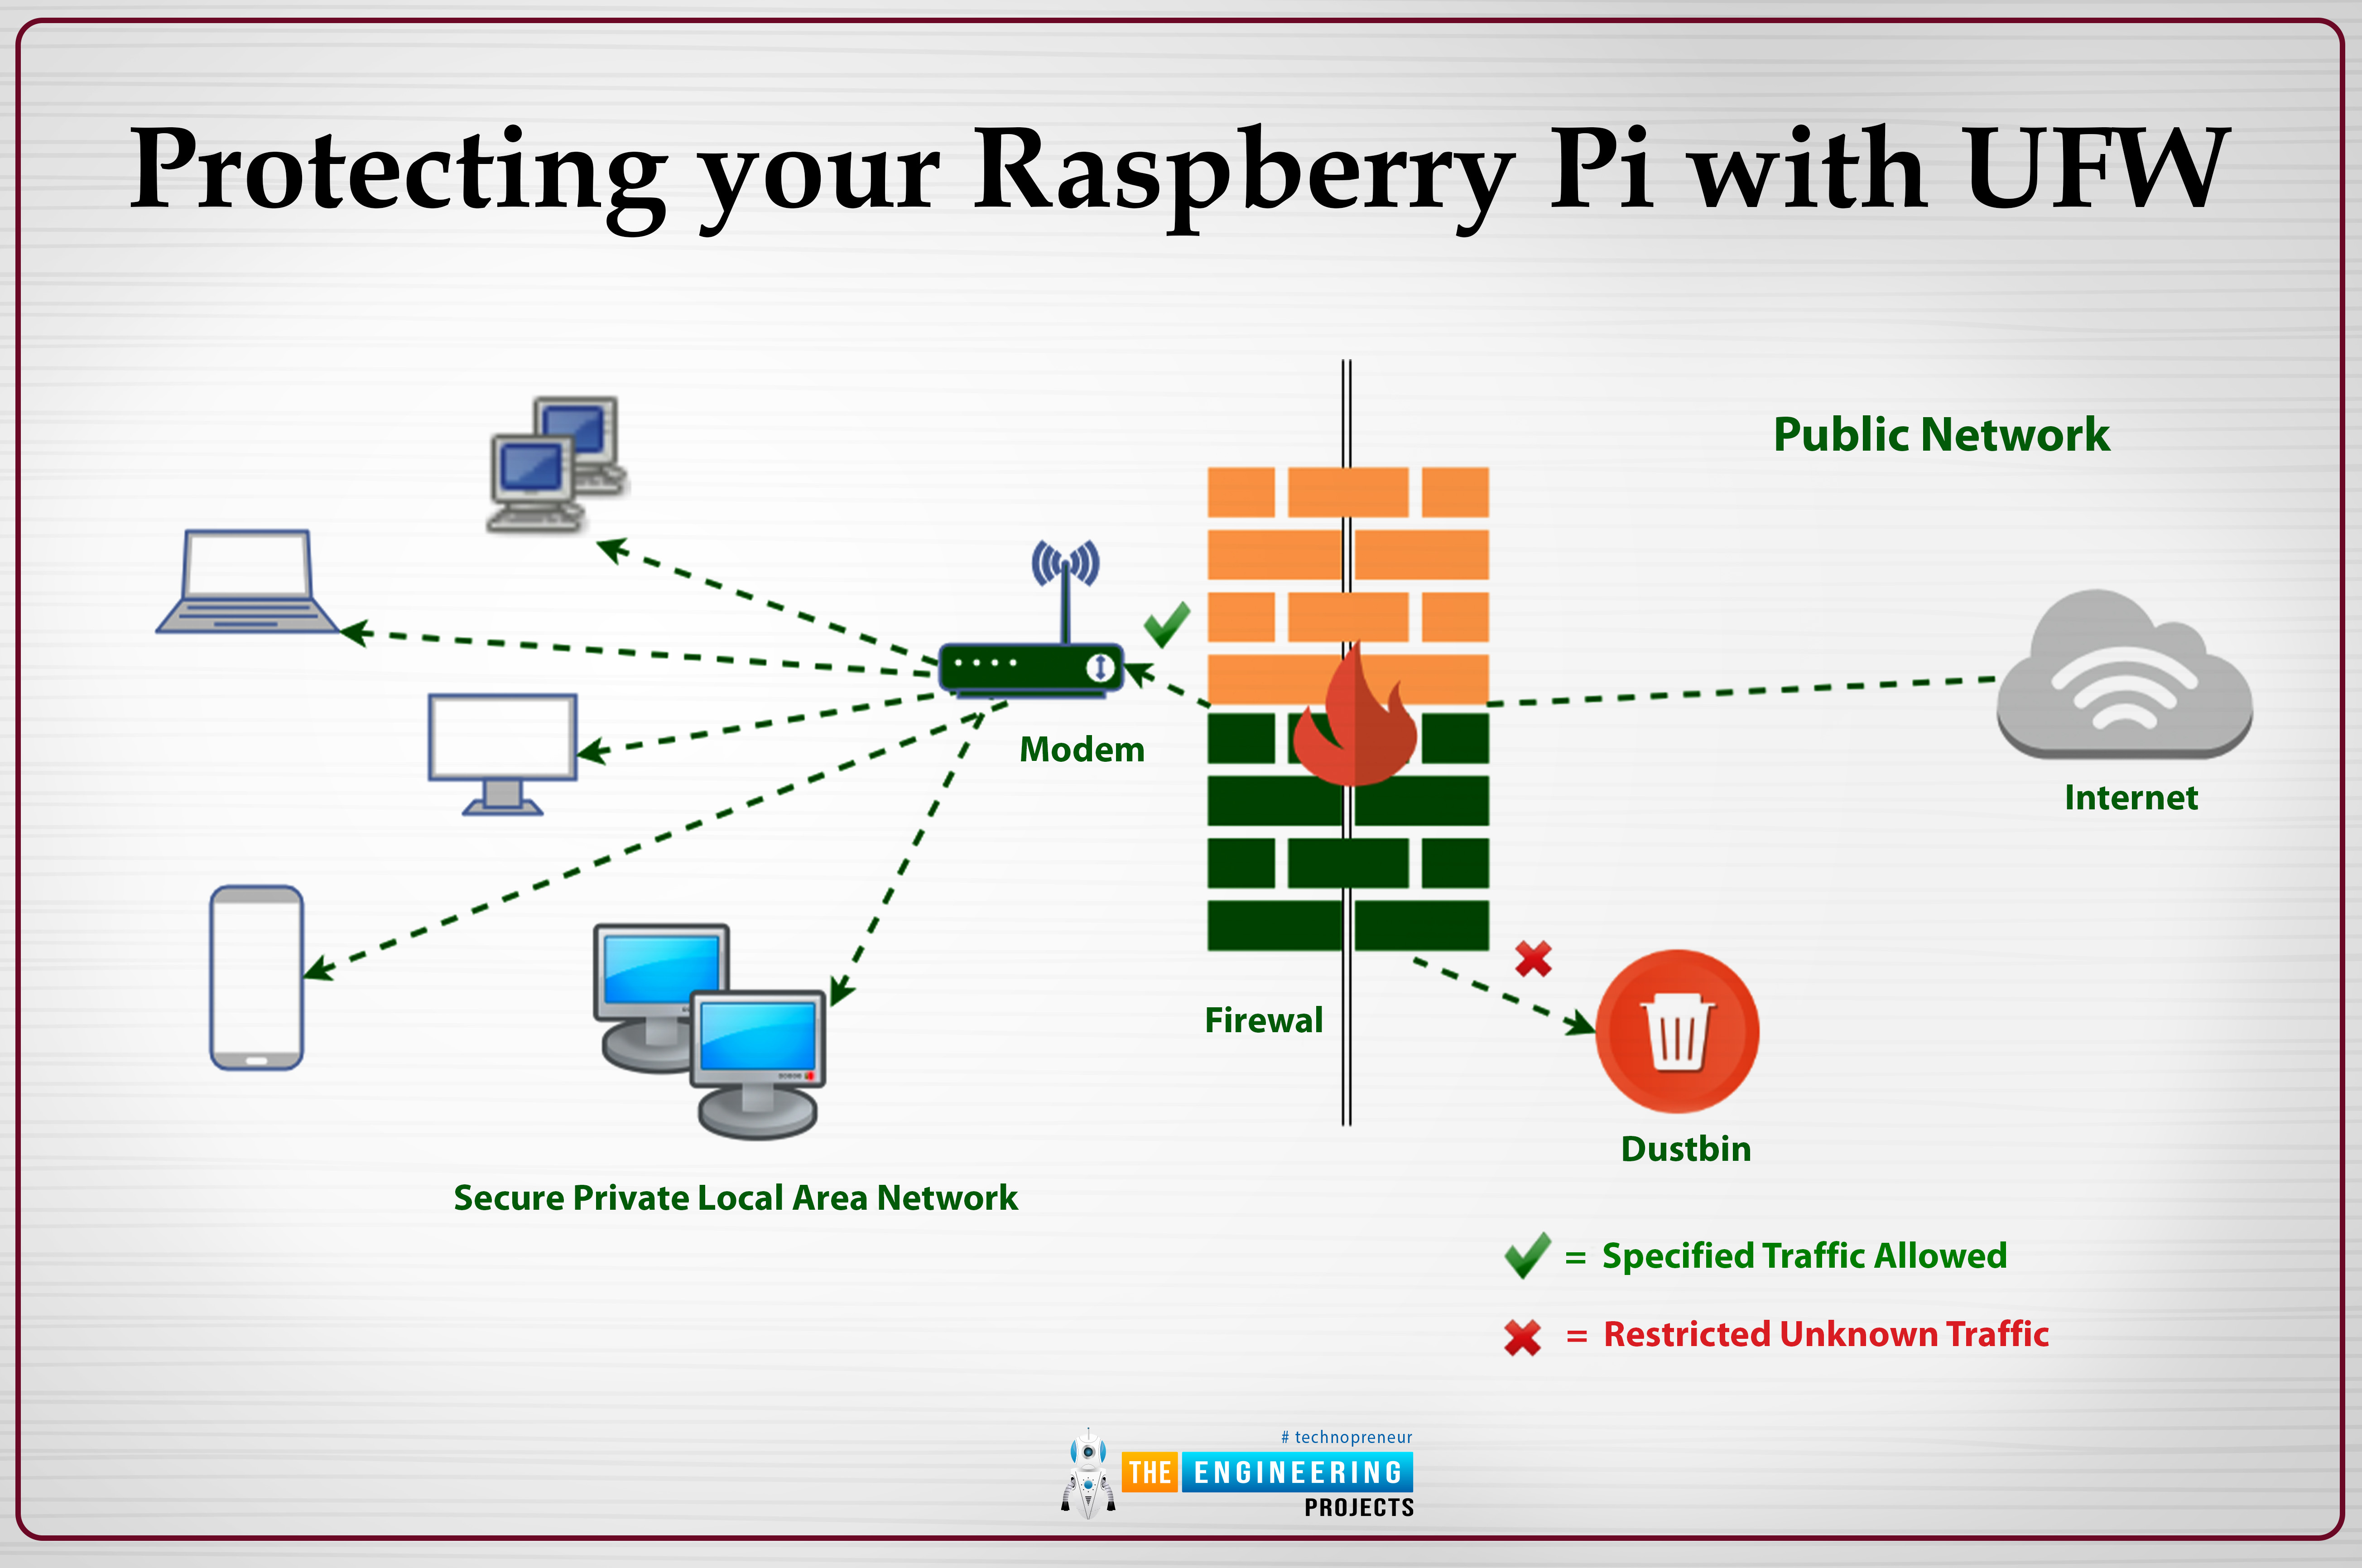
Protecting your Raspberry Pi with UFW
Setting Up Syncthing on a Raspberry Pi
Here you can find detailed instructions for setting up your RPi with the Syncthing program. For the program to be installed, we must first add the program's PGP keys and the package repo as possible sources.

sudo apt full-upgrade
Following this, check that the apt-transport-HTTP package has been successfully installed. When using the installer, you can now access sources that utilize the secure Secure protocols, thanks to this package's inclusion. It's not possible to do this by default. This is included by default in most modern operating systems, but it may be missing from lightweight distributions like Raspberry Pi OS Lite. Executing the line below will install the necessary package.

Finally, the Syncthing credentials may be added to our keyrings folder. The purpose of these keys is to verify the authenticity and integrity of the packages we install before trusting them. To obtain the credentials, execute the command that follows on the RPi.

Since the key has been included, the repo itself may be included. The RPi project will use the Syncthing program, namely the stable release. Use the following command to include the repo in the list of sources.

We have to refresh the installation list before installing Syncthing from the repo. We must revise the list for the package manager to use our different sources. To update your RPI, type the following command into your device's terminal.
Let's finish setting up our RPi by installing the Syncthing app. Now that the package repository has been added, the program can be installed with a single command.
Permitting Third-Party Access to the Syncthing Graphical Interface
The Syncthing web application will only be accessible while close to the device. Those using a Raspberry Pi without a monitor or keyboard would have a very frustrating time if this were the case, but we can change the setup to allow external access.
The first order of business is to discover the RPi's actual local network address. Before proceeding, please ensure that your Rpi has been assigned a permanent IP address. This command lets you find your Pi's local IP address.
To move on, a single iteration of Syncthing must be run to create initial configuration files. The RPI user will be used solely in this tutorial to launch Syncthing.
Press CTRL + C to exit the program after the first launch.
The necessary configurations for Syncthing will be generated after the first execution. The Syncthing program must be launched in the context of the pi user for this configuration file to take effect. With nano editor, start editing the necessary configuration file with the line below.

Locate the following code in this script with the searching key CTRL + W to quickly locate this sentence.
127.0.0.1:8384This line needs to have the local Internet protocol of our Pi substituted for the default local Internet address (127.0.0.1). For instance, with our Pi's IP address, this code would become something like this.
192.168.0.193:8384We are limiting our access to people in the same local area network by use of the local Internet address. Alternatively, you can use the internet address "0.0.0.0" to grant access to every IP. Following the successful IP address change, save changes to the script.
Installing Syncthing on a Raspberry Pi as a Web Service
One final step is necessary now that the Syncthing us may be accessed from devices other than the RPi. This responsibility includes developing and launching a system for the program. The Service will enable Syncthing to launch automatically at system boot and be halted and started quickly.
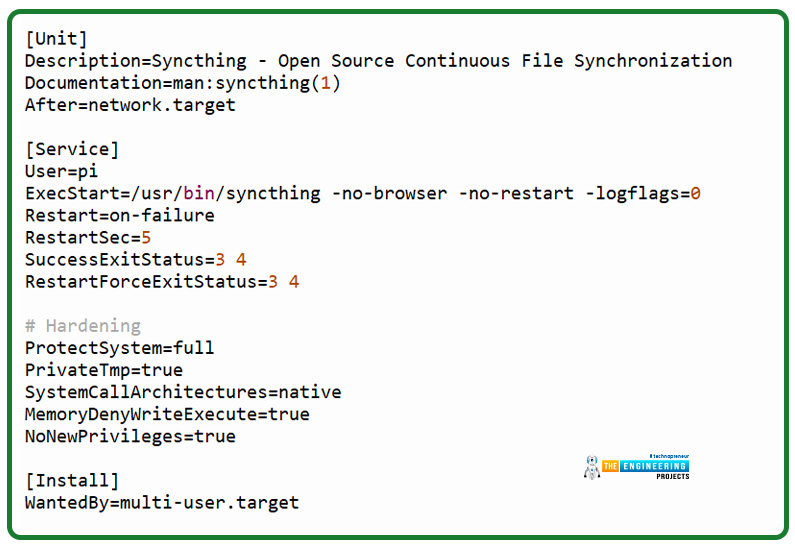
Once again, we'll use nano to make the necessary changes to the Service's configuration file. The Syncthing authorized GitHub is the source for the application we will be developing. To start adding content to the file in "/lib/systemd/system," run the following command.

copy lines below and paste them to this file.
Description=Syncthing - Open Source Continuous File Synchronization
Documentation=man:syncthing(1)
After=network.target
[Service]
User=pi
ExecStart=/usr/bin/syncthing -no-browser -no-restart -logflags=0
Restart=on-failure
RestartSec=5
SuccessExitStatus=3 4
RestartForceExitStatus=3 4
# Hardening
ProtectSystem=full
PrivateTmp=true
SystemCallArchitectures=native
MemoryDenyWriteExecute=true
NoNewPrivileges=true
[Install]
WantedBy=multi-user.target
Those lines specify how our Rpi's OS must deal with Syncthing. When you're done adding lines, save the file. We could now set up our Service to automatically launch at system startup. Enter this command and hit enter.

Let's run the Service to use the Syncthing internet UI. Once again, the systemctl tool will need to be used to kick off the Service.

The Syncthing program on the RPi should be checked to ensure it has begun. Using the below program, we can make sure of that.

The notification should read as follows if the Service was successfully started and is now active.
Web-based Syncthing management through RPi
If everything goes smoothly, you should utilize the Syncthing program on the RPi. Now that the hardware has been added, we can move on to configure the program and synchronize our data. We'll break this up into chunks for easy reading. The web-based user interface makes installing and linking devices a breeze.
Establishing a Link to the Syncthing Online Control Panel
You'll need to launch the web-based interface in your preferred internet browser to begin using it. The Internet address of the RPi is required to use the web-based interface. Using the Url, navigate to the following location in your preferred internet browser.
Since the Syncthing program only listens on port 8384, you mustn't remove it from the end of the string.
After creating login details, you will be prompted to sign in before proceeding to the next step.
Safeguarding Syncthing's User Interface
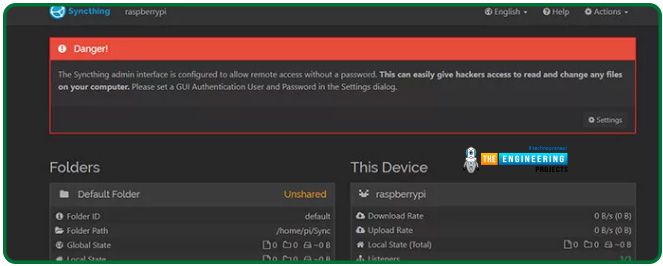
There is no predetermined login information for Syncthing, meaning anyone with access to the UI can change your preferences. Login credentials can be set up to prevent unauthorized users from wreaking havoc.
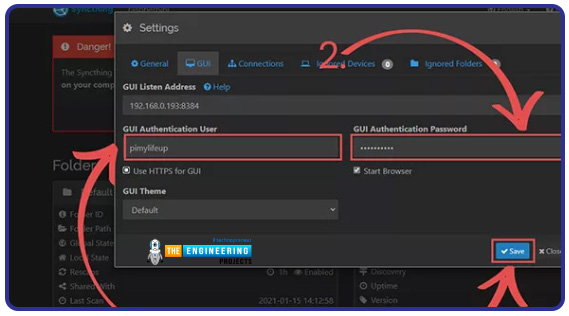
You will be warned of the potential risks if you have never specified the login details. The "Settings" button on this caution will take us directly to the configuration page.
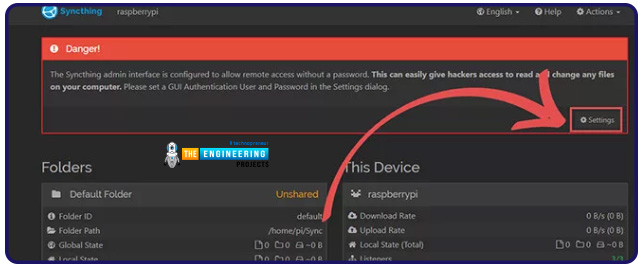
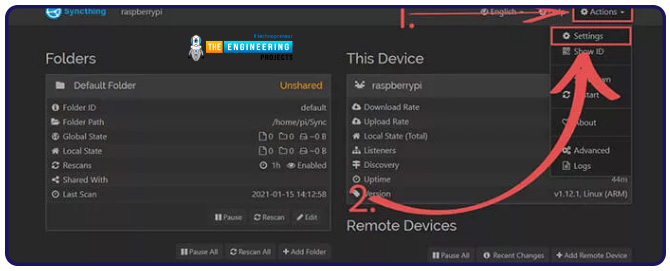
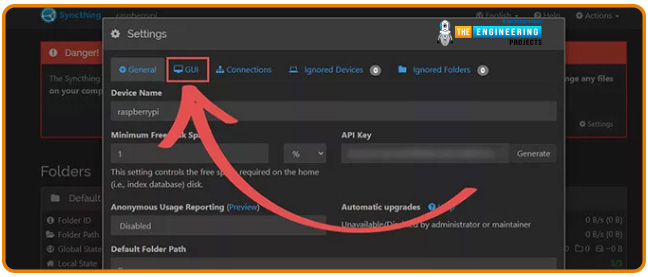
After resetting your password, this website will log you out. You'll need to sign in with your new credentials each time you access Syncthing's graphical interface.
How to Get the Syncthing ID of a Device
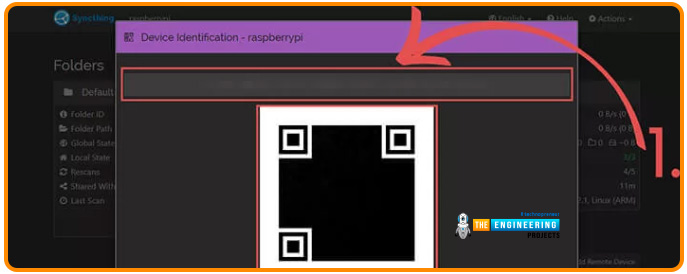
For Syncthing to function, it must create a random identifier for each connected device. Adding the other device's ID to your own is necessary for sharing information between devices. The RPi Syncthing installation's unique identifier can be located via the web interface.
To return to the main page of the web interface, select "Actions" from the toggle menu in the top right. Select "Show ID" from the selection menu to open the desired dialogue box.
The identification string and corresponding QR code are displayed below. The ideal identifier length is between 50 and 56 characters and may incorporate digits, letters, and hyphens. System-wise, the hyphens are disregarded, but they improve readability. If you want to connect your Raspberry Pi to additional devices, you'll need to give each of them the unique ID assigned to your Pi. You must also include their identification number. Syncthing's mechanism for linking many gadgets to a single pool requires the ID.
Incorporating a New Device into Your Raspberry Pi's Syncthing Network
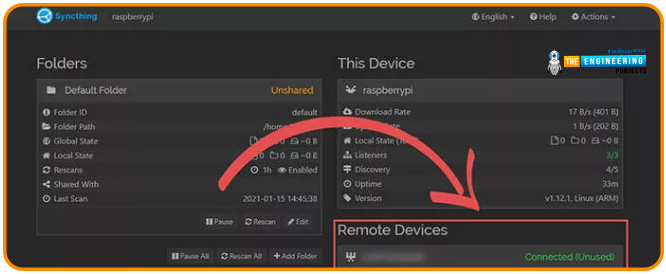
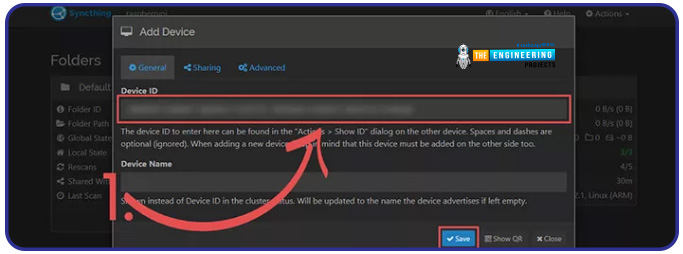
We've covered how to get your gadget id Number, so now we'll cover adding a new one. Keep in mind that the identifier for your RPi must be entered into whatever gadget you are installing. If not, communication between the devices will be impossible.
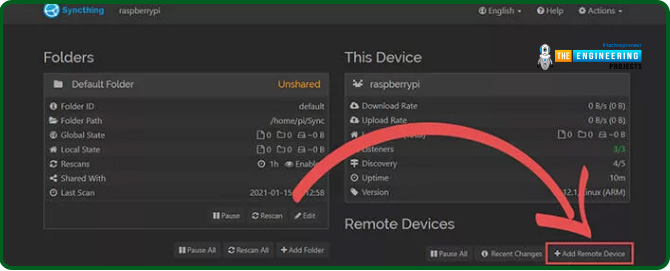
The "Add Remote Device" button may be in the lower right corner of the Syncthing UI. When we click this option, we'll be taken to a dialogue where we can add a gadget to our Syncthing collection.
Replicating a Directory Across All of Your Devices
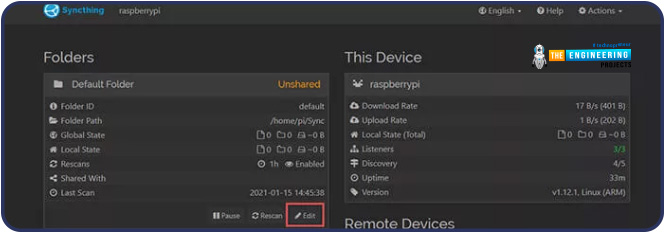
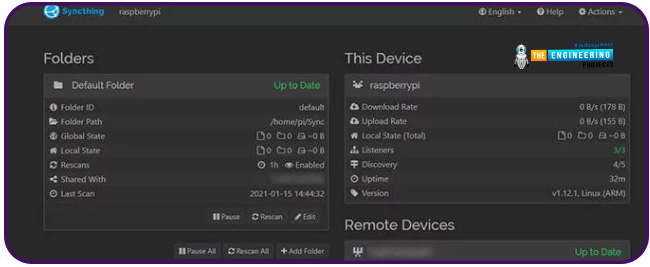
Now that we have a device linked to the RPi Syncthing, you can test directory sharing. In this particular chunk, the default directory will suffice. Here, we keep our sync files in a folder called "/home/pi/sync" on our RPi.
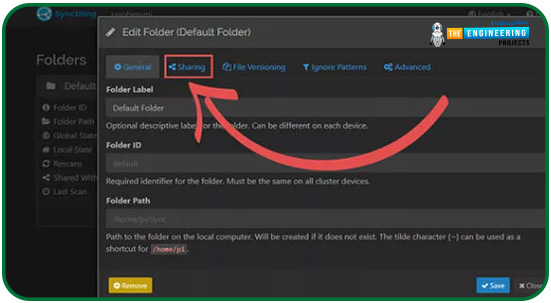
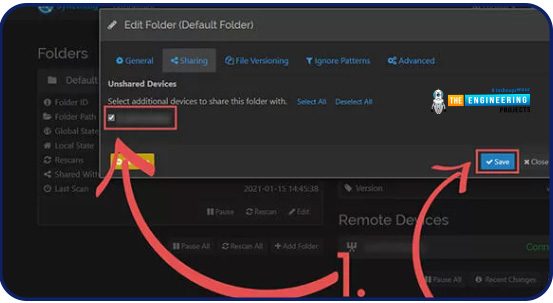
Select the "Edit" button next to a directory to change its share settings. We can access the folder's sharing settings dialog by clicking this option and making the necessary changes.
Conclusion
Having ZeroTier Syncthing installed on your RPi and linked to a VPN, you may now sync data across machines. If you're looking for a basic virtual network solution, ZeroTier is it. And the best part is that it offers an ideally enough free plan for most people's fundamental needs. Additionally, Syncthing is a user-friendly software that enables you to synchronize folders across several gadgets. The program is among the best methods for allowing many computers to maintain directory consistency in real time. No longer will you have to trust a remote service like Cloud Servers to keep your data safe.


