Thank you for joining us for yet another session of this series on Raspberry Pi programming. In the preceding tutorial, we integrated a real-time clock with our raspberry pi four and used it to build a digital clock. However, In this tutorial, we will construct your personal Twitter bot using Tweepy, a Py framework for querying the Twitter application programming interface.

You will construct a Response to mentions robot that will post a response to everybody's tweet mentioning it with a certain keyword.
The response will be a photo we will make and put any text over it. This message is a quote you will acquire from a 3rd application programming interface. Finally, we will look at the benefits and drawbacks of bots.
This is what it looks like:

| Where To Buy? | ||||
|---|---|---|---|---|
| No. | Components | Distributor | Link To Buy | |
| 1 | Raspberry Pi 4 | Amazon | Buy Now | |
Prerequisites
To continue through this guide, you'll need to have the following items ready:
An AWS account
Ensure you've joined up for Aws Beanstalk before deploying the finished project.
Twitter application programming interface auth credentials
To connect your robot to Twitter, you must create a developer account and build an app that Twitter provides you access to.
Python 3
Python 3.9 is the current version, although it is usually recommended to use an edition that is one point behind the latest version to avoid compatibility problems with 3rd party modules.
You have these Python packages installed in your local environment.
Tweepy — Twitter's API can be used to communicate with the service.
Pillow — The process of creating an image and then adding words to it
Requests — Use the Randomized Quote Generation API by sending HTTP queries.
APScheduler — Regularly arrange your work schedule
Flask — Develop a web app for the Elastic Beanstalk deployment.
The other modules you will see are already included in Python, so there's no need to download and install them separately.
Twitter application programming interface auth credentials
OAuth authentication is required for all requests to the official Twitter API. As a result, to use the API, you must first create the necessary credentials. The following are my qualifications:
consumer keys
consumers secret
access tokens
access secrets
Once you've signed up for Twitter, you'll need to complete the following steps to generate your user ID and password:
Step 1: Fill out an Application for a Developers Twitter Account
The Twitter developer’s platform is where you may apply to become a Twitter developer.
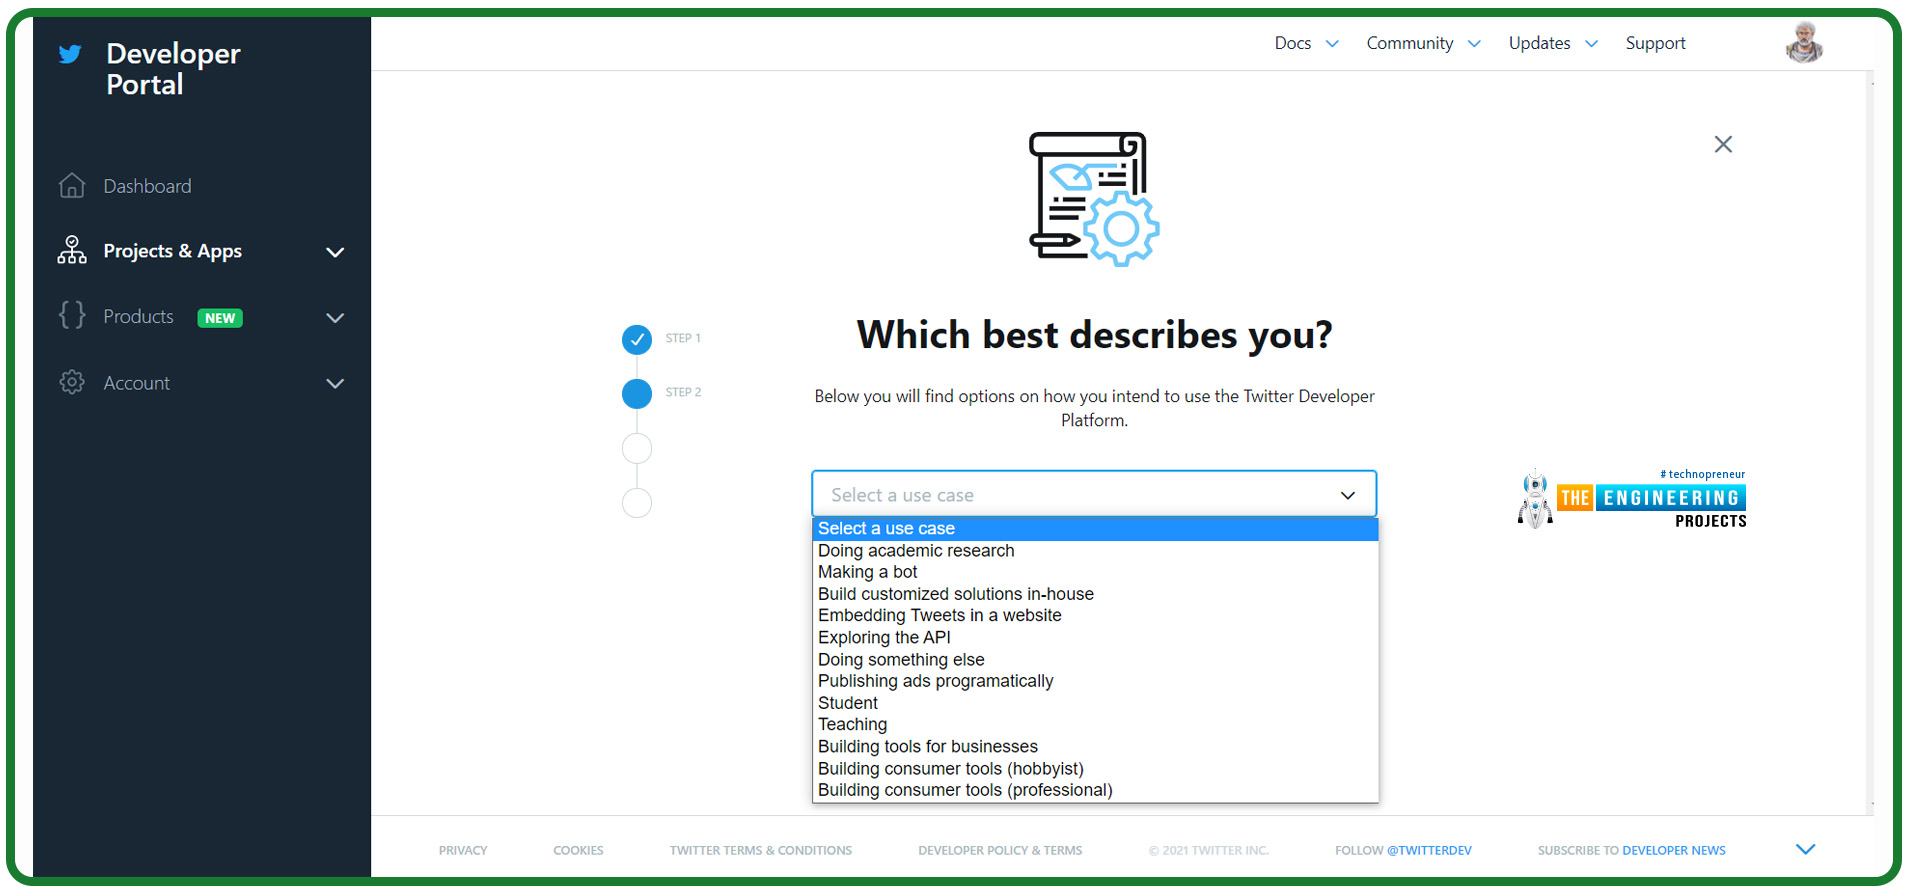
When you sign up for a developer account, Twitter will inquire about the intended purpose of the account. Consequently, the use case of your application must be specified.
To expedite the approval process and increase your chances of success, be as precise as possible about the intended usage of your product.
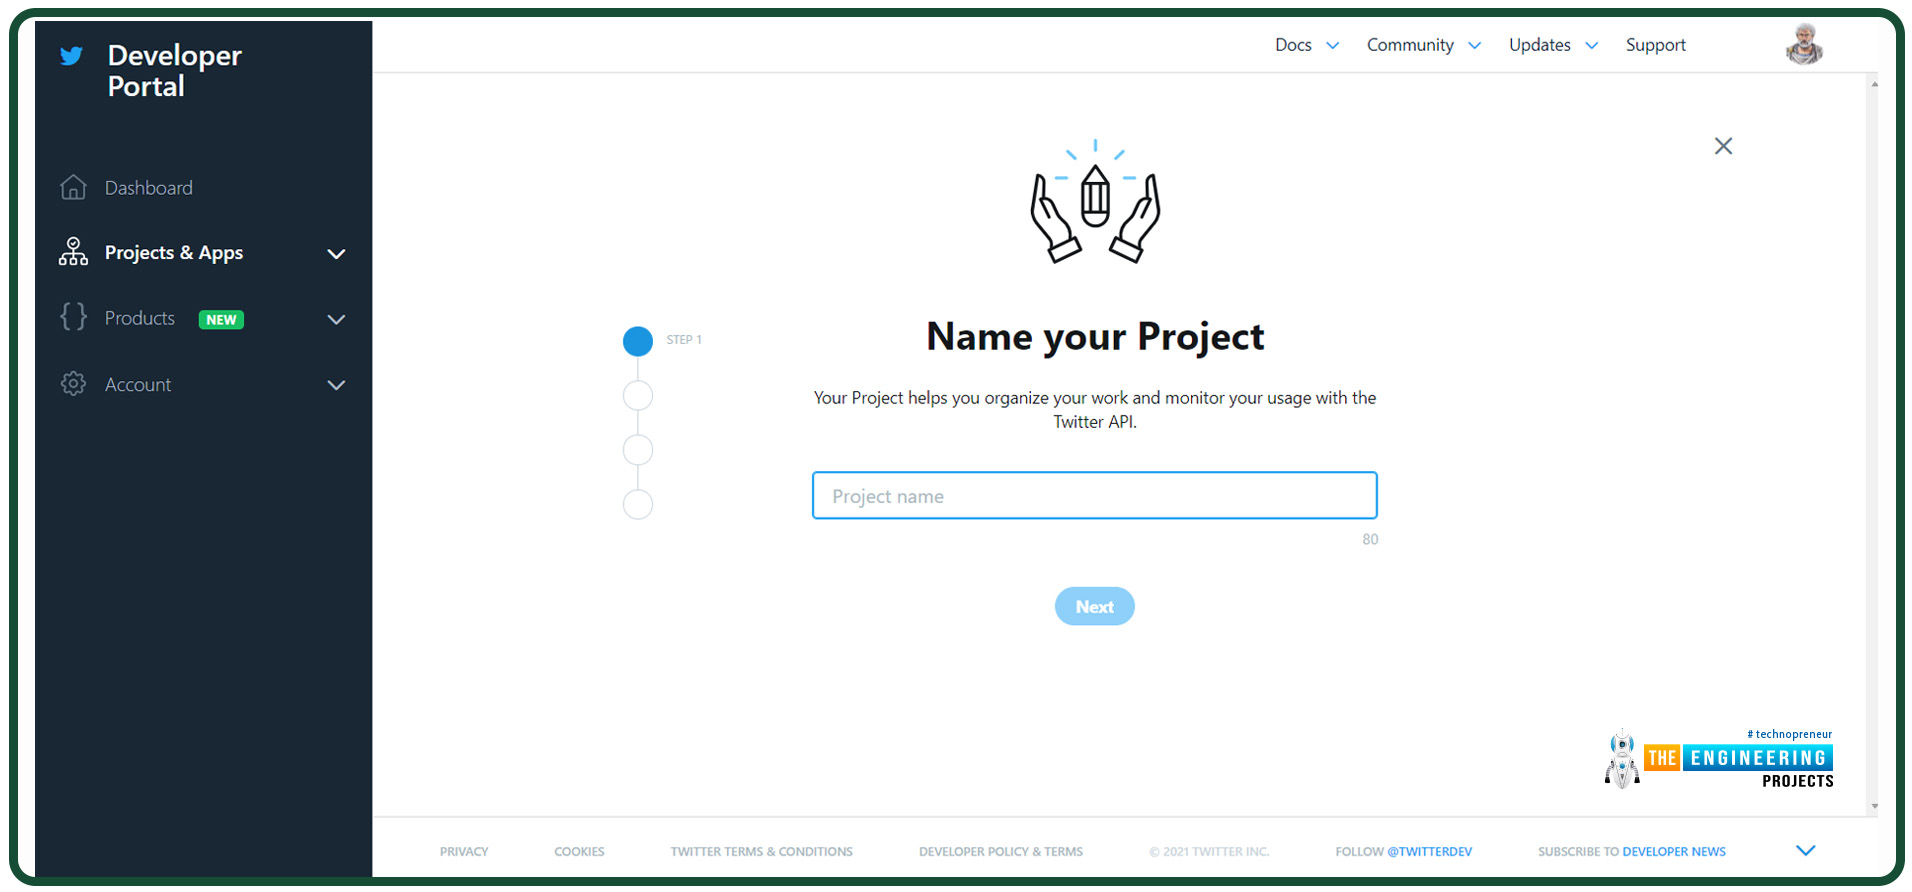
Step 2: Build an App
The verification will arrive in a week. Build an application on Twitter's developers portal dashboard after Twitter's developers account access has been granted.
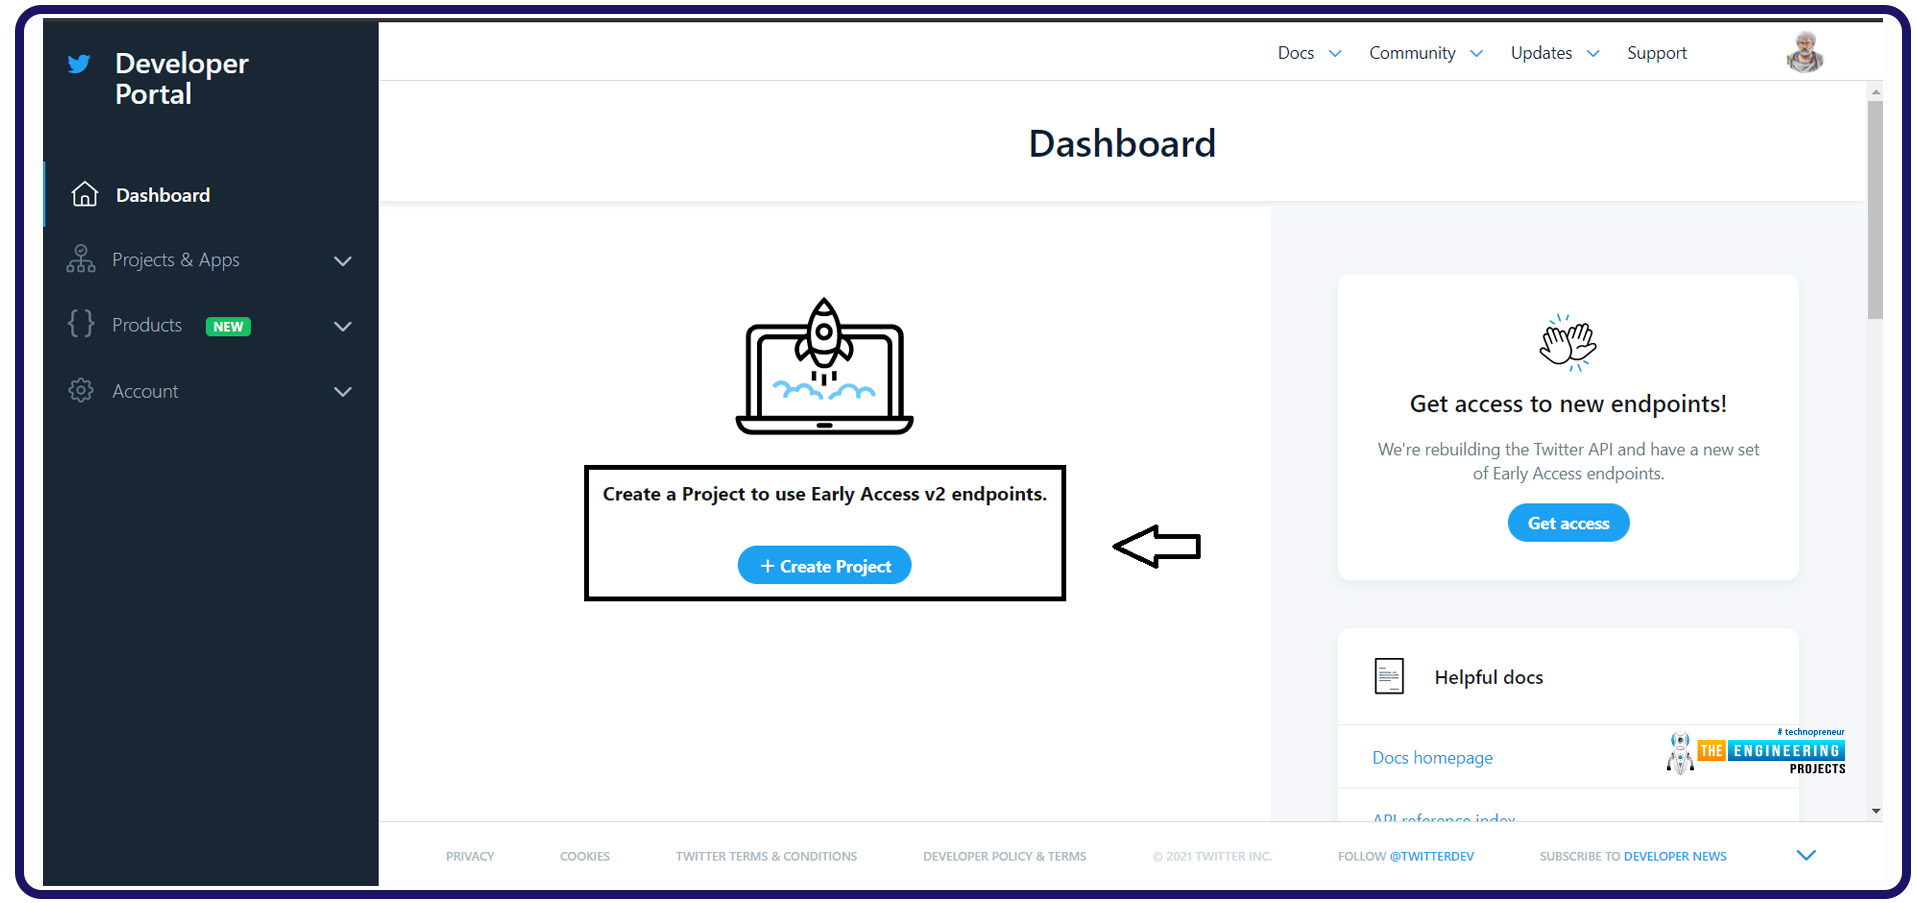
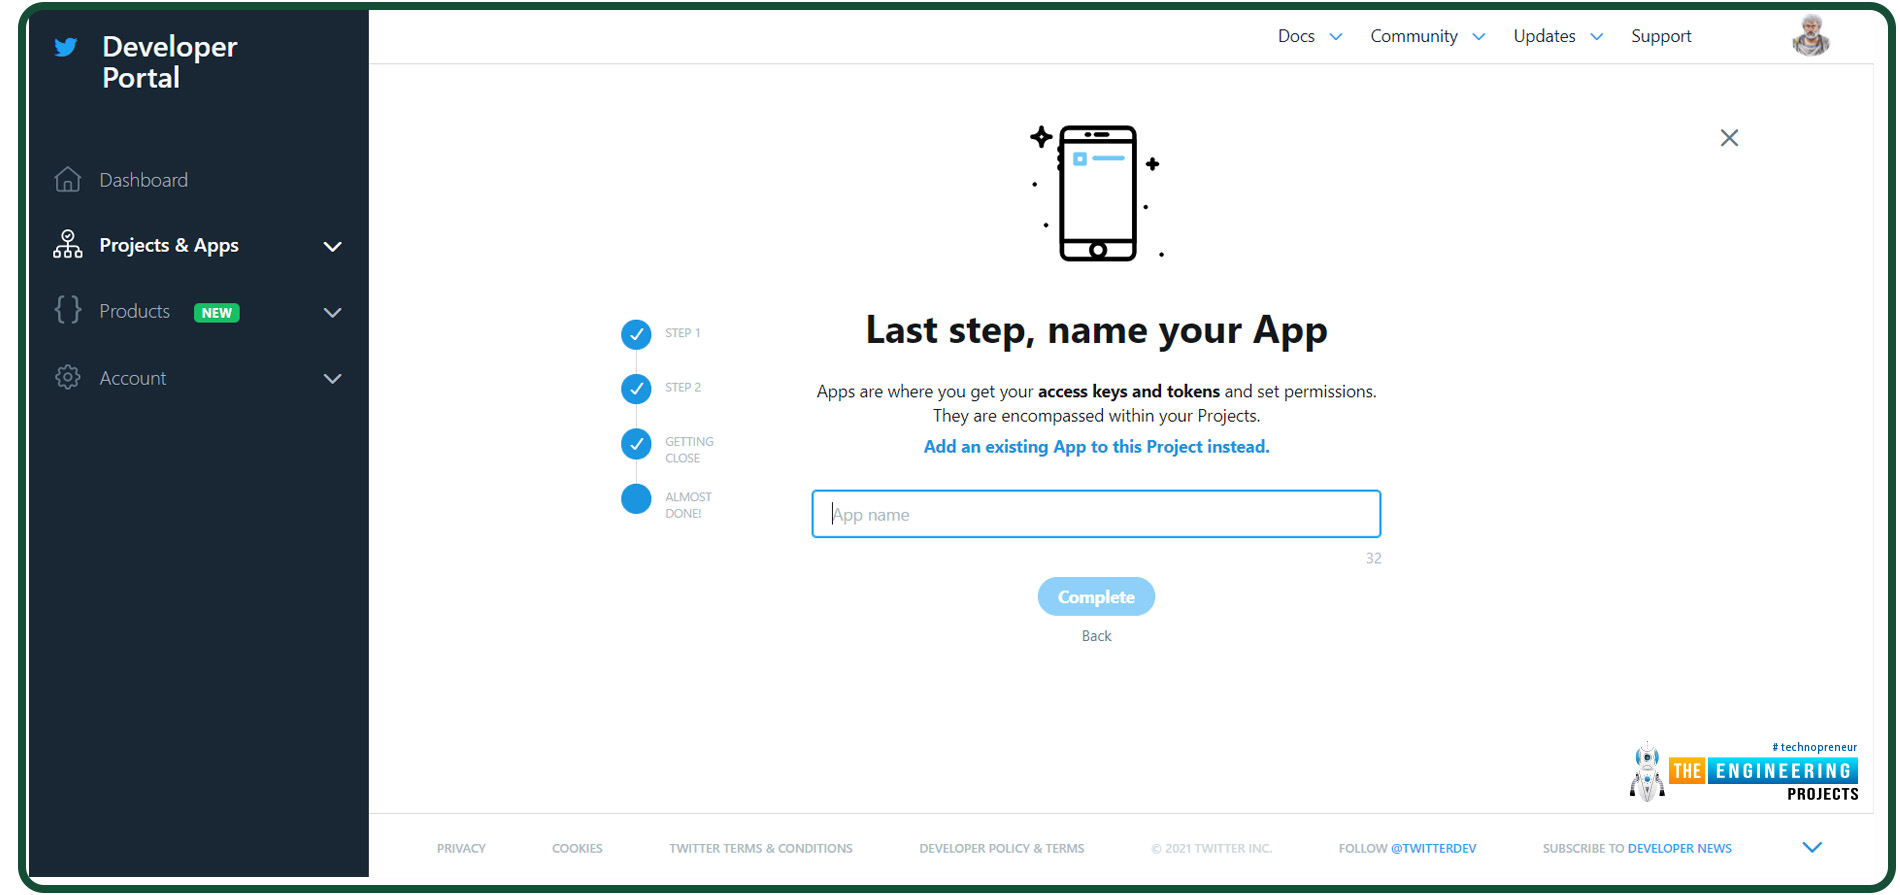
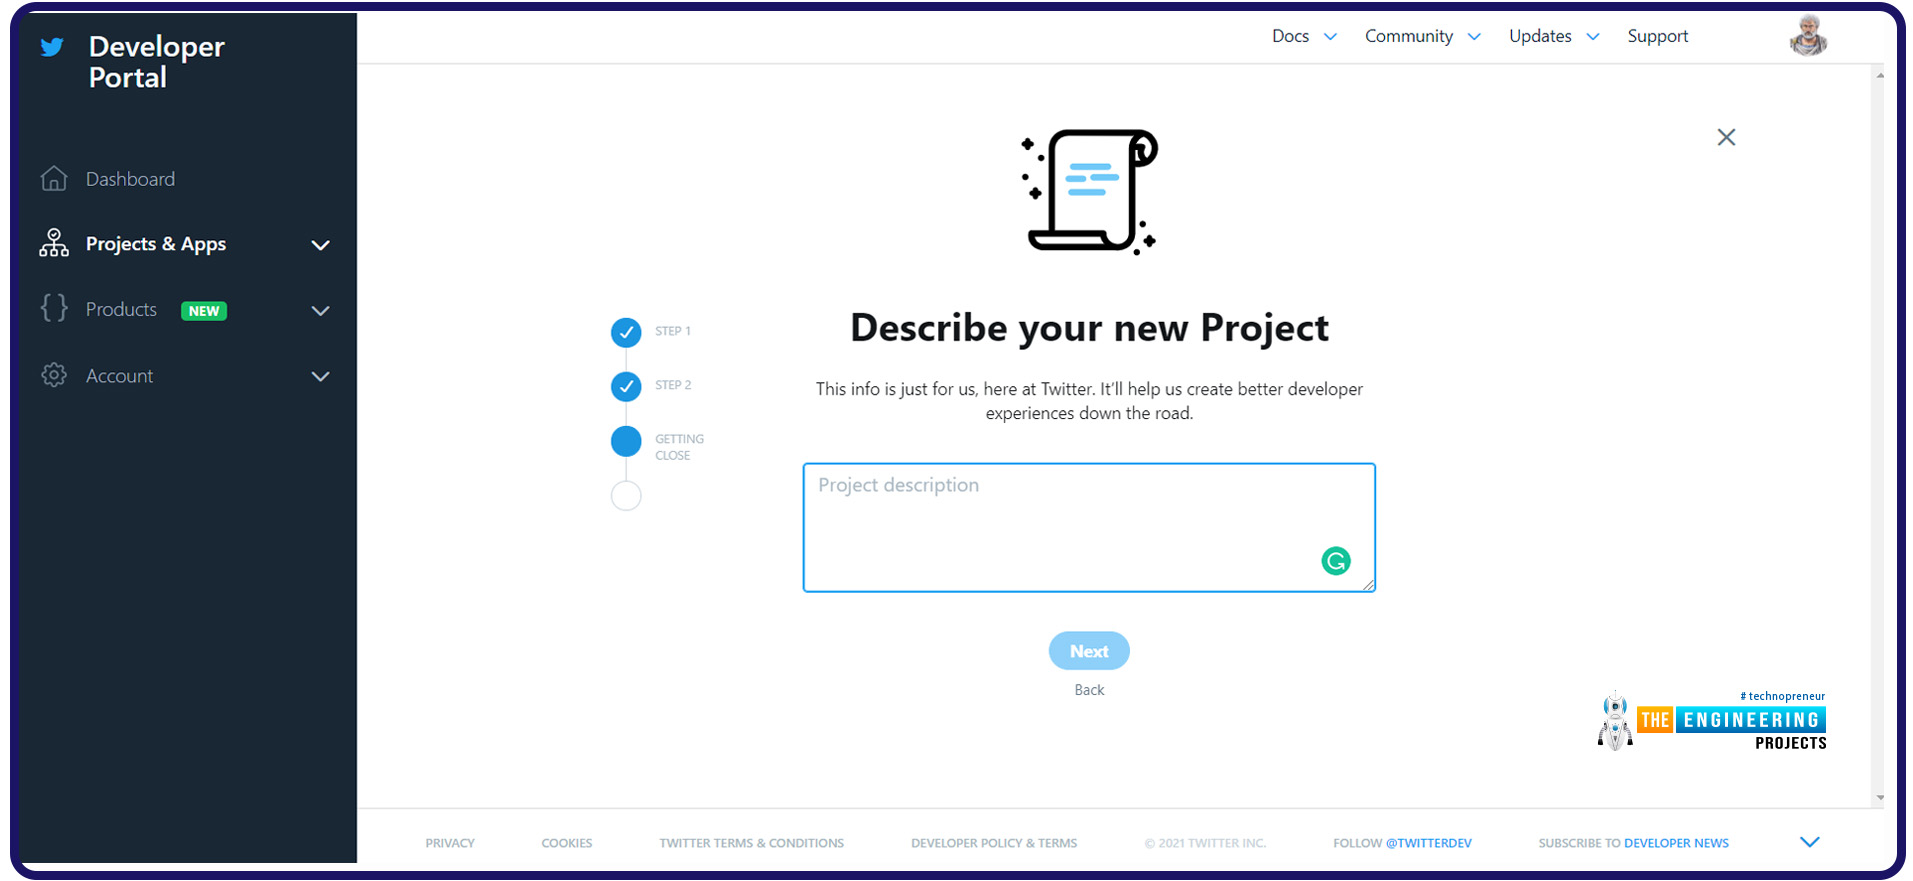
Apps can only use authentication details; thus, you must go through this process. Twitter's application programming interface can be used to define an app. Information regarding your project is required:
Your project's purpose or how users will interact with your app should be described in this section.
Step 3: The User Credentials should be created
To begin, navigate to Twitter's apps section of your account and create your user credentials. When you click on this tab, you'll be taken to a new page on which you can create your credentials.
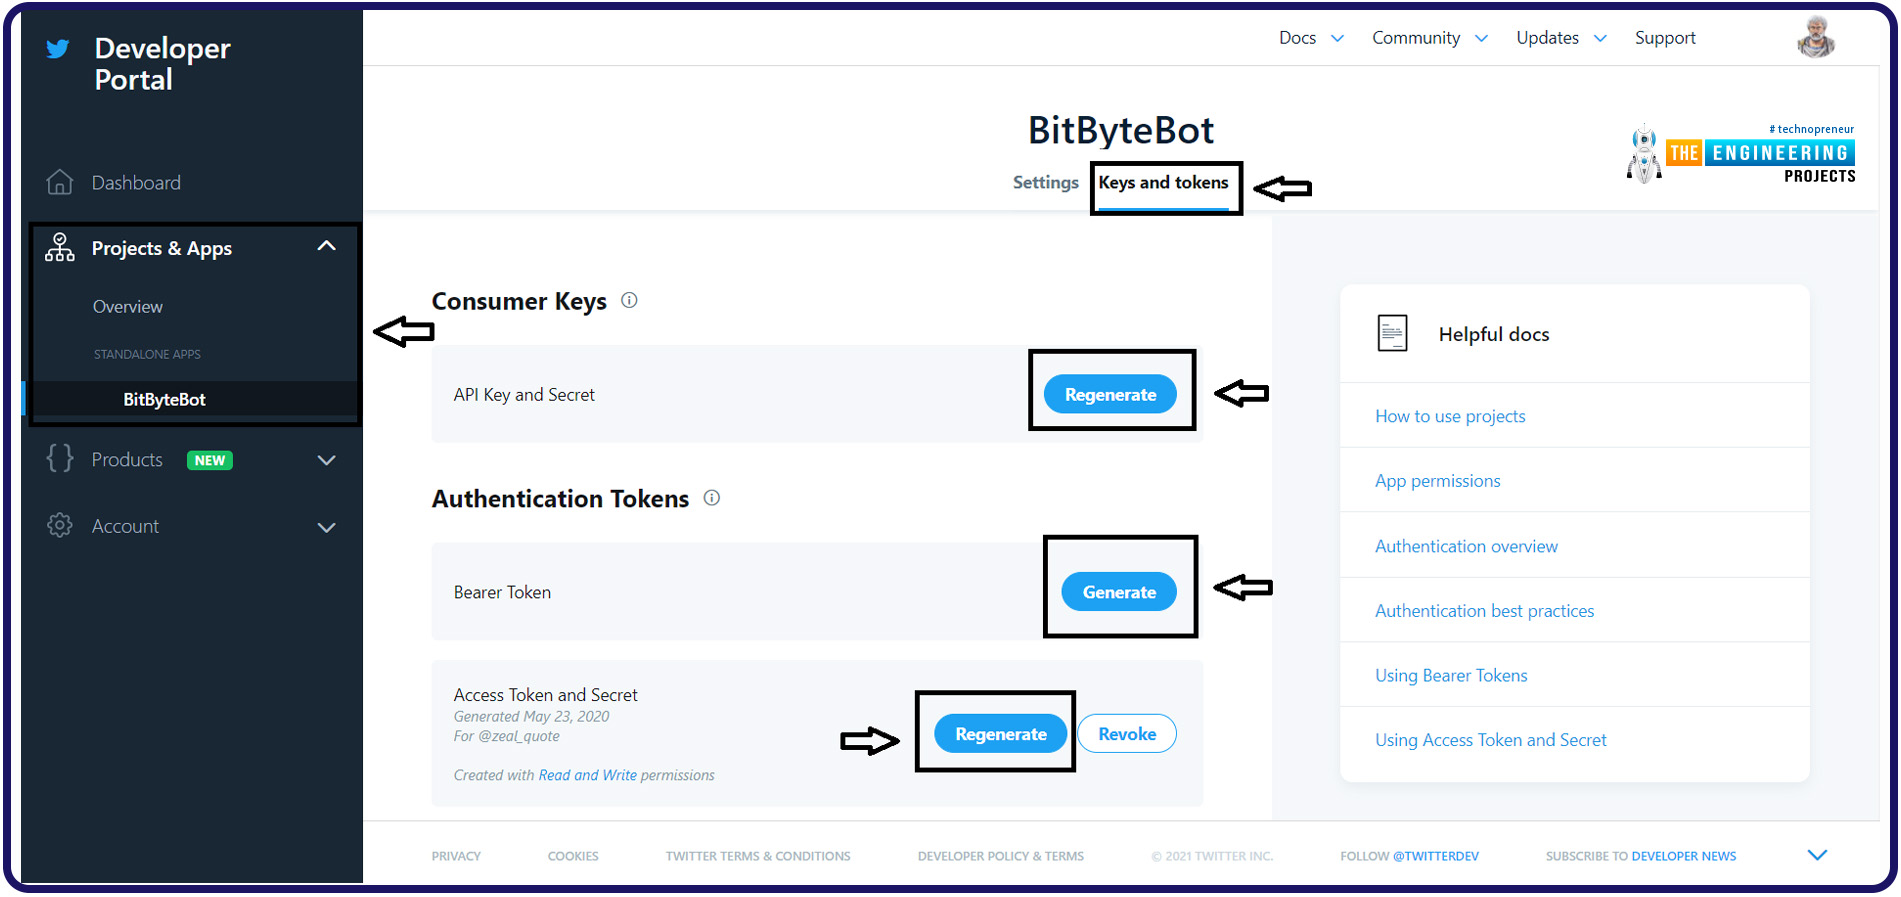
The details you generate should be saved to your computer so they may be used in your program later. A new script called credentials.py should be created in your project's folder and contains the following four key-value pairs:
access_token="XXXXXXX"
access_token_secret="XXXXXXXX"
API_key="XXXXXXX"
API_secret_key="XXXXXXXX"
You can also test the login details to see if everything is functioning as intended using:
import tweepy
# Authenticate to Twitter
auth = tweepy.OAuthHandler("CONSUMER_KEY", "CONSUMER_SECRET")
auth.set_access_token("ACCESS_TOKEN", "ACCESS_SECRET")
api = tweepy.API(auth)
try:
api.verify_credentials()
print("Authentication Successful")
except:
print("Authentication Error")
Authorization should be successful if everything is set up correctly.
Understand Tweepy
Tweepy is a Python module for interacting with the Twitter application programming interface that is freely available and simple. It provides a way for you to interact with the Application programming interface of your program.
Tweepy's newest release can be installed by using the following command:
pip install tweepy
Installing from the git repo is also an option.
pip install git+https://github.com/tweepy/tweepy.git
Here are a few of its most important features:
OAuth
As part of Tweepy, OAuthHandler class handles the authentication process required by Twitter. As you can see from the code above, Tweepy's OAuth implementation is depicted below.
Twitter application programming interface wrapper
If you'd want to use the RESTful application programming functions, Tweepy provides an application programming interface class that you can use. You'll find a rundown of some of the more popular approaches in the sections that follow:
Function for tweet
Function for user
Function for user timeline
Function for trend
Function for like
Models
Tweepy model class instances are returned when any of the application programming interface functions listed above are invoked. The Twitter response will be contained here. How about this?
user = api.get_user('apoorv__tyagi')
When you use this method, you'll get a User model with the requested data. For instance:
python print(user.screen_name) #User Name print(user.followers_count) #User Follower Count
Fetch the Quote
You're now ready to begin the process of setting up your bot. Whenever somebody mentions the robot, it will respond with a picture with a quotation on it.
So, to get the quote, you'll need to use an application programming interface for a random quotation generator. If you want to do this, you'll need to establish a new function in the tweetreply.py script and send a hypertext transfer protocol request to the application programming interface endpoint. Python's requests library can be used to accomplish this.
Using Python's request library, you can send hypertext transfer protocol requests. As a result, you could only fixate on the software's interactions with services and data consumption rather than dealing with the complex making of requests.
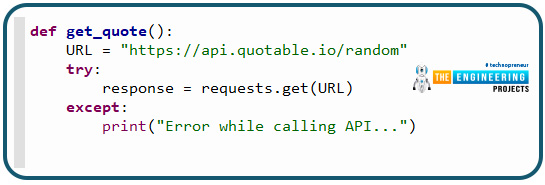
def get_quote():
URL = "https://api.quotable.io/random"
try:
response = requests.get(URL)
except:
print("Error while calling API...")
This is how they responded:

The JSON module can parse the reply from the application programming interface. You can use import JSON to add JSON to your program because it is part of the standard libraries.
As a result, your method returns the contents and author alone, which you will use. As you can see, here's how the whole thing will work.
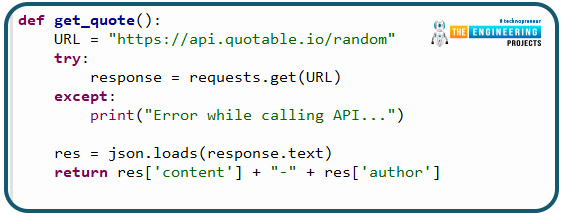
def get_quote():
URL = "https://api.quotable.io/random"
try:
response = requests.get(URL)
except:
print("Error while calling API...")
res = json.loads(response.text)
return res['content'] + "-" + res['author']
Generate Image
You have your text in hand. You'll now need to take a picture and overlay it with the text you just typed.
The Pillow module should always be your first port of call when working with images in Python. The Python Pillow imaging module provides image analysis and filetypes support, providing the interpreter with a strong image processing capacity.
Wallpaper.py should be created with a new function that accepts a quote as the argument.

def get_image(quote):
image = Image.new('RGB', (800, 500), color=(0, 0, 0))
font = ImageFont.truetype("Arial.ttf", 40)
text_color = (200, 200, 200)
text_start_height = 100
write_text_on_image(image, quote, font, text_color, text_start_height)
image.save('created_image.png')
Let's take a closer look at this feature.
Image.new() A new photo is created using the given mode and size. The first thing to consider is the style used to generate the new photo. There are a couple of possibilities here: RGB or RGBA. Size is indeed the second factor to consider. The width and height of an image are given as tuples in pixels. The color of the background image is the final option (black is the default color).
ImageFont.TrueType() font object is created by this method. It creates a font object with the desired font size using the provided font file. While "Arial" is used here, you are free to use any other font if you so like. Font files should be saved in the project root folder with a TrueType font file extension, such as font.ttf.
In other words, the text's color and height at which it begins are specified by these variables. RGB(200,200,200) works well over dark images.
Image. Save () created png image will be saved in the root directory due to this process. It will overwrite any existing image with the same name that already exists.

def write_text_on_image(image, text, font, text_color, text_start_height):
draw = ImageDraw.Draw(image)
image_width, image_height = image.size
y_text = text_start_height
lines = textwrap.wrap(text, width=40)
for line in lines:
line_width, line_height = font.getsize(line)
draw.text(((image_width - line_width) / 2, y_text),line, font=font, fill=text_color)
y_text += line_height
A message will be added to the image using the following method in the same script, Wallpaper.py. Let's take a closer look at how this feature works:
Create two-dimensional picture objects with the ImageDraw package.
A solitary paragraph is wrapped in texts using text wrap. Wrap () ensures that each line is no more than 40 characters in length. Output lines are returned in a tally form.
Draw. Text () will draw a text at the provided location.
Use parameter:
XY — The text's upper-left corner.
Text — The text to be illustrated.
Fill — The text should be in this color.
font — One of ImageFont's instances
This is what Wallpaper.py look like after the process:
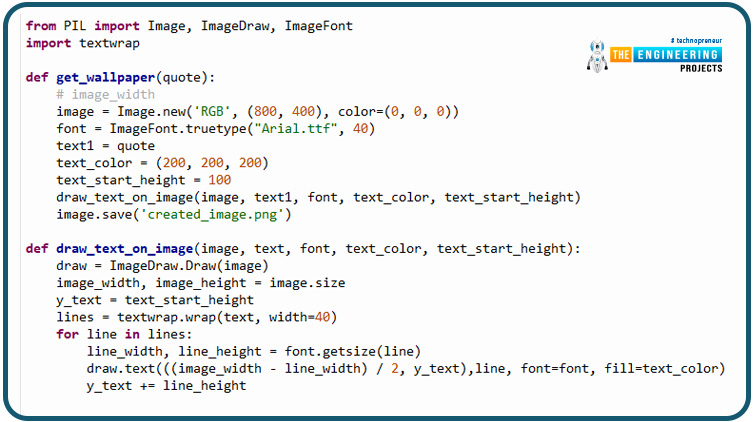
from PIL import Image, ImageDraw, ImageFont
import text wrap
def get_wallpaper(quote):
# image_width
image = Image.new('RGB', (800, 400), color=(0, 0, 0))
font = ImageFont.truetype("Arial.ttf", 40)
text1 = quote
text_color = (200, 200, 200)
text_start_height = 100
draw_text_on_image(image, text1, font, text_color, text_start_height)
image.save('created_image.png')
def draw_text_on_image(image, text, font, text_color, text_start_height):
draw = ImageDraw.Draw(image)
image_width, image_height = image.size
y_text = text_start_height
lines = textwrap.wrap(text, width=40)
for line in lines:
line_width, line_height = font.getsize(line)
draw.text(((image_width - line_width) / 2, y_text),line, font=font, fill=text_color)
y_text += line_height
Responding to Mentions by Keeping an Eye on the Twitter Feed.
You've got both the quote and an image that incorporates it in one. It's now only a matter of searching for mentions of you in other people's tweets. In this case, in addition to scanning for comments, you will also be searching for a certain term or hashtags.
When a tweet contains a specific hashtag, you should like and respond to that tweet.
You can use the hashtag "#qod" as the keyword in this situation.
Returning to the tweet reply.py code, the following function does what we want it to:
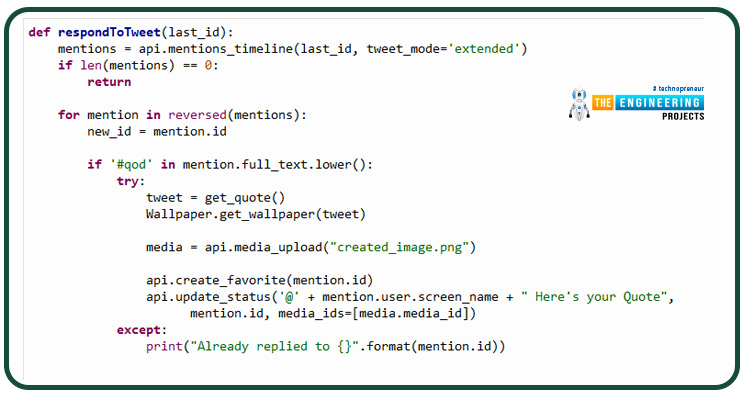
def respondToTweet(last_id):
mentions = api.mentions_timeline(last_id, tweet_mode='extended')
if len(mentions) == 0:
return
for mention in reversed(mentions):
new_id = mention.id
if '#qod' in mention.full_text.lower():
try:
tweet = get_quote()
Wallpaper.get_wallpaper(tweet)
media = api.media_upload("created_image.png")
api.create_favorite(mention.id)
api.update_status('@' + mention.user.screen_name + " Here's your Quote",
mention.id, media_ids=[media.media_id])
except:
print("Already replied to {}".format(mention.id))
Respond to tweet() The last id is the function's only argument. Using this variable, you can only retrieve mentions produced after the ones you've previously processed. Whenever you initially invoke the method, you will set its value to 0, and then you'll keep updating it with each subsequent call.
mentions_timeline() Tweets are retrieved from the Tweepy module using this function. Only tweets with the last id newer than the provided value will be returned using the first parameter. The default is to show the last 20 tweets. When tweet mode='extended' is used, the full uncut content of the Tweet is returned. Text is shortened to 140 characters if the option is set to "compat."
Create favorite() is used to generate a favorite for every tweet that mentions you in reverse chronological order, starting with the earliest tweet first and working backward from there.
In your case, you'll use update status() to send a reply to this message, which includes the original tweet writer's Twitter handle, your textual information, the original tweet's identification, and your list of multimedia.
To Prevent Repetition, Save Your Tweet ID
There are several things to keep in mind when repeatedly responding to a certain tweet. Simply save the tweet's identification to which you last answered in a text document, tweetID.txt; you'll scan for the newer tweet afterward. The mention timeline() function will take care of this automatically because tweet IDs can be sorted by time.
Now, you'll pass a document holding this last identification, and the method will retrieve the identification from the document, and the document will be modified with a new one at the end.
Finally, here is what the method response to tweet() looks like in its final form:
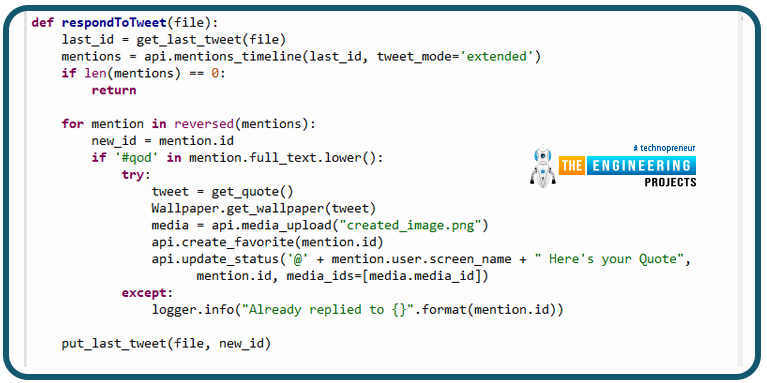
def respondToTweet(file):
last_id = get_last_tweet(file)
mentions = api.mentions_timeline(last_id, tweet_mode='extended')
if len(mentions) == 0:
return
for mention in reversed(mentions):
new_id = mention.id
if '#qod' in mention.full_text.lower():
try:
tweet = get_quote()
Wallpaper.get_wallpaper(tweet)
media = api.media_upload("created_image.png")
api.create_favorite(mention.id)
api.update_status('@' + mention.user.screen_name + " Here's your Quote",
mention.id, media_ids=[media.media_id])
except:
logger.info("Already replied to {}".format(mention.id))
put_last_tweet(file, new_id)
You'll notice that two additional utility methods, get the last tweet() and put the last tweet(), have been added to this section ().
A document name is required for the function to get the last tweet(); the function putlasttweet() requires the document as a parameter, and it will pick the most recent tweet identification and modify the document with the latest identification.
Here's what the final tweet reply.py should look like after everything has been put together:
import tweepy
import json
import requests
import logging
import Wallpaper
import credentials
consumer_key = credentials.API_key
consumer_secret_key = credentials.API_secret_key
access_token = credentials.access_token
access_token_secret = credentials.access_token_secret
auth = tweepy.OAuthHandler(consumer_key, consumer_secret_key)
auth.set_access_token(access_token, access_token_secret)
api = tweepy.API(auth)
# For adding logs in application
logger = logging.getLogger()
logging.basicConfig(level=logging.INFO)
logger.setLevel(logging.INFO)
def get_quote():
url = "https://api.quotable.io/random"
try:
response = requests.get(url)
except:
logger.info("Error while calling API...")
res = json.loads(response.text)
print(res)
return res['content'] + "-" + res['author']
def get_last_tweet(file):
f = open(file, 'r')
lastId = int(f.read().strip())
f.close()
return lastId
def put_last_tweet(file, Id):
f = open(file, 'w')
f.write(str(Id))
f.close()
logger.info("Updated the file with the latest tweet Id")
return
def respondToTweet(file='tweet_ID.txt'):
last_id = get_last_tweet(file)
mentions = api.mentions_timeline(last_id, tweet_mode='extended')
if len(mentions) == 0:
return
new_id = 0
logger.info("someone mentioned me...")
for mention in reversed(mentions):
logger.info(str(mention.id) + '-' + mention.full_text)
new_id = mention.id
if '#qod' in mention.full_text.lower():
logger.info("Responding back with QOD to -{}".format(mention.id))
try:
tweet = get_quote()
Wallpaper.get_wallpaper(tweet)
media = api.media_upload("created_image.png")
logger.info("liking and replying to tweet")
api.create_favorite(mention.id)
api.update_status('@' + mention.user.screen_name + " Here's your Quote", mention.id,
media_ids=[media.media_id])
except:
logger.info("Already replied to {}".format(mention.id))
put_last_tweet(file, new_id)
if __name__=="__main__":
respondToTweet()
Deploy the bot to Server
In order to complete the process, you will need to upload your program to a server. Python applications can be deployed using AWS Elastic Beanstalk in this area.
Amazon web service simplifies management while allowing for greater flexibility and control. Your application is automatically provisioned with capacity, load-balanced, scaled and monitored for health using Elastic Beanstalk.
Here is how it's going to work out:
Install Python on the AWS environment
Build a basic Flask app for the bot
Connect to AWS and deploy your Flask app
Use logs to find and fix bugs
Set up Elastic Beanstalk environment
After logging into the Aws services account, type and pick "Elastic Beanstalk," then click "setup a New App."
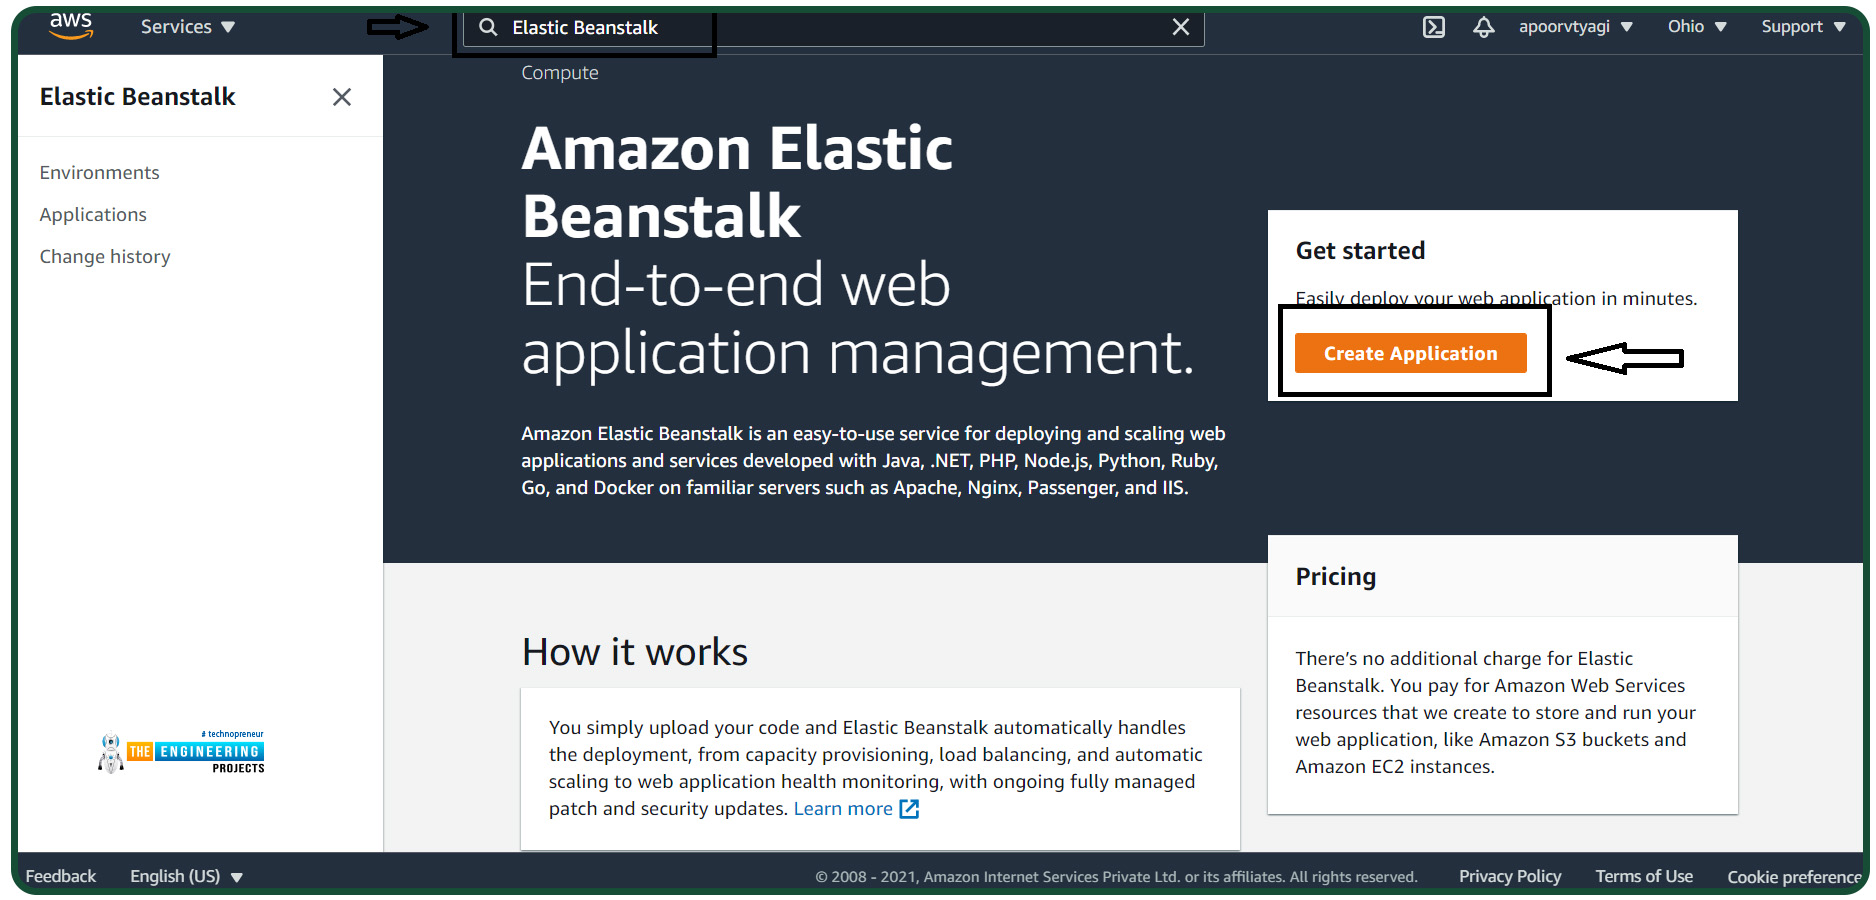
You'll be asked to provide the following information:
Name of the application;
Application's tags;
Environment;
Code of the application
Each AWS Elastic Beanstalk application resource can have up to 50 tags. Using tags, you may organize your materials. The tags may come in handy if you manage various AWS app resources.
Platform branches and versions are automatically generated when Python is selected from the selection for the platform.
Later, you will deploy your app to elastic Beanstalk. Select "sample app" from the drop-down menu and click "new app." For the most part, it should be ready in about a minute or two
Create a Flask app

Python is used to create Flask, a website development framework. It's simple to get started and use. Flask has no dependencies, making it a more "beginner-friendly" framework for web applications.
Flask has several advantages over other frameworks for building online applications, including:
Flask comes with a debugger and a development server.
It takes advantage of Jinja2's template-based architecture.
It complies with the WSGI 1.0 specification.
Unit testing is made easier with this tool's built-in support.
Flask has a plethora of extensions available for customizing its behavior.
Flask as a micro-framework
It is noted for being lightweight and simply providing the needed components. In addition to routing, resource handling, and session management, it includes a limited set of website development tools. The programmer can write a customized module for further features, such as data management. This method eliminates the need for a boilerplate program that isn't even being executed.
Create a new Python script and call it application.py, then paste the code below into it while AWS creates an environment.
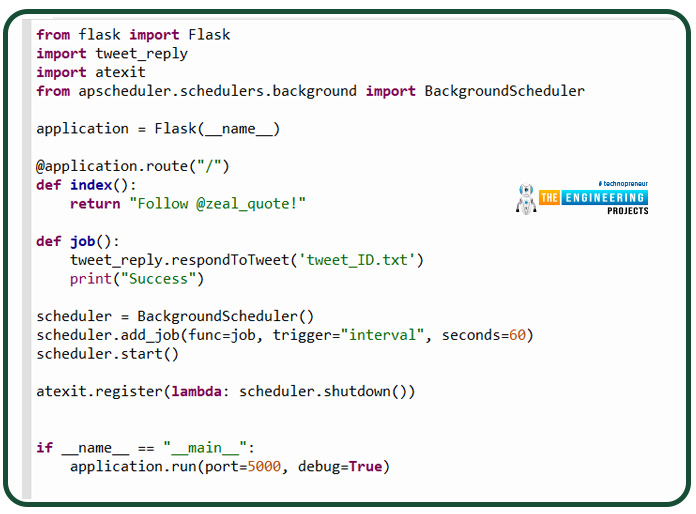
from flask import Flask
import tweet_reply
import atexit
from apscheduler.schedulers.background import BackgroundScheduler
application = Flask(__name__)
@application.route("/")
def index():
return "Follow @zeal_quote!"
def job():
tweet_reply.respondToTweet('tweet_ID.txt')
print("Success")
scheduler = BackgroundScheduler()
scheduler.add_job(func=job, trigger="interval", seconds=60)
scheduler.start()
atexit.register(lambda: scheduler.shutdown())
if __name__ == "__main__":
application.run(port=5000, debug=True)
Use up scheduler and a flask app to execute a single job() function that will ultimately call the main method in the tweet reply.py script on a minute basis.
As a reminder, the object instance's identifier of the flask app must be "app." For Elastic Beanstalk to work with your application, you must give it the correct name.
Deploy and set up the app to Amazon Web Services.
Your online app's code can include Elastic Beanstalk conf files (.ebextensions) for configuring amazon web services resources and the environments.
The .config script extension is used for YAML files, and these are put in the .ebextensions directory together with the app's code during the deployment process.
Establish a new directory called .ebextensions inside the code folder and add a new file called Python .config. Add the following code:

files:
"/etc/httpd/conf.d/wsgi_custom.conf":
mode: "000644"
owner: root
group: root
content: WSGIApplicationGroup %{GLOBAL}
If you want Elastic Beanstalk to tailor its settings to the app's prerequisites, you'll need to include a list of any external libraries inside a requirements.txt script you produce.
Execute the command below to generate the requirements.txt file using pip freeze
Finally, package up everything for uploading on Elastic Beanstalk with Elastic Beanstalk. The architecture of your project directory should now look like this:

Compress all the files and directories listed here together. Open amazon web services again and select Upload Code.
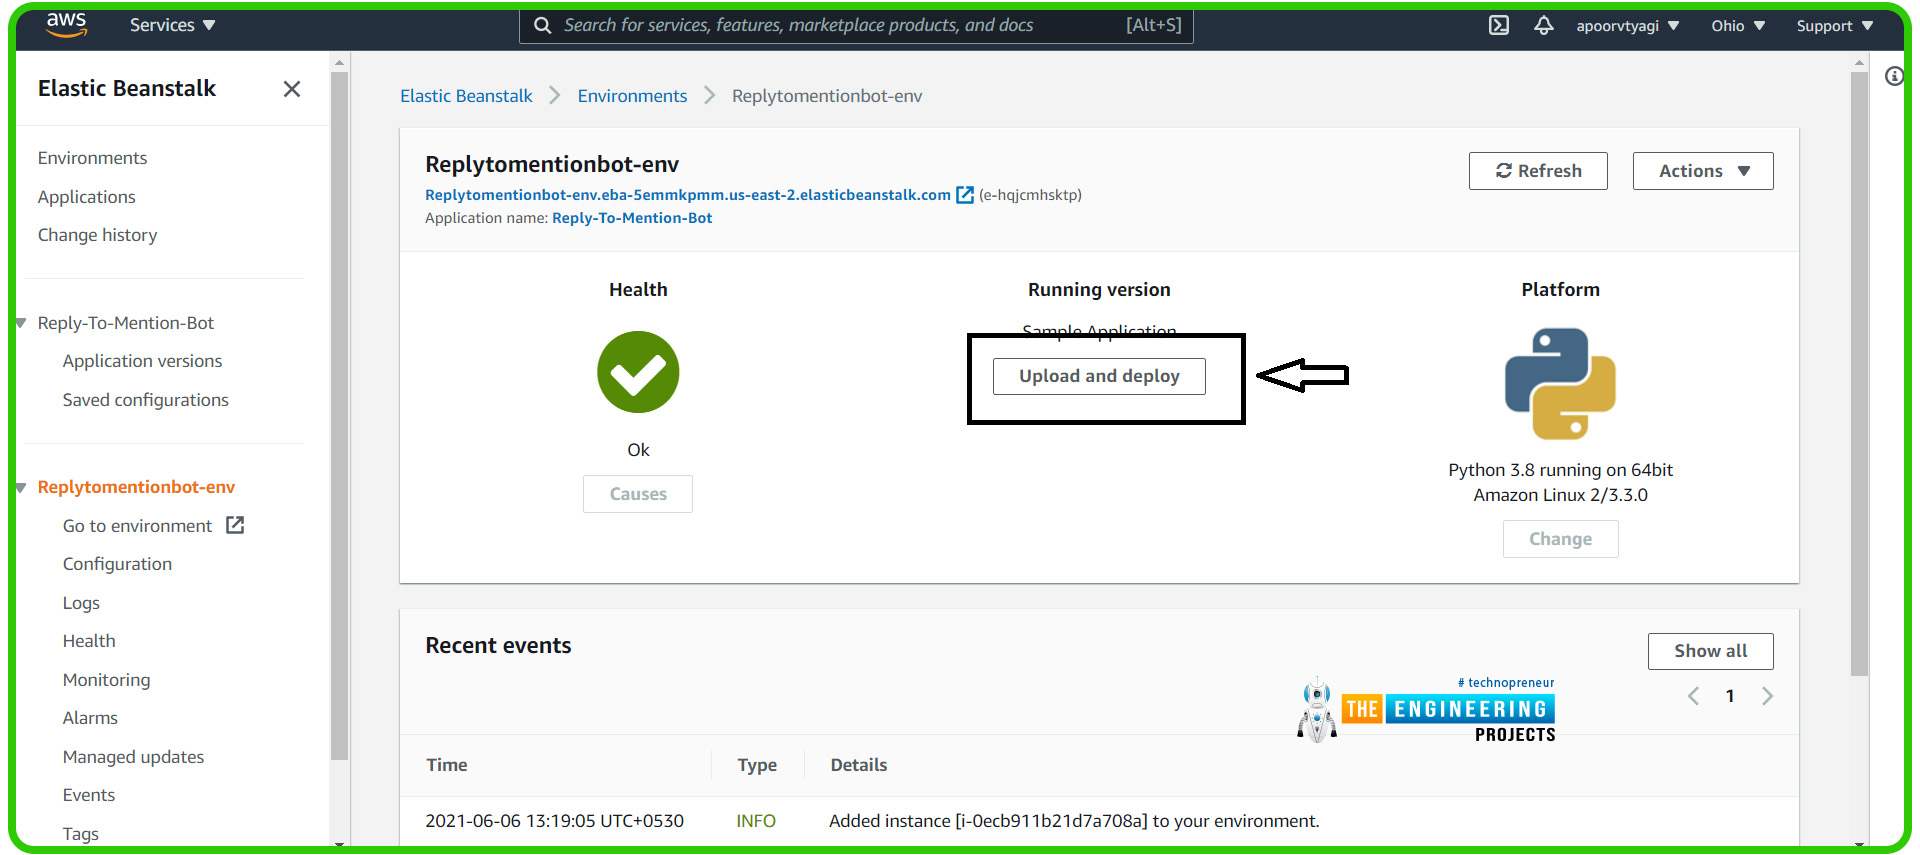
Once you've selected a zip archive, click "Deploy." When the health indicator becomes green, your app has been successfully launched. "Follow @zeal quote!" if all of the above steps have been followed correctly, they should appear on your website link.
Procedure for getting an error report in the system
The following steps will help you access the reports of your app in the event of an error:
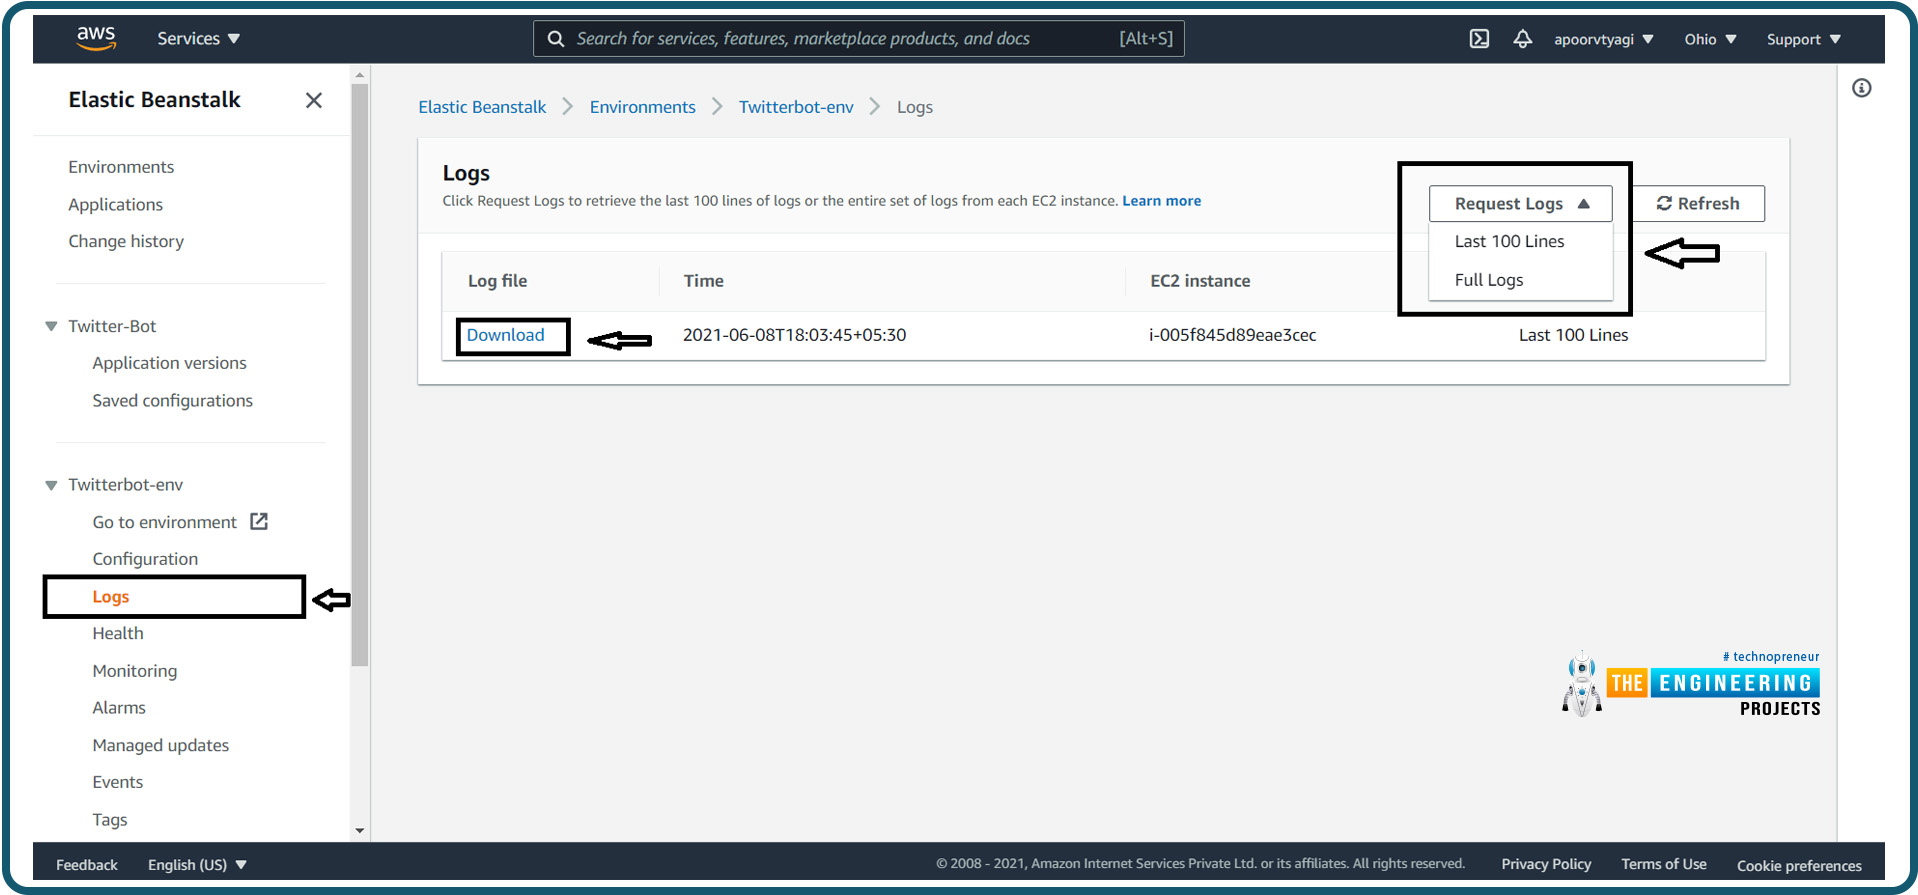
Logs can be seen under the "Environment" tab in the Dashboard.
After choosing "Request Log," you'll be taken to a new page with an options list. The last lines option is for the latest issues, but the "full log" option can be downloaded if you need to troubleshoot an older error.
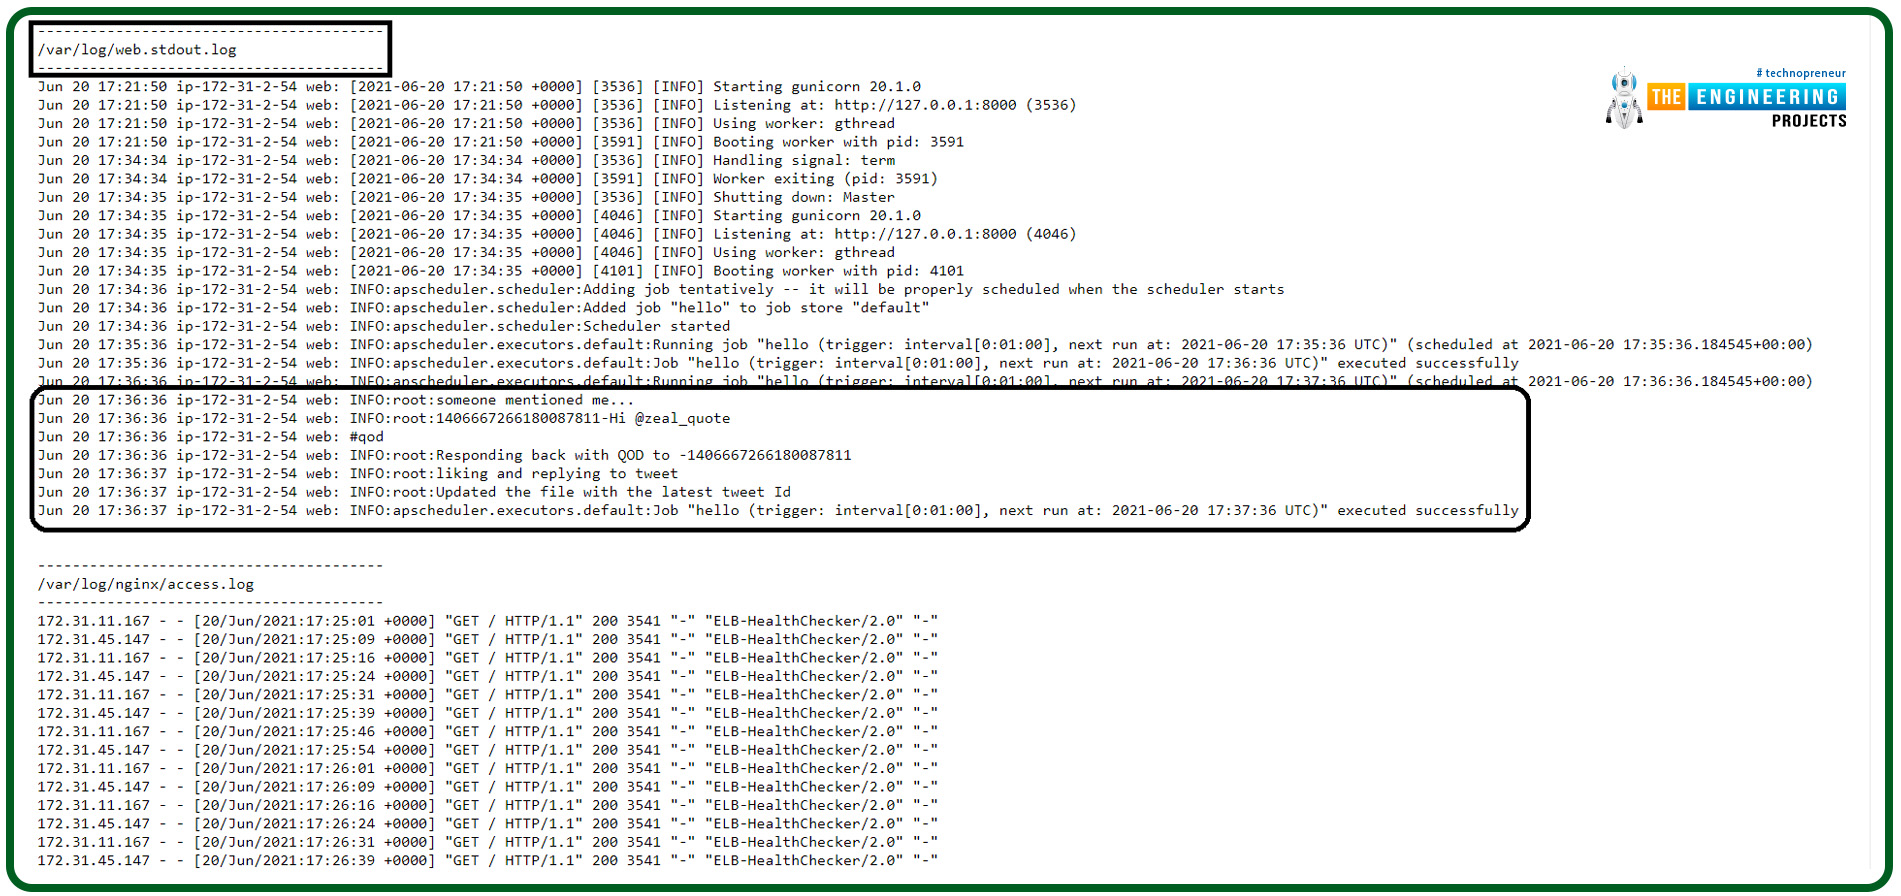
To see the most recent log line, click "Download," A new web page will open.
The Benefits and Drawbacks of Twitter Autonomy
Media platforms entrepreneurs benefit greatly from automation, which reduces their workload while increasing their visibility on Twitter and other media platforms. We may use various strategies to ensure that we're always visible on Twitter.
The benefits of automation are numerous.
There is still a need for human intervention with any automated process.
However, automation should only be a minor element of your total plan. An online presence that is put on autopilot might cause problems for businesses. If your campaign relies on automation, you should be aware of these problems:
Appearing like a robot
Engaging others is all about being yourself. The tweet was written by a person who was using a phone to produce it, based on the bad grammar and occasional errors. Those who aren't in the habit of writing their own Twitter tweets on the fly risk seeming robotic when they send out several automated messages. Tweets written in advance and scheduled to post at specific times appear disjointed and formulaic.
It is possible to appear robotic and dry if you retweet several automated messages. If your goal is to promote user interaction, this is not the best option.
The solution: Don't automate all of your messages. The platform can also be used for real-time interaction with other people. Whenever feasible, show up as yourself at gatherings.
Awful Public Relations Fumbles
When you plan a message to go out at a specific time, you have no idea what will be trending. If a tragic tale is trending, the tweet could be insensitive and out of context. On Twitter, there is a great deal of outrage. Because everyone is rightly concerned about their collective destiny, there is little else to talk about.
Then, in a few hours, a succession of your tweets surface. Images showing the group having a great time in Hawaii.
While it's understandable that you'd want to avoid coming across as uncaring or unaware in this day and age of global connectivity and quick accessibility of info from around the globe, it's also not a good look. Of course, you didn't mean it that way, but people's perceptions can be skewed.
What to do in response to this: Automatic tweets should be paused when there is a major development such as the one above. If you're already informed of the big news, it's feasible, but it may be difficult due to time variations.
Twitter automation allows your messages to display even if you are not into the service. Your or your company's identity will remain visible to a worldwide audience if you have a global target market.
If an automatic tweet appears before you can brush up on the latest events in your location, follow it up with a real one to show your sympathy. People find out about breaking news through Twitter, a global platform. Few of us have the luxury of remaining in our small worlds. While it's excellent to be immersed in your company's day-to-day operations, it's also beneficial to keep up with global events and participate in Twitter's wider discussion.
Absence of Reaction
People respond to your automatic tweet with congratulations, questions, or pointing out broken links that go unanswered because you aren't the one publishing it; a program is doing it in your stead, not you. Awkward.
Suppose something occurs in the wee hours of the morning. Another tweet from you will appear in an hour. After seeing the fresh tweet, one wonders if Mr. I-Know-It-All-About-Social-Media has even read his reply.
What to do in response to this situation: When you next have a chance to log on, read through the comments and answer any that have been left. Delayed responses are better than no responses. Some people don't understand that we're not all connected to our Twitter 24 hours a day.
Damage to the reputation of your company
As a means of providing customer support, Twitter has become increasingly popular among businesses. It's expected that social media queries will be answered quickly. Impatience breeds on the social web since it's a real-time medium where slow responses are interpreted as unprofessionalism.
On the other hand, Automatic tweets offer the idea that businesses are always online, encouraging clients to interact with the company. Customers may think they're being neglected if they don't hear back.
When dealing with consumer issues, post the exact hours you'll be available.
Vital Comments Left Unanswered
As soon as somebody insults you, the business, or even just a tweet, you don't want to let those unpleasant feelings linger for too long. We're not referring to trolls here; we're referring to legitimate criticism that individuals feel they have the right to express.
What should you do? Even though you may not be able to respond immediately, you should do so as soon as you go back online to limit any further damage.
Inappropriate actions like Favoriting and DMing might be harmful.
Individuals and organizations may use IFTTT recipes to do various tasks, like favorite retweets, follow back automatically, and send automated direct messages.
The unfortunate reality is that automation cannot make decisions on its own. In light of what people may write unpredictably, selecting key phrases and establishing a recipe for a favorite tweet that includes those terms, or even postings published by certain individuals, may lead to awkward situations.
Spam firms or individuals with shady history should not be automatically followed back. Additionally, Twitter has a cap on the number of followers you can follow at any given time. Spammy or pointless Twitter individuals should not be given your followers.
What should you do? Make sure you are aware of what others are praising under your name. Discontinue following anyone or any company that does not exude confidence in your abilities. In our opinion, auto-DMs can work if they are personalized and humorous. Please refrain from including anything that can be found on your profile. They haven't signed up for your blog's newsletter; they've just become one of your Twitter followers. Take action as a result!
Useful Benefits
Smaller companies and busy people can greatly benefit from Tweet automation. As a result of scheduling Twitter posts, your workload is reduced. A machine programmed only to do certain things is all it is in the end. But be careful not to be lulled into complacency.
Social media platforms are all about getting people talking. That can’t be replaced by automation. Whether you use automation or not, you must always be on the lookout for suspicious activity on your Twitter account and take action as soon as you notice it.
Conclusion
In this article, you learned how to build and publish a Twitter robot in Py.
Using Tweepy to access Twitter's API and configuring an amazon web service Elastic Beanstalk environment for the deployment of your Python application were also covered in this tutorial. As part of the following tutorial, the Raspberry Pi 4 will be used to build an alarm system with motion sensors.


