Hello readers, I hope you all are doing great.
ESP32 is a powerful chip for Internet of Things applications. This tutorial is also based on one of the ESP32 applications in the field of IoT.
Project Overview
In this tutorial, we will learn how to update LCD display with new data or input using a web server created with ESP32.

Fig. 1
To achieve the target, we will be using an HTML (Hypertext Markup Language) form to provide web input and then update the text displayed on LCD. The values or input received from the webserver will be further stored inside a variable in the code for further use (to display on LCD).
We have already posted a tutorial on LCD (Liquid Crystal Display) interfacing with ESP32. In that tutorial, we demonstrated how to display the hard-coded data (in the ESP32 module) on LCD.
ESP32 Web Server
A web server is computer software and hardware that accepts requests and responds to those requests using HTTP (Hypertext transfer protocol) or HTTPS (HTTP Secure) (HTTP is a network protocol for delivering online content to client user agents).
The ESP32 standalone web server is mobile-enabled and can be accessed from any device with a browser on the local network. B. Mobile phones, computers, laptops, tablets. However, all the devices must be connected to the same WiFi network to which the ESP32 is connected.
Software and Hardware requirements
- ESP32 development board
- 16*2 LCD display
- 10K trim-pot
- Breadboard or general-purpose PCB
- Connecting Wires
- Arduino IDE
- h, ESPAsynchWenServer.h header files
Interfacing16*2 LCD with ESP32
There are basically two ways to connect the ESP32 to a 16 * 2 LCD display.
- Interface with I2C adapter
- Direct connection without using I2C adapter.
Connecting an LCD display without an I2C adapter is cheap, but this method requires more connection cables and is complicated to implement. On the other hand, using an I2C adapter reduces complexity but increases cost. In this tutorial, you will connect the ESP32 directly without using an I2C adapter.

Table: 1

Fig. 2: ESP32 and 16*2 LCD interfacing
For more details on interfacing 16*2 LCD with ESP32, follow our previous tutorial at www.theengineeringprojects.com
Programming ESP32
Installing ESP32 board manager in Arduino IDE:
We are using Arduino IDE to compile and upload code into ESP32 module. You must have ESP32 board manager installed on your Arduino IDE to program ESP32 module. To know more about Arduino IDE and how to use it, follow our previous tutorial i.e., on ESP32 programming series. The link is given below:
https://www.theengineeringprojects.com/2021/11/introduction-to-esp32-programming-series.html
Installing necessary libraries:
ESP32 board manager doesn’t come with inbuilt libraries to create an asynchronous web server. So we need to download the library file from external sources and then add into Arduino IDE.
We need to install two library files:
- ESPAsynWebServer: Follow the link https://github.com/me-no-dev/ESPAsyncWebServer to download the respective library.
- AsyncTCP: You can download the AsyncTCP library from the following link https://github.com/me-no-dev/AsyncTCP
Once you have successfully downloaded the required libraries, next step it to install or add these libraries in Arduino IDE.
To add the libraries in Arduino IDE, go to Sketch >> Include Library >> Add .zip library and then select the downloaded library files.

Fig. 3: adding necessary libraries
Arduino IDE code
#include < WiFi.h >
#include < AsyncTCP.h >
#include < ESPAsyncWebServer.h >
#include < LiquidCrystal.h > // LCD header file
LiquidCrystal lcd (22, 23, 5, 18, 19, 21 );
AsyncWebServer server ( 80 );
// Enter your netwrok credentials
const char* ssid = "replace this with netwrok SSID";
const char* password = "replace this with Password";
const char* PARAM_INPUT_1 = "data_field1";
const char* PARAM_INPUT_2 = "data_field2";
// HTML web page to handle data input fields
const char index_html[] PROGMEM = R"rawliteral(
<!DOCTYPE HTML> <html> <head>
<title> ESP Input Form </title>
<meta name = " viewport" content="width=device-width, initial-scale=1 ">
<style>
html{ font-family: Times New Roman; display: inline-block; text-align: justify;}
</style>
</head> <body>
<form action="/get">
Data_field1: <input type="text" name="data_field1" >
<input type="submit" value="Post ">
</form> <br>
<form action="/get">
Data_field2: <input type="text" name="data_field2">
<input type="submit" value="Post">
</form><br>
</body></html>)rawliteral";
void notFound(AsyncWebServerRequest *request) {
request->send(404, "text/plain", "Not found");
}
void setup() {
Serial.begin(115200);
WiFi.mode(WIFI_STA);
WiFi.begin(ssid, password);
if (WiFi.waitForConnectResult() != WL_CONNECTED) {
Serial.println("WiFi Failed!");
return;
}
Serial.println();
Serial.print("IP Address: ");
Serial.println(WiFi.localIP());
//===set LCD
lcd.begin(16, 2);
lcd.clear();
lcd.setCursor(1,0);
server.onNotFound(notFound);
server.begin();
// Send web page with input fields to client
server.on("/", HTTP_GET, [](AsyncWebServerRequest *request)
{
request->send_P(200, "text/html", index_html);
});
server.on("/get", HTTP_GET, [] (AsyncWebServerRequest *request) {
String inputMessage;
String inputParam;
// GET input1 value
if (request->hasParam(PARAM_INPUT_1))
{
inputMessage = request->getParam(PARAM_INPUT_1)->value();
inputParam = PARAM_INPUT_1;
}
// GET input2 value
else if (request->hasParam(PARAM_INPUT_2))
{
inputMessage = request->getParam(PARAM_INPUT_2)->value();
inputParam = PARAM_INPUT_2;
}
else
{
inputMessage = " No message sent";
inputParam = " none";
}
Serial.println ( inputMessage );
delay( 1000);
lcd.clear();
lcd.print( inputMessage);
request-> send (200, "text/html", " HTTP GET request sent to ESP32("
+ inputParam + "): " + inputMessage +
"<br><a href=\"/\"> Back to Home Page </a>");
});
}
void loop( )
{
}
Code Description
- The first step is adding the necessary header files.
- Here we are using two libraries:
- The first one is WiFi.h, which is used to enable the Wi-Fi module and hence wireless network connectivity.
- LiquidCrystal.h is used to call the necessary functions required to interface and control LCD with ESP32.
- ESPAsynchWenServer library file is responsible for creating an asynchronous web server.
- AsyncTCP is used to enable a multi-connection network for ESP32 (Espressif’s) microcontroller unit.

Fig. 4: Adding header files
- Define the data and control pins (of 16*2 LCD) to be interfaced with ESP32.

Fig. 5: LCD data and control pins
- While creating a web server we also need to assign a port and usually port 80 is used for local web server.

Fig. 6: server port
- Enter the network credentials in place of SSID and PASSWORD.

Fig. 7: Enter Network credentials
- The next thing is the declaration of variables for input data fields.

Fig. 8
Creating HTML Form
- !DOCTYPE html><html> is used to describe/indicate that we are transmitting HTML, this command should always be the first thing we send.
- <title> tag is used to write a title for the web page.
- The next line in the code is used to make the web page responsive in any web browser.
- The <style> tag is used to style the webpage, which includes the type of font, alignment, display etc.

Fig. 9: HTML web page
- Next comes the HTML form for user input. We are going to create two data input fields for user input and each filed is having a Post button to send the new data string to the ESP device and the variable declared to store the input will be updated.
- <form> tag is used to create the HTML form. Here we are creating an HTML form with two input fields namely the Data_field2 and Data_filed2 and each field is having individual Post buttons to post the input from the web server to the client.
- The action attribute is used to specify, where to send the data input provided in the input data fields after pressing the post
- After pressing the post button a new web page will open, indicating the status whether the input string is successfully posted or not.

Fig. 10: HTML form for data input
- The two attributes, type and value specifies a button and the text on the button respectively.

Fig. 11: Post button.
- If we make an invalid request, the notFound() function will be called.
Setup
- Initialize the serial monitor at 115200 baud rate for debugging purpose.
- begin() function is used to initialize the Wi-Fi module with Wi-Fi credentials used as arguments.
- The While loop will continuously run until the ESP32 is connected to Wi-Fi network.

Fig. 12
- If the device is connected to local Wi-Fi network then print the details on serial monitor.
- localIP() function is used to fetch the IP address.
- Print the IP address on serial monitor using println() function.

Fig. 13: Fetch/obtain the IP adrress
- Initialize the 16*2 LCD using begin() function.
- Clear the previous data from the LCD before printing or displaying the new one using clear() function.
- Set the cursor position at row 1 and column 0 using setCursor() function.
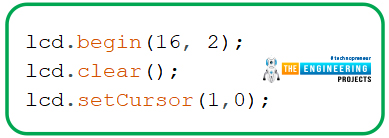
Fig. 14: Set 16*2 LCD
- begin() function is used to initialize the web server once ESP32 is connected with the Wi-Fi network.

Fig. 15: Initialize the server
Handling HTTP GET requests
- The next part in the programming includes handling of HTTP GET requests.
- When we access the route URL, we send the web page to client along with the data input fields.
- We have defined a variable namely index_html to save the HTML text.

Fig. 16: Send web page to client
- Next task is handling what happens when device receive a request on the /get routes.
- To save input values, we have created two variables: inputPram and

Fig. 17
- Next we need to check if HTTP get request contains the Data_input1 and Data_input1 These fields values are saved on PRAM_INPUT_1 and PRAM_INPUT2.
- If the HTTP GET request contains inputs, then the inputMessage1 will be set to the value inserted in the data_field1.

Fig. read the input from HTML form
- Else there will be no input for inputMessage.
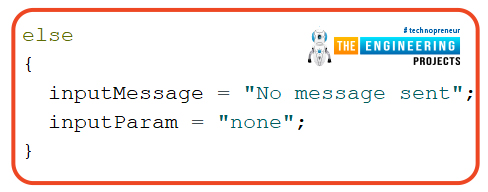
Fig. 18
- Print the input value saved on variable inputMessage using Serial.print command.
- clear() command is used to clear the previous data printed on LCD.
- New data or message received from the web server will be printed on the LCD display using print() function.
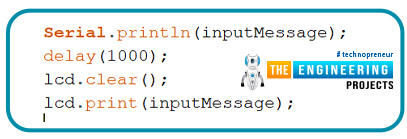
Fig. 19
- After pressing the post button a new web page will open, indicating the status whether the input string is successfully posted or not.

Fig. 20
Testing
- Open your Arduino IDE and paste the above code.
- Change the network credentials, that is the SSID and PASSWORD as per you network setup.
- Compile and upload the code into ESP32 development board.
- Before uploading the code make sure that you have selected the correct development board and COM port.
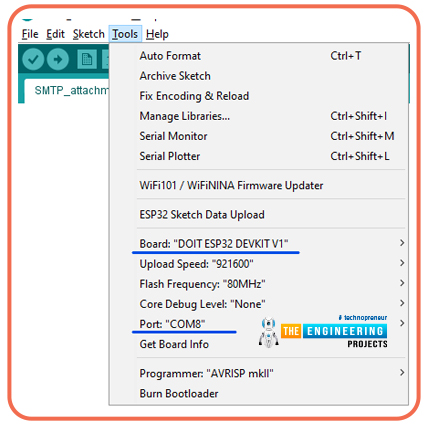
Fig. 21: Select development board and COM port
- Once the code is uploaded successfully, open the Serial monitor and select the 1115200 baud rate (as per your code instructions).
- Make sure Wi-Fi to which your ESP device is supposed to connect is ON.
- Once your ESP32 is connected to the internet, the IP address of the device will be printed on the Serial monitor.
- Copy the IP address.
- Open the browser and paste the IP address and press
- A web page with HTML form containing two input fields will open as shown below:
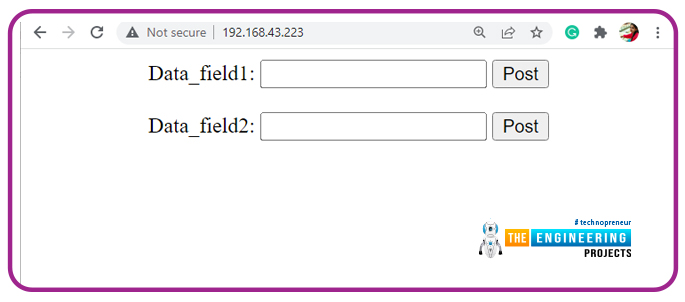
Fig. 22: web Page
- Enter the text in the HTML form you want to be printed on on the LCD display.
- Press the Post

Fig. 23: Enter the Input to ESP32
- After pressing the post button a new web page will open, indicating the status whether the input string is successfully posted or not.

Fig. 24: Input Updated

Fig. 25: IP address and Web Input on serial monitor.

Fig. 26: String input received from Web server, printed on LCD
This concludes the tutorial. We hope you found this of some help and also hope to see you soon with a new tutorial on ESP32.


 ESP32 Projects
 ahmedyasin
 0 Comments


 2.3k
2.3k
 953
953
 921
921
 2.1K
2.1K

