USART is the acronym for Universal Synchronous-Asynchronous Receiver-Transmitter, and is the advancement of the old UART that was unable to handle synchronous communications; in computers, it deals with the management of communication via the RS-232 interface.
Generally, in the communication between devices, there is a transmitter and receiver that can exchange data bidirectionally, thus it happens for example in the communication between the microcontroller and third-party peripherals.

| Where To Buy? | ||||
|---|---|---|---|---|
| No. | Components | Distributor | Link To Buy | |
| 1 | STM32 Nucleo | Amazon | Buy Now | |
What is Serial Communication?
In serial communications, the transmitting device sends information (bitstream) through a single channel one bit at a time. Serial communications are distinguished from parallel communications where the bitstream is sent over several dedicated lines altogether. Over the years, serial communication has become the most used as it is more robust and economical. On the other hand, serial communication requires, compared to the parallel case, a more complex management and control architecture, think for example how a trivial loss of a bit during a communication could irreparably corrupt the content of the final message. To this end, various communication protocols have been introduced over the years in order to improve speed, reliability and synchronization. In detail, three different communication modes can be found: synchronous, asynchronous, and isochronous.
Synchronous Mode
- In synchronous communication, the transmitter sends the data one bit at a time at a certain frequency (constant frequency), so you have the channel on which the data travels and another on which a clock signal travels. Thanks to the clock signal, the receiving device (receiver) knows when one bit ends and another start, or rather a bit starts and ends on a rising or falling edge of the clock signal.

Asynchronous Mode
- In asynchronous communication, there is no channel dedicated to the clock signal so there is no type of synchronization between receiver and transmitter.
- When the transmitter is ready it starts to send the bits serially which are read directly by the receiver.
- The sent packet always contains a start bit, which signals the start of transmission to the receiver, the start of transmission.
- Generally, the sent packet is made up of 8 bits plus any parity bit which has the purpose of verifying the correctness of the data transmitted and of the stop bits that signal the end of the packet to the receiver.
- In the case of sending a large flow of data, this type of communication is less efficient than synchronous as bits that do not contain information such as start and stop bits are sent several times.

Isochronous Mode
- Isochronous mode is a hybrid mode, that is obtained by making a synchronous device communicate with an asynchronous one, this can only happen under certain conditions.
UART communication on STM32 Microcontrollers using HAL
The microcontrollers from the ST family are equipped with at least one USART, for example, the NUCLEO-L053R8 Board has two (USART1 and USART2). It is possible to configure the dedicated pins easily directly from the STCUBE tool, as we will see in the example, and the dedicated HAL libraries allow you to easily write functions and algorithms to transmit or receive data. There are three ways to exchange data via serial port in STM32, which are:- Polling Mode
- Interrupt Mode
- DMA Mode
Polling Mode
- In polling mode, also called blocking mode, the application waits for the data transmission and reception. This is a simple way to communicate between devices when the bit rate is not very low, for example when we can debug the board and we want to display the result on screen console.
- HAL_UART_Transmit(UART_HandleTypeDef *huart, uint8_t *pData, uint16_t Size, uint32_t Timeout);
- HAL_UART_Receive(UART_HandleTypeDef *huart, uint8_t *pData,uint16_t Size, uint32_t Timeout).
Interrupt Mode
- In interrupt mode, also called non-blocking mode, in this way the application waits the end of transmission or reception. it is used when the transmission is not used continuously with respect to the activity of the microcontroller.
- HAL_UART_Transmit_IT(UART_HandleTypeDef *huart, uint8_t *pData, uint16_t Size, uint32_t Timeout);
- HAL_UART_Receive_IT(UART_HandleTypeDef *huart, uint8_t *pData,uint16_t Size, uint32_t Timeout).
DMA Mode
- DMA mode is the best way the exchange data, especially when we want to exchange data fastly and continuously that often require access to memory.
- HAL_UART_Transmit_DMA(UART_HandleTypeDef *huart, uint8_t *pData, uint16_t Size, uint32_t Timeout);
- HAL_UART_Receive_DMA(UART_HandleTypeDef *huart, uint8_t *pData,uint16_t Size, uint32_t Timeout).
Using USART in Polling Mode for STM32
In this example, we will write a project using USART in a polling mode to transmit text on the laptop monitor. To do that we need:- NUCLEO-L053R8 board.
- Windows Laptop
- The ST-Link USB connector needs both for serial data communications, and firmware downloading and debugging on the MCU.
- A Type-A to mini-B USB cable must be connected between the board and the computer.
Creating New Project in STM32CubeMX
Now we create a new STM32CubeMX project with the following steps:- Select File > New project from the main menu bar. This opens the New Project window.
- Go to the Board selector tab and filter on STM32L0 Series.

- Select NUCLEO-L053R8 and click OK to load the board within the STM32CubeMX user interface.

- Then the tool will open the pinout view.

- Select Debug Serial Wire under SYS, for do it click on System Core (on the top right) and then select SYS and finally flag on “Debug Serial Wire”.

- Select Internal Clock as clock source under TIM2 peripheral. To do this click on Timers and then select TIM2. Now go to clock source and select through the drop-down menu “internal clock”.

- Select the Asynchronous mode for the USART2 peripheral. Click on connectivity and select USART2. Now go to Mode and select through the drop-down menu “asynchronous”.

- Check that the signals are properly assigned on pins :
- SYS_SWDIO on PA13
- TCK on PA14
- USART_TX on PA2
- USART_RX on PA3
- Go to the Clock Configuration tab and no change the configuration in order to use the MSI as input clock and an HCLK of 2.097 MHz.

- Come back to Pinout&Configuration and select Connectivity -> USART2 to open the peripheral Parameter Settings window and set the baud rate to 9600. Make sure the Data direction is set to “Receive and Transmit”.

- Select Timers -> TIM2 and change the prescaler to 16000 and the Counter Period to 1000.

- Go to NVIC Settings tab and flag TIM2 global interrupt to enable the interrupt related to TIM2.

- In the Project Manager tab, configure the code to be generated and click OK to generate the code.


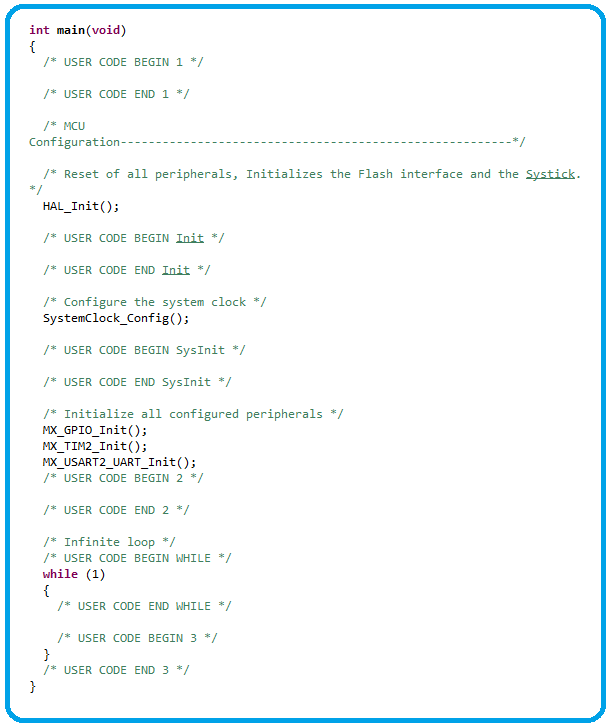
- Our project has been initialized by STCubeMX. In /UsartEx/Core/Src/main.c we will find our main where we will write the main body of our program.

Understanding STM32 Code for Serial Communication
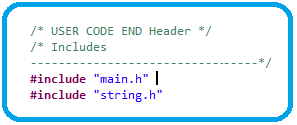
Now let’s see what the code generator did:- First of all, we find the “Include” section we can add the library needed.

- In our case, we can add also a string.h library to handle and send text data.
- In “Private variables” has been defined two private variables htim2 and huart2; - htim2 as the first parameter an instance of the C struct TIM_HandleTypeDef; -huart2 as first parameter an instance of the C struct UART_HandleTypeDef.
/* Private variables ---------------------------*/ TIM_HandleTypeDef htim2; UART_HandleTypeDef huart2;
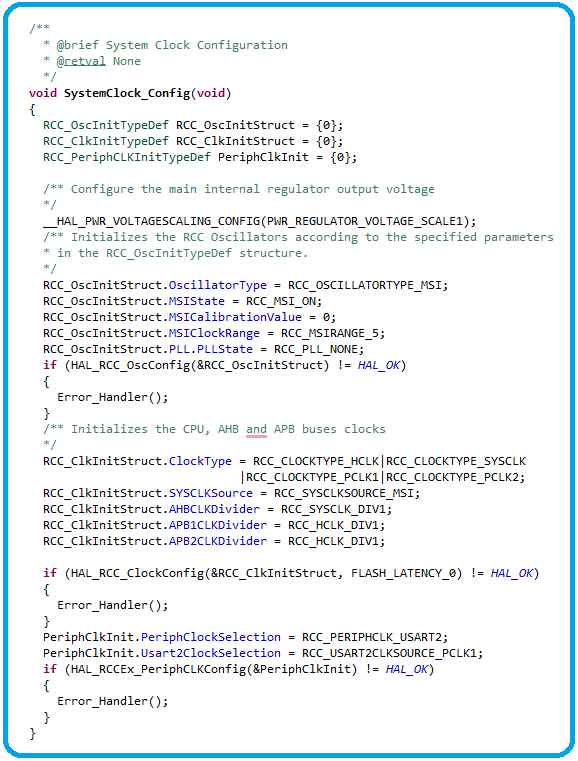
- In “Private function prototypes” we find the prototype of function to initialize the System Clock, GPIO, timer and peripheral:
/* Private function prototypes -----------------------------------------------*/ void SystemClock_Config(void); static void MX_GPIO_Init(void); static void MX_TIM2_Init(void); static void MX_USART2_UART_Init(void);
- This function has been generated automatically by STCubeMx with the parameter selected as shown below:

- It is important to highlight that the WordLength parameter of huart2 is UART_WORDLENGTH_8B, since we are sending 8-Bit ASCII chars.
- We can easily adjust the baud rate with the BaudRate parameter.
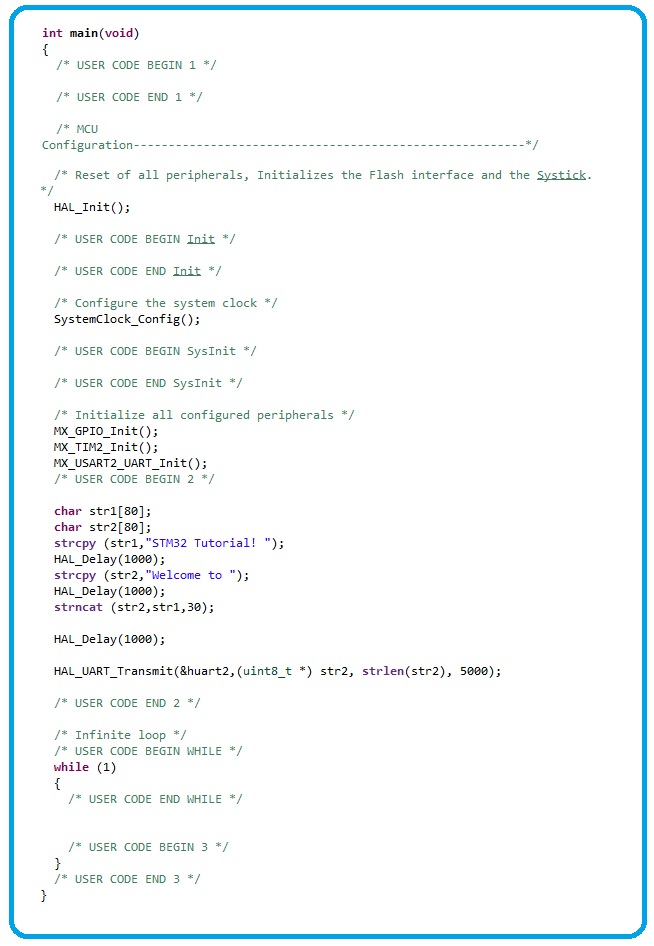
- Now we are ready to write our code in main():

- As shown in the code below, two strings, str1 and str2, are declared. Then the string concatenation function ( strncat() ) is used and finally, the HAL_UART_Transmit function is used to display them on the monitor through UART2.

- Compile the project within IDE.
- Download it to the board.
- Run the program.
- On the computer, check the virtual communication port used by ST Microelectronics from the Device Manager window.

- To configure Tera Term to listen to the relevant virtual communication port, adjust the parameters to match the USART2 parameter configuration on the MCU.

- The CoolTerm window displays a message coming from the board at a period of a few seconds.


