Interfacing of Arduino with 74HC595 & 74HC165
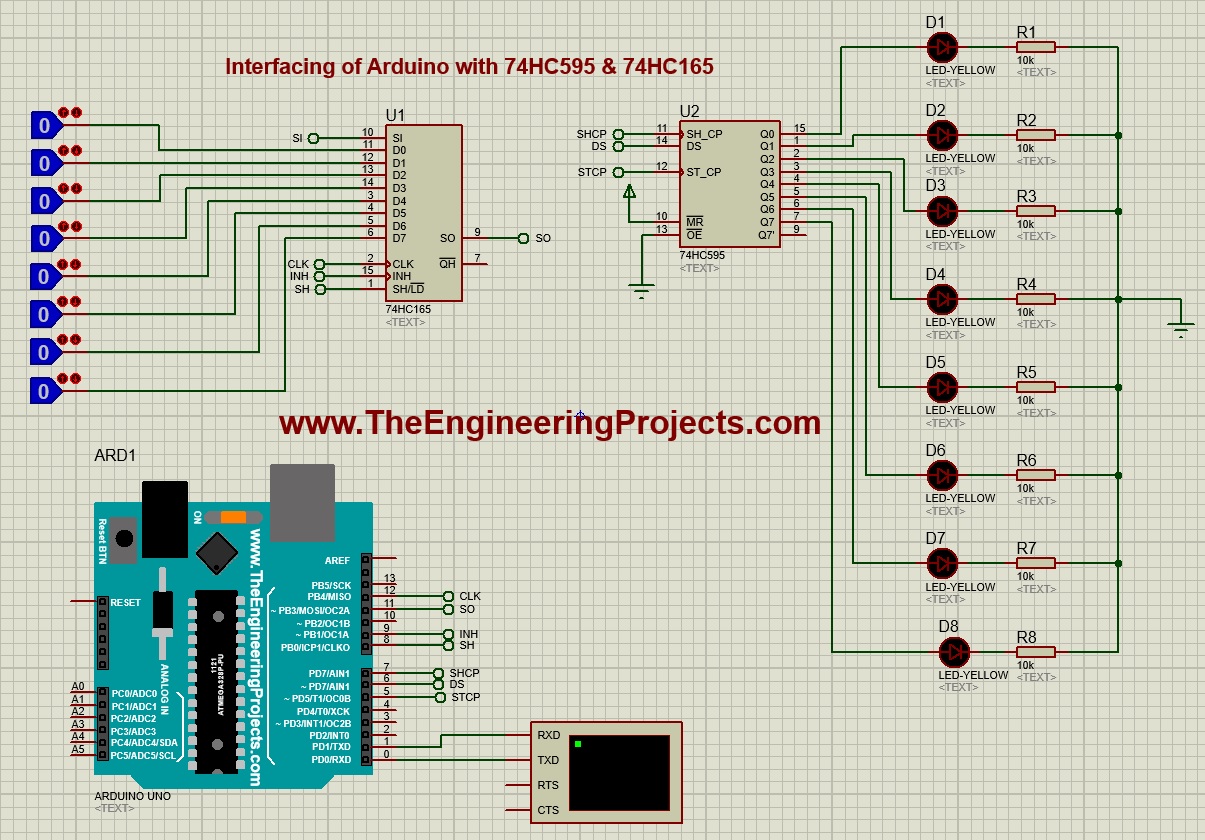
- First of all, you need to design a Proteus Simulation as shown in below figure:

- As you can see in above figure, I have used 74HC165 & 74HC595 and interfaced its pins with Arduino UNO.
- I could use same clock for these shift registers but it would have made the code quite complex.
- That's why I have used separate clock pins and I have used the below code to reflect the input on output.
#define NUMBER_OF_SHIFT_CHIPS   1
#define DATA_WIDTH   NUMBER_OF_SHIFT_CHIPS * 8
#define TotalIC 2
#define TotalICPins TotalIC * 8

int LoadPin    = 8;
int EnablePin  = 9;
int DataPin    = 11;
int ClockPin   = 12;

int RCLK = 5;
int SER = 6;
int SRCLK = 7;

unsigned long pinValues;
unsigned long oldPinValues;
boolean Data[TotalICPins];

void setup()
{
    Serial.begin(9600);

    pinMode(LoadPin, OUTPUT);
    pinMode(EnablePin, OUTPUT);
    pinMode(ClockPin, OUTPUT);
    pinMode(DataPin, INPUT);

    digitalWrite(ClockPin, LOW);
    digitalWrite(LoadPin, HIGH);
    Serial.println("Visit us at www.TheEngineeringProjects.com");
    Serial.println();
    pinMode(SER, OUTPUT);
    pinMode(RCLK, OUTPUT);
    pinMode(SRCLK, OUTPUT);

    ClearBuffer();

    pinValues = read_shift_regs();
    print_byte();
    oldPinValues = pinValues;
}

void loop()
{
    pinValues = read_shift_regs();

    if(pinValues != oldPinValues)
    {
        print_byte();
        oldPinValues = pinValues;
    }

}

unsigned long read_shift_regs()
{
    long bitVal;
    unsigned long bytesVal = 0;

    digitalWrite(EnablePin, HIGH);
    digitalWrite(LoadPin, LOW);
    delayMicroseconds(5);
    digitalWrite(LoadPin, HIGH);
    digitalWrite(EnablePin, LOW);

    for(int i = 0; i < DATA_WIDTH; i++)
    {
        bitVal = digitalRead(DataPin);
        bytesVal |= (bitVal << ((DATA_WIDTH-1) - i));

        digitalWrite(ClockPin, HIGH);
        delayMicroseconds(5);
        digitalWrite(ClockPin, LOW);
    }

    return(bytesVal);
}

void print_byte() {
  byte i;

  Serial.println("*Shift Register Values:*\r\n");

  for(byte i=0; i<=DATA_WIDTH-1; i++)
  {
    Serial.print("P");
    Serial.print(i+1);
    Serial.print(" ");
  }
  Serial.println();
  for(byte i=0; i<=DATA_WIDTH-1; i++)
  {

    Serial.print(pinValues >> i & 1, BIN);
    Data[i] = pinValues >> i & 1, BIN;
    //if(BinaryValue == 1){Data[i] = HIGH;}
    //if(BinaryValue == 0){Data[i] = LOW;}
    UpdateData();
    if(i>8){Serial.print(" ");}
    Serial.print("  ");

  }

  Serial.print("\n");
  Serial.println();Serial.println();

}

void ClearBuffer()
{
    for(int i = TotalICPins - 1; i >=  0; i--)
    {
       Data[i] = LOW;
    }
    UpdateData();
}

void UpdateData()
{
   digitalWrite(RCLK, LOW);
   for(int i = TotalICPins - 1; i >=  0; i--)
   {
        digitalWrite(SRCLK, LOW);
        digitalWrite(SER, Data[i]);
        digitalWrite(SRCLK, HIGH);

  }
  digitalWrite(RCLK, HIGH);
}
- In the above code, I have used Number_of_Shift_Chips 1 and it means I am using 1 chip each, so in total 2 chips.
- Now get hex file from Arduino software and upload it in your Proteus software.
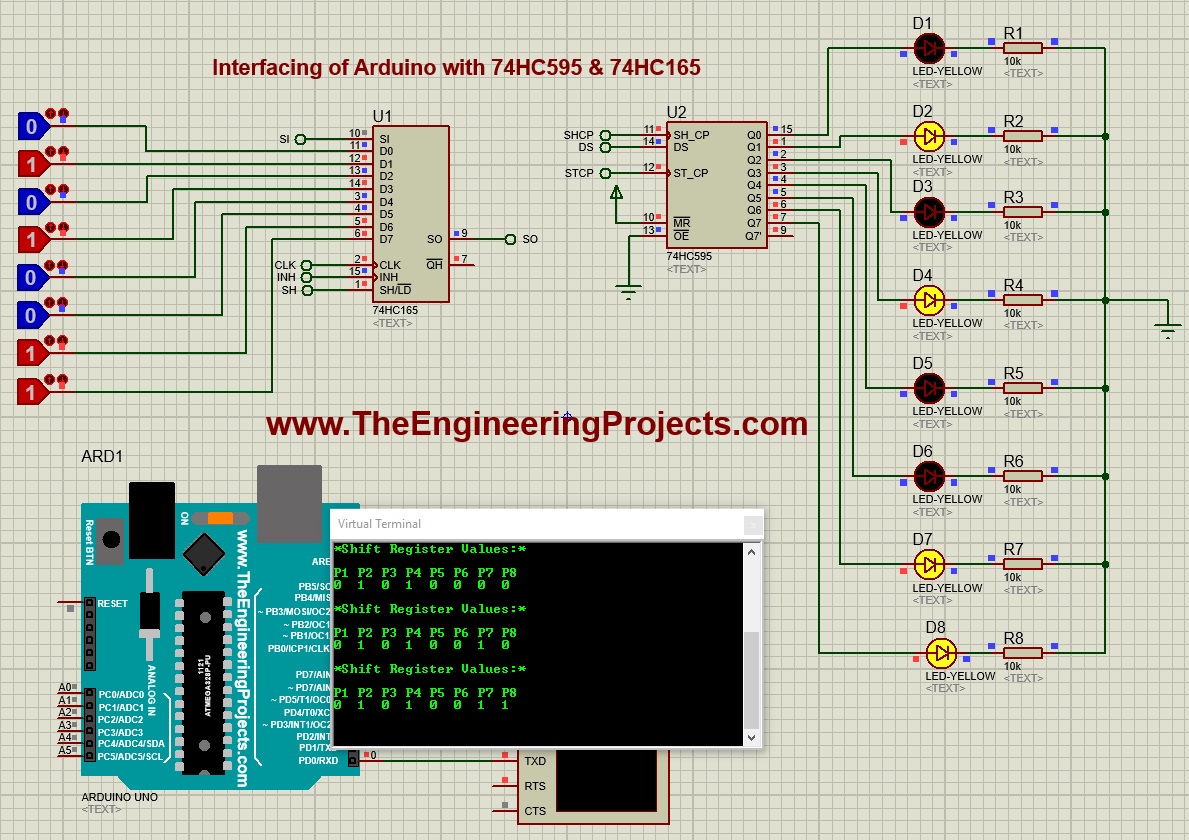
- Run your simulation and if everything goes fine then you will get something as shown in below figure:

- You can see in above figure that all those LED outputs are ON which has HIGH inputs.
- I have also attached a Virtual Terminal with Arduino to have a look at the input bits.
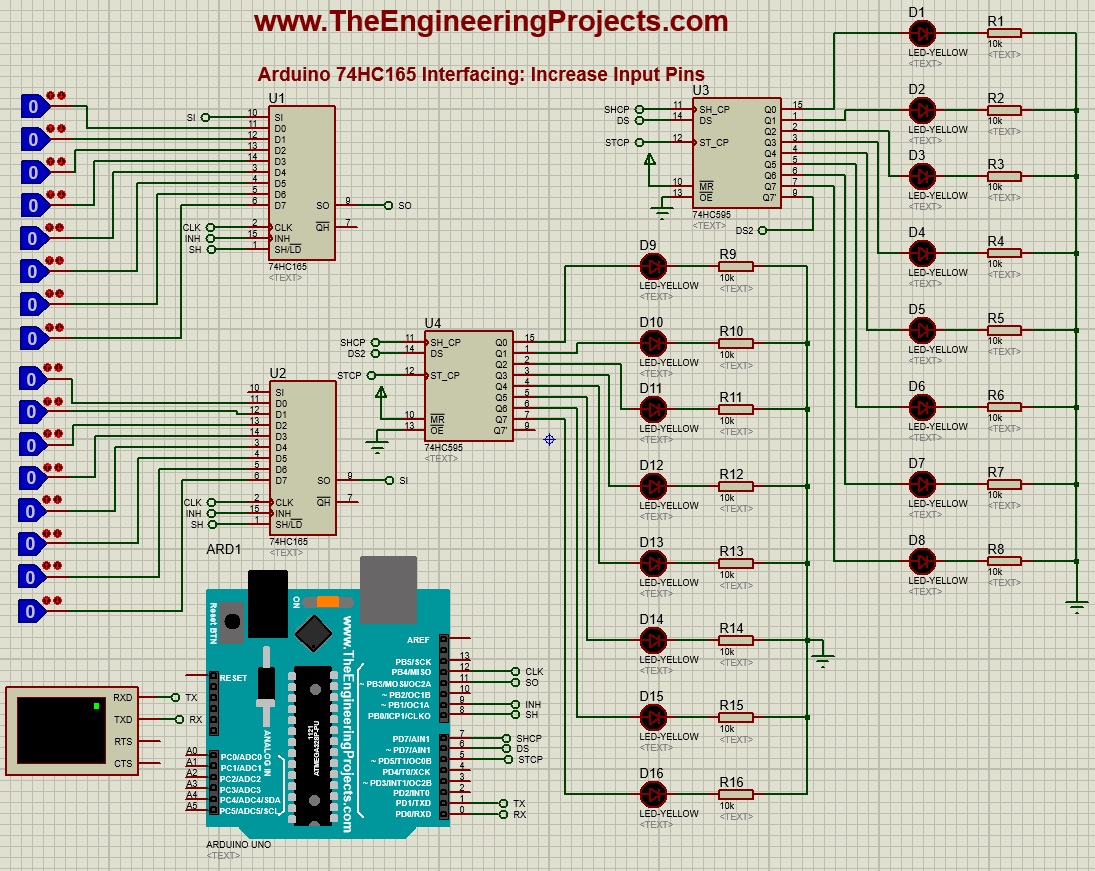
- Now let's add 2 chips of 74HC165 and 74HC959, so design a simple simulation as shown in below figure:

- Now in your above code change the Number of Shift chips from 1 to 2, as now we are using 2 chips each.
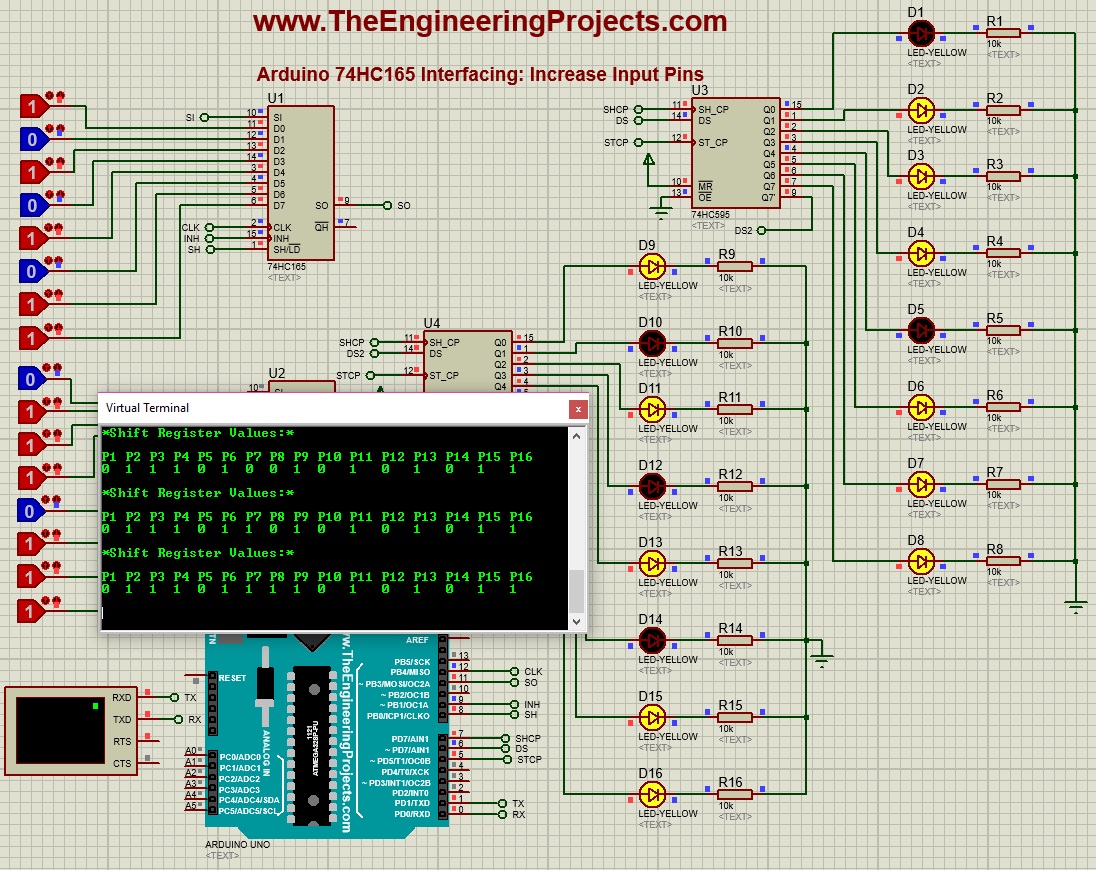
- Upload your hex file and if everything goes fine then you will get similar results:

- So, that's how you can easily increase input and output pins of Arduino UNO.
- I have just designed a simple code but you can work on it and can control these inputs separately as well.
- You can interface different digital sensors on these input pins and can control motors, relays, solenoids etc. at output pins.
- You can download both of these Proteus Simulations along with Arduino code by clicking the below button, but I would suggest you to dwsign it on yoru own so that you could learn from mistakes.
[dt_default_button link="https://theengineeringprojects.com/ArduinoProjects/Interfacing%20of%20Arduino%20with%2074HC595%20&%2074HC165.zip" button_alignment="default" animation="fadeIn" size="medium" default_btn_bg_color="" bg_hover_color="" text_color="" text_hover_color="" icon="fa fa-chevron-circle-right" icon_align="left"]Download Proteus Simulation & Arduino Code [/dt_default_button]
So, that was all about Interfacing of Arduino with 74HC595 & 74HC165. I hope you can now easily simulate it. If you have any questions then ask in comments and I will try my best to resolve them. Thanks for reading. Take care !!! :)


