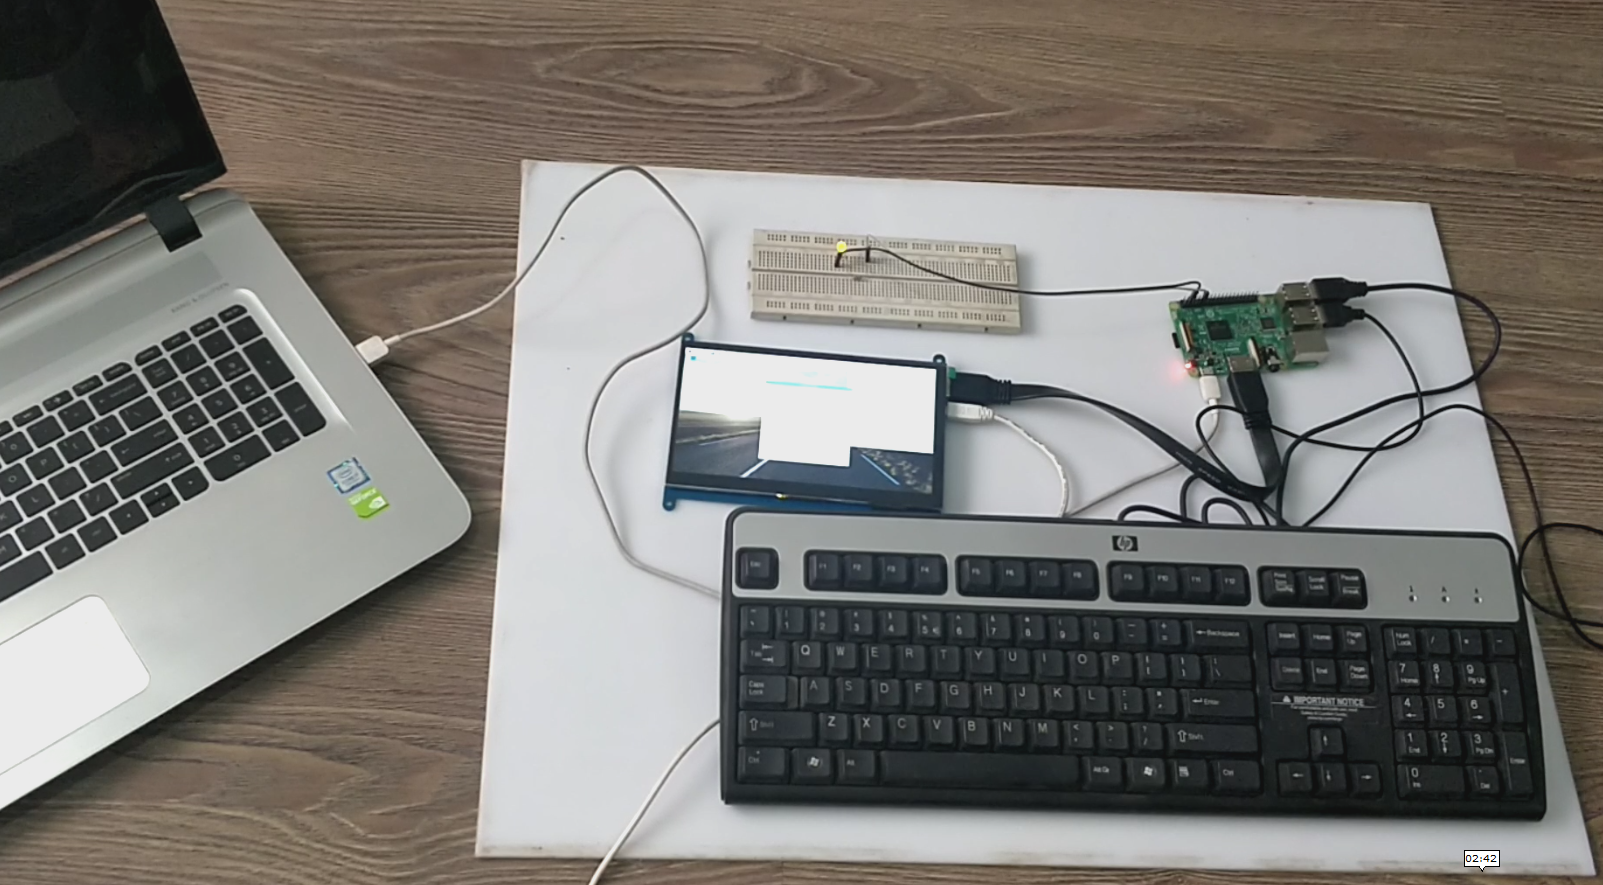
LED Blinking using Raspberry Pi 3
- On our previous tutorials, we have already set up our computer with raspberry Pi 3. If you haven't read those articles then you must go through them first.
- So, here's our final setup as shown in below figure:
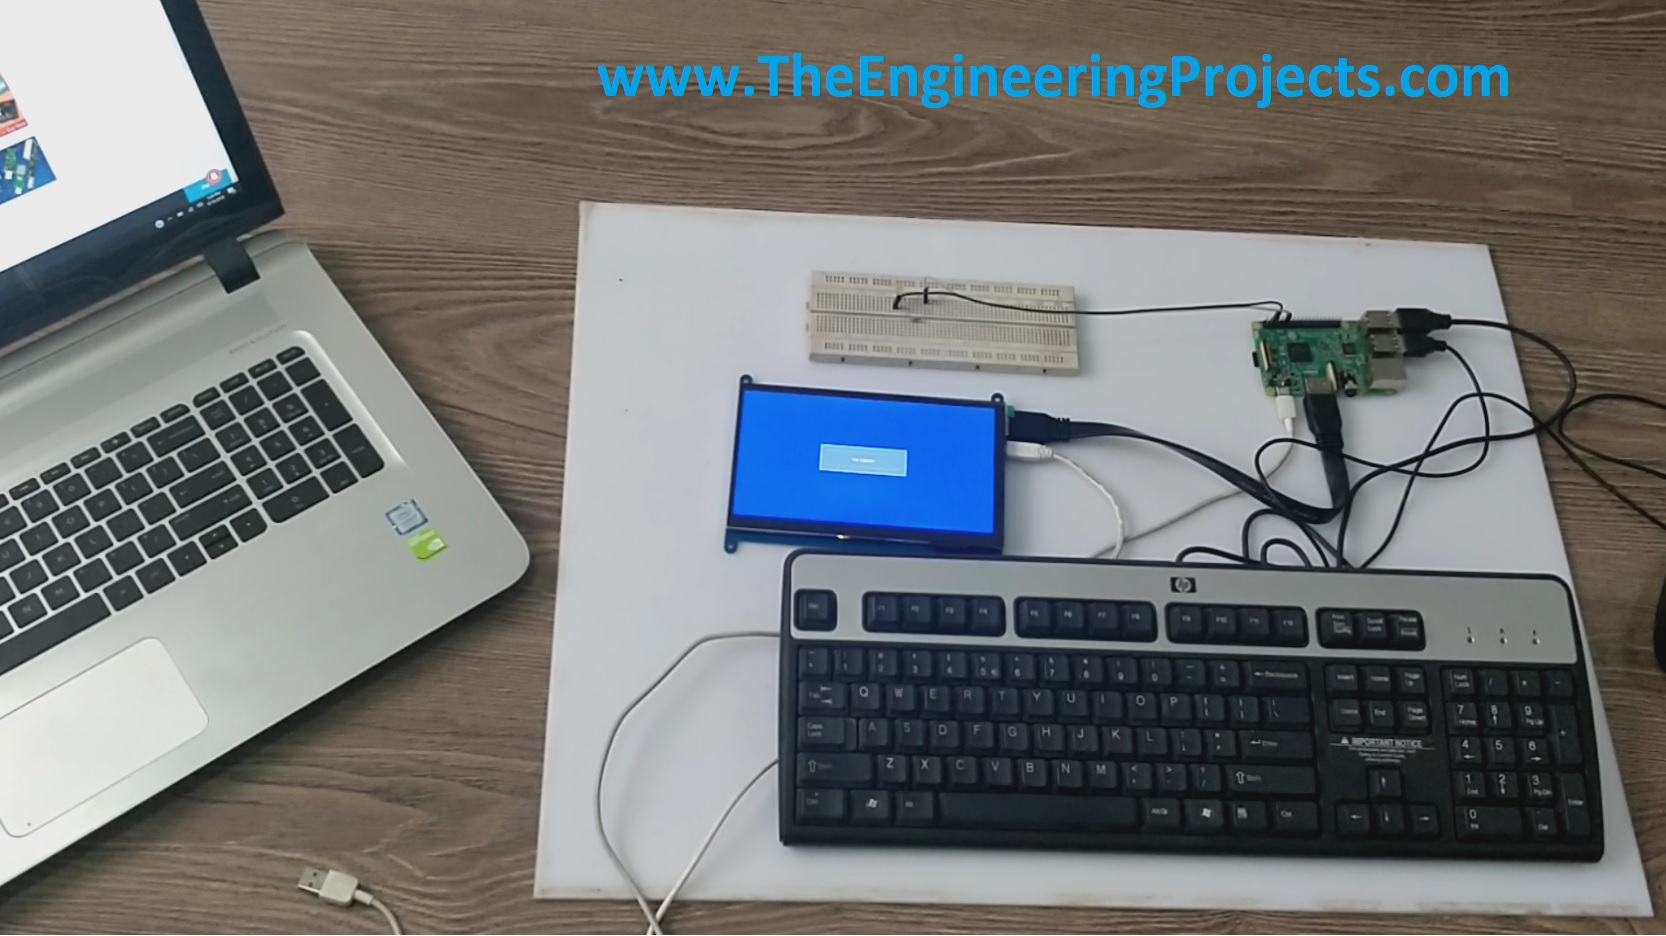
- You must have noticed in above figure that we have an extra Bread Board, which was not present in our Previous Setup.
- I have placed an LED on this Bread board and here's its circuit diagram:
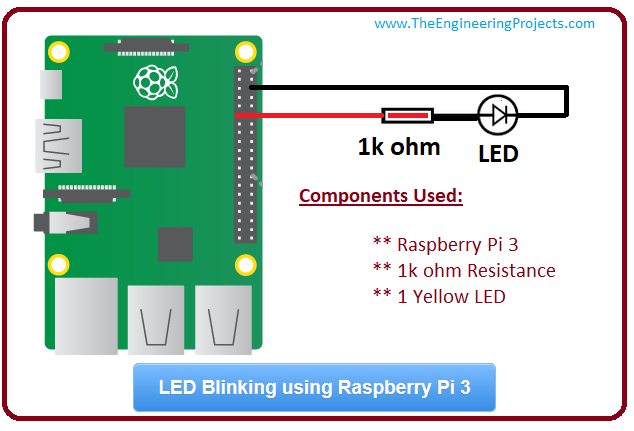
- I would recommend you to use Bread Board but if you can manage to connect legs of resistor and LED then that's fine as well. :P
- Here's a close look of this LED placed in Bread Board.

- Now we have successfully designed our simple electronic circuit.
- It's time to start moving towards coding part.
- We are gonna use Python language that's why I am gonna open pre installed tool in raspbian named as Python 3 (IDLE).
- We are gonna use this environment to design our python code.
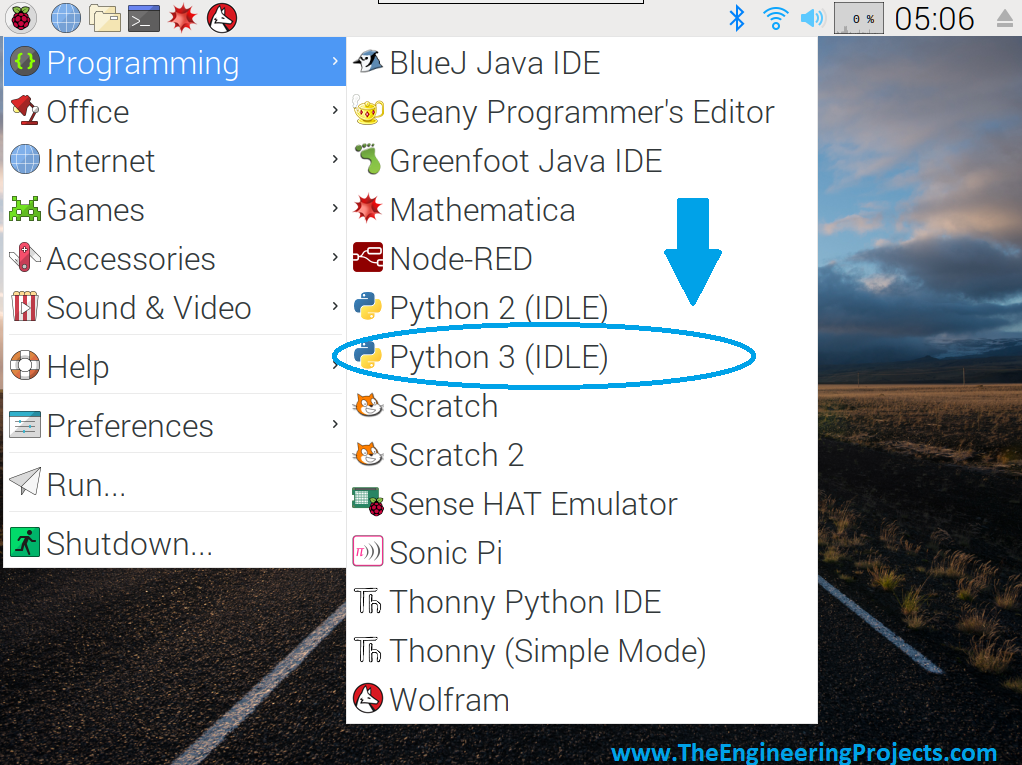
- So click on your Menu > Programming > Python 3 (IDLE), as shown in below figure:
- Python 3 will open up, so click on File and then New File to create a seperate File for this project, as shown in below figure:
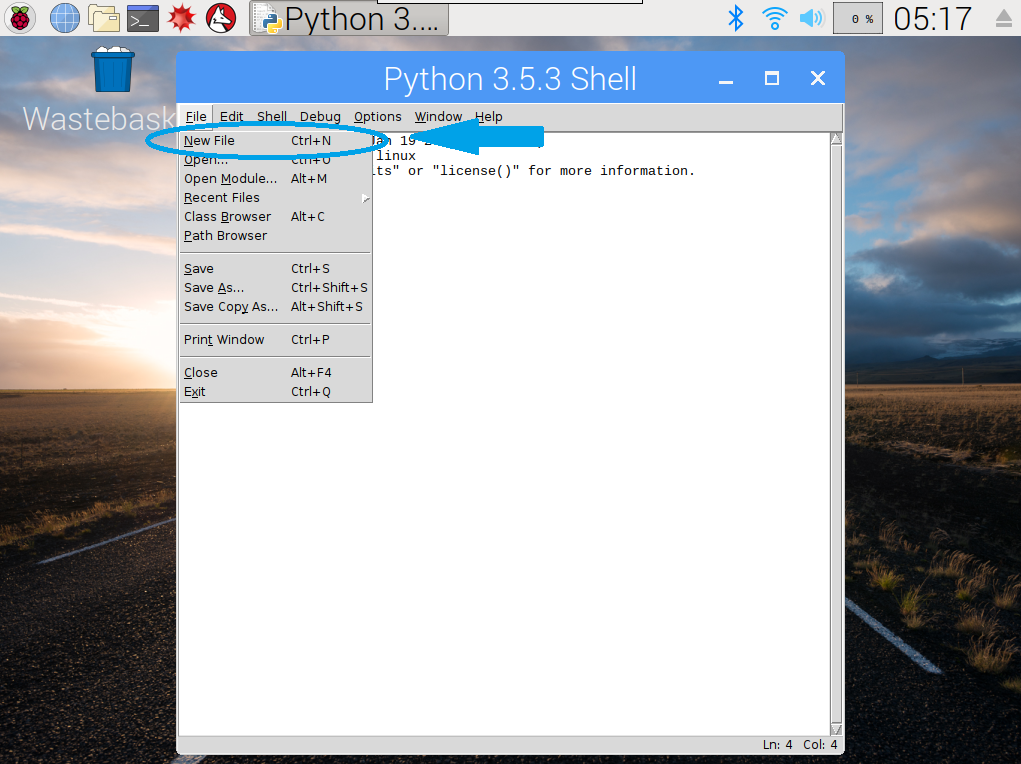
- You can give a name to this New File, as I have give it Blink.py , .py is the extension for python files.
- In this Blink.py, we are gonna write our code, which will blink the LED, here's our code:
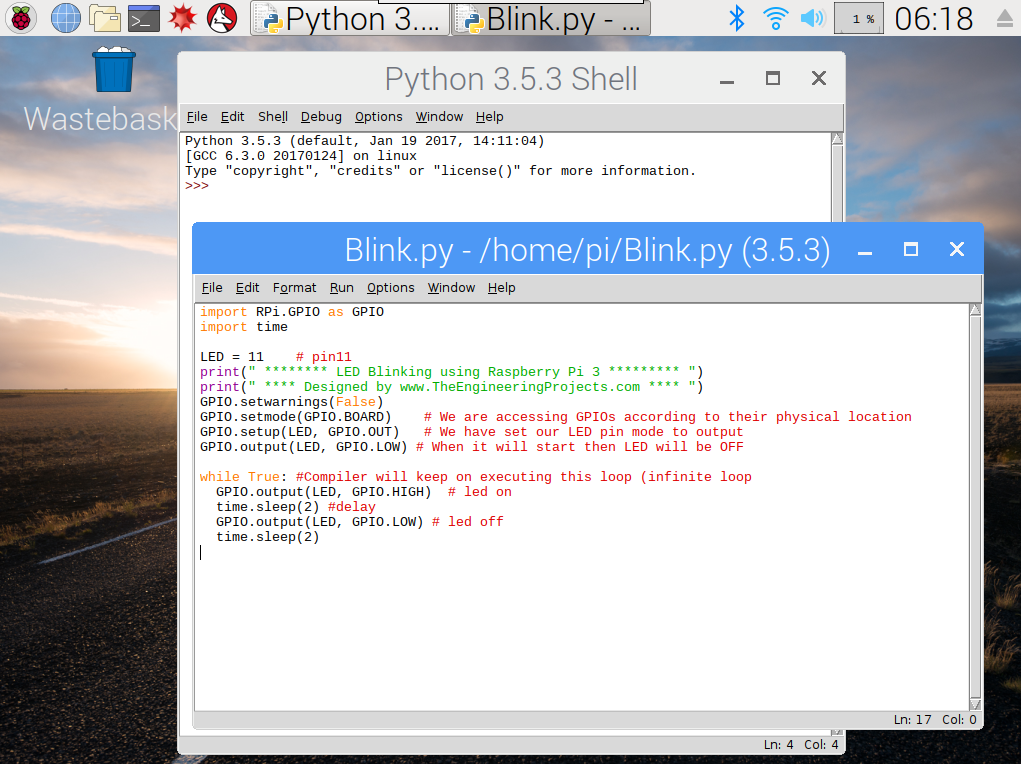
- Copy the below code and paste it in your Blink.py file as shown in above figure.
import RPi.GPIO as GPIO
import time

LED = 11 # pin11
print(" ******** LED Blinking using Raspberry Pi 3 ********* ")
print(" **** Designed by www.TheEngineeringProjects.com **** ")
GPIO.setwarnings(False)
GPIO.setmode(GPIO.BOARD) # We are accessing GPIOs according to their physical location
GPIO.setup(LED, GPIO.OUT) # We have set our LED pin mode to output
GPIO.output(LED, GPIO.LOW) # When it will start then LED will be OFF

while True: #Compiler will keep on executing this loop (infinite loop
GPIO.output(LED, GPIO.HIGH) # led on
time.sleep(2) #delay
GPIO.output(LED, GPIO.LOW) # led off
time.sleep(2)
- You can also download this Blink.py file by clicking below button:
[dt_default_button link="https://www.theengineeringprojects.com/RaspberryPi3/LED Blinking using Raspberry Pi 3.rar" button_alignment="default" animation="fadeIn" size="medium" default_btn_bg_color="" bg_hover_color="" text_color="" text_hover_color="" icon="fa fa-chevron-circle-right" icon_align="left"]Download Blink.py File[/dt_default_button]
- When you run this Blink.py File by pressing F5, then your LED will start blinking. Here's the screenshot of LED in ON state:

- So, that's how you can interact with hardware pins of Pi 3.


