Today, I am going to uncover the details on C# DateTimePicker Control. It allows you to select date and time and show it in specific format. It is extremely useful when you develop any application where you want date of birth of user ....
Hi Guys! We always aspire to make yourself equipped with useful information so you can excel and grow in your relevant field. Today, I am going to uncover the details on C# DateTimePicker Control. It allows you to select date and time and show it in specific format. It is extremely useful when you develop any application where you want date of birth of user in a specified format or where you want to display date and time explicitly. I'll try to discuss each and every feature of C# DateTimePicker Control, so you don't have to go anywhere else for finding the information regarding this specific control. Let's get started.
C# DateTimePicker Control
C# DateTimePicker Control allows you to select date and time and show in specified format.
It is very useful in developing the applications where you want user data in the form of date of birth.
It behaves like an interface where user can change the date and time information.
The display of this control contains fields that are defined by the format string of the control.
Creating a DateTimePicker control is very easy. Open your windows form application and drag and drop the DateTimePicker control from Toolbar that is appeared on the left side to your Form1.
Or simply double click the DateTimePicker control, it will automatically be placed on your Form1 displayed on the screen.
You can play with it and change its location in the given space of Form1 or resize it with the help of mouse.
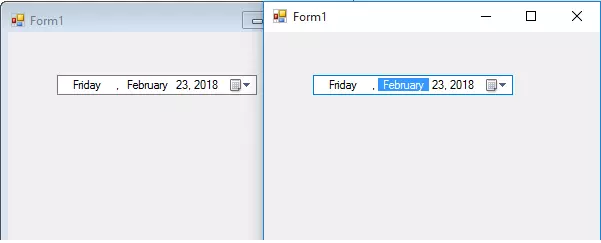
When you run the application, monthly calendar will be displayed on the screen, where you can see date, month year and day.
You can select any date of your own choice. It will appear like the figure below.
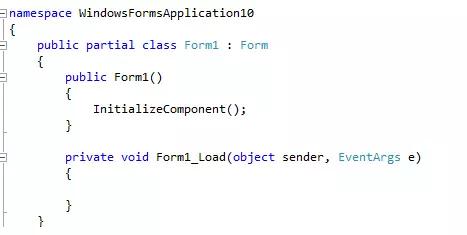
You can also change the format of the DateTimePicker control in the code. As you double click the Form1, following figure will appear.
Simply put the following code under the Form1_Load function if you want to appear the date in this format i.e year/month/date.
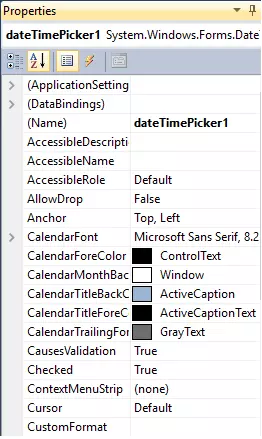
Setting the properties of DateTimePicker control is very easy. In order to open the properties of the DateTimePicker control just right click on the DateTimePicker control and select properties.
Properties window will appear on the right side of the screen and it will appear like the figure below.
Name
Name property defines the specific name of the DateTimePicker control which is user to access the control in the main code.
In the figure above name of the DateTimePicker control is set as dateTimePicker1.
Location and Size Properties
Location property defines the location of the DateTimePicker control with respect to x axis and y axis on the Form1.
You can set values of your own choice by simply putting the values in the Location property box or you can move around the DateTimePicker control on the Form with the help of mouse.
Size property defines the size of the DateTimePicker control. You can simply put the values of your own choice in the size property box or you can increase the size with the mouse by simply putting the cursor of the mouse of the right border of the control and expanding it towards right side or lower side.
Font and Format Properties
Font property defines the text style of the DateTimePicker control.
Go to the properties window and select the Font property.
It will show font size with different font style. You can choose any style of your own choice.
Similarly you can change the format of the DateTimePicker control. This control comes with four format including long, short, time and custom.
ShowChekBox and ShowUpDown Properties
ShowCheckBox property allows the the control to be editable without using the calendar.
This can be achieved by setting the ShowCheckBox as true.
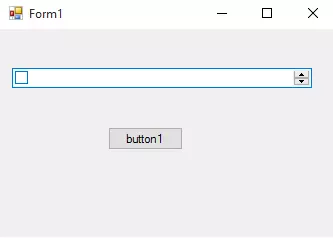
ShowUpDown property in the property window allows you to change the date and time by showing up and down value where you can increase and decrease the value of date and time.
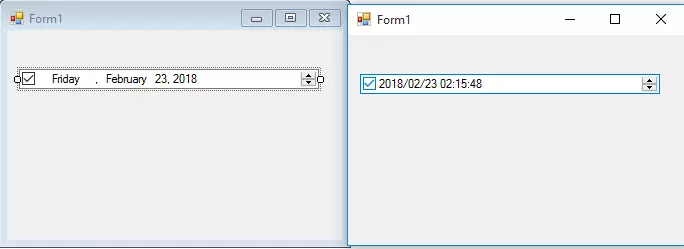
Set the ShowUpDown as true and modify the date and time of your own choice.
When you set both ShowCheckBox and ShowUpDown as true and run the application, following figure will appear.
Value
Value property of DateTimePicker control is widely used in C#.
It stores the current value of date and current in the control.
Example 1
Now we build a code where it will show the date and time in the specific format and when button is clicked, then code will show the current date and time stored in the DateTimePicker control. Check following code to understand this process.
using System;
using System.Collections.Generic;
using System.ComponentModel;
using System.Data;
using System.Drawing;
using System.Linq;
using System.Text;
using System.Windows.Forms;
namespace WindowsFormsApplication10
{
public partial class Form1 : Form
{
public Form1()
{
InitializeComponent();
}
private void Form1_Load(object sender, EventArgs e)
{
}
private void dateTimePicker1_ValueChanged(object sender, EventArgs e)
{
            dateTimePicker1.Format = DateTimePickerFormat.Custom;
            dateTimePicker1.CustomFormat = "yyyy/MM/dd hh:mm:ss";
}
private void button1_Click(object sender, EventArgs e)
{
DateTime iDate;
iDate = dateTimePicker1.Value;
MessageBox.Show("Current date is " + iDate);
}
}
}
When you run the application, and click the button, output will show in the following form.
How to Show Null Value in DateTimePicker Control
It is important to note that we can not use null value in DateTimePicker control by default because it is a value type like int, bool, and float and it returns some value.
You can make DateTimePicker control empty or it will show null value.
First drag and drop one DateTimePicker control on the Form. Then right click on the DateTimePicker control and go to properties. Properties will appear on the right side of the screen.
In the property window find the property "Format" and set it as Custom. Then find the property "CustomFormat" and simply add a space in the box. After you run the application it will show the empty box of DateTimePicker control.
Or you can show DateTimePicker control empty by the following code.
Before applying this code first we set ShowCheckBox as true in the property window of the DateTimePicker control. Then we apply this code.
We are playing a trick here, we first set the format of the DateTimePicker as custom, then set the format text of the DateTimePicker as black space.
This will do the trick and will set the DateTimePicker as blank when the box will be unchecked otherwise it will return some value.
When you run this code output will appear like the figure below when ShowCheckBox is unchecked.
That's all for today. I have tried my best to give you valuable information in simple steps so you can get an easy grip on C# sharp language. However, if still you feel skeptical or have any doubt you can ask me in the comment section below. I'll go extra mile to help you solve your questions and queries as soon as possible. Stay Tuned!
syedzainnasir
I am Syed Zain Nasir, the founder of The Engineering Projects (TEP). I am a
programmer since 2009 before that I just search things, make small projects and now I am sharing my
knowledge through this platform. I also work as a freelancer and did many projects related to
programming and electrical circuitry. My Google Profile+Follow
Get Connected