Hello everyone, I hope you all are doing great. Today, I am going to share a new Heart Beat Sensor Library for Proteus. Using this Library, now you can easily simulate your Heart Beat Sensor in Proteus ISIS. I am quite excited while sharing this Library as it has never been designed before. All credit goes to the TEP team for creating this awesome Heart Beat Sensor Library for Proteus. You should also have a look at this Second Version of Heart Beat Sensor Library for Proteus.
Heart Beat Sensor is used to measure the Heart Beat Count of a person. When you are using a Heart Beat Sensor in hardware then there's a chance that you won't get the same results as this simulation because the placement of a finger on this sensor matters a lot. If you haven't placed your finger correctly then you may get different results. This Proteus Sensor will give you the ideal result means the finger is perfectly placed on the sensor. So, let's get started with Heart Beat Sensor Library for Proteus:
Heart Beat Sensor Library for Proteus
- First of all, you need to download this Heart Beat Sensor Library for Proteus by clicking the below button:
- Download this zip file and then open it.
- You will find three files in it named:
- HeartBeatSensorTEP.IDX
- HeartBeatSensorTEP.LIB
- HeartBeatSensorTEP.HEX
- Place all these three files in the Library folder of your Proteus Software.
- If you are using Proteus 7 Professional, then the library folder link will be something like this: C:Program Files (x86)Labcenter ElectronicsProteus 7 ProfessionalLIBRARY
- If you are using Proteus 8 Professional, then the library folder link will be something like this: C:ProgramDataLabcenter ElectronicsProteus 8 ProfessionalDataLIBRARY
- You should also have a look at Heat Beat Sensor Library V2.0 for Proteus.
- Now open your Proteus software or restart it, if it's already running.
- Search for Heart Beat Sensor in the components section, as shown in the below figure:

- Now select this sensor and place it in your Proteus workspace.
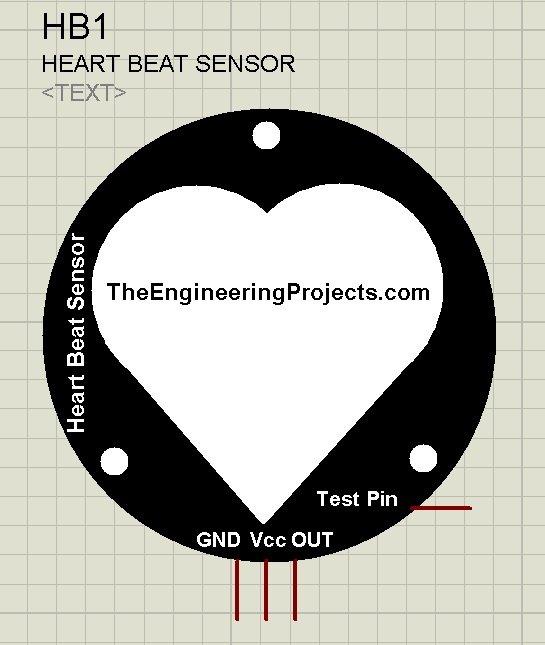
- If everything goes fine then you will get something as shown in the below figure:

- How it looks ?? Do let me know in the comments. Btw I think it looks pretty cool. :)
- So, now you can see in the above figure that it has in total four pins.
- TestPin is just for the simulation, it's not present in the real Heart Beat Sensor.
- In Proteus, we can't actually place our finger on this sensor, that's why I have added this TestPin.
- If TestPin is HIGH, it means that the finger is placed on the Sensor and it will start counting the heart beat.
- If TestPin is LOW, then it means the finger is not placed on the sensor and it won't give the output and will remain silent.
- The remaining three pins are simply GND, Vcc and OUT pins.
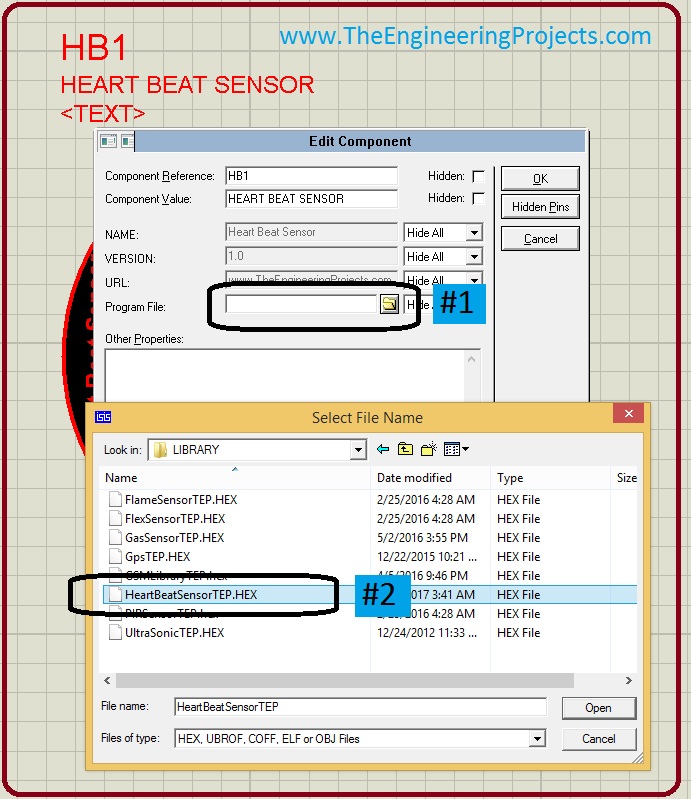
- Now, we need to upload the Hex file in this Heart Beat Sensor, so double-click it and open its Properties section as shown in the below figure:

- In the above figure, you can see first of all you have to click on the Program File Section and then you need to Browse to the Hex File of Heart Beat Sensor, which we have just downloaded above and placed in the Library folder of Proteus software.
- Now your Heart Beat Sensor is ready to simulate in Proteus software, so let's simulate it in Proteus:
Heart Beat Sensor Simulation in Proteus
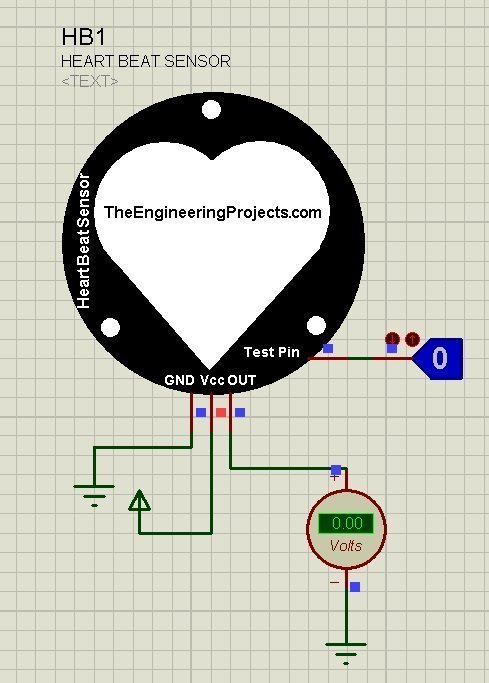
- First of all, design a small circuit as shown in the below figure:

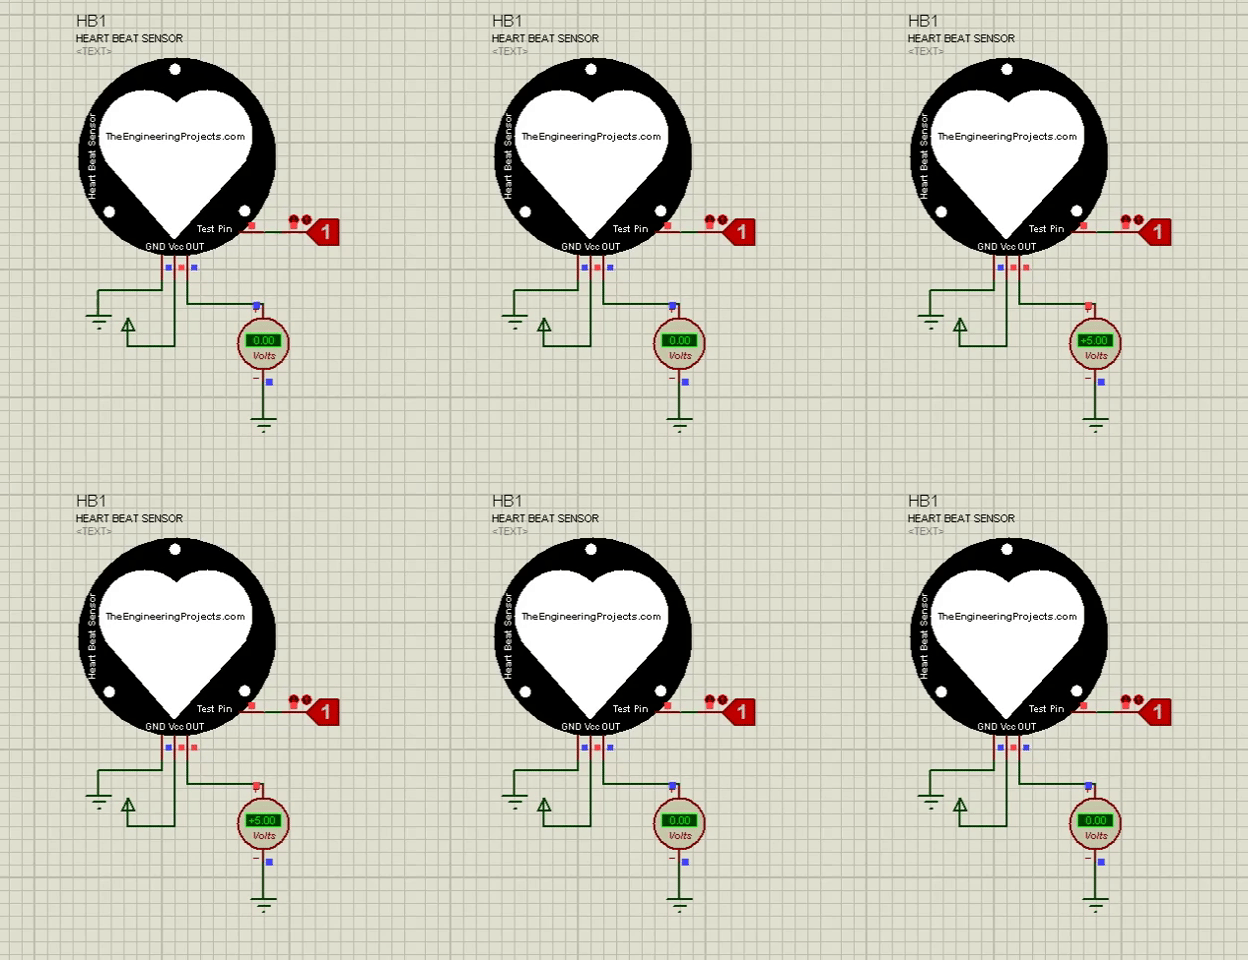
- Now, run your simulation and if everything goes fine then you will get the results as shown in the below figure:

- You can see in the above figure that OUT Pin is toggling, the HIGH & LOW states of OUT Pin are actually simulating the heart beat.
- Now you can easily count it for some period of time and then can display your heart beat.
- I have also explained its working, in the below video:
So, that's all for today. I hope you have enjoyed this awesome Heart Beat Sensor Library for Proteus. Let me know about your feedback in the comments. Till next tutorial, take care and have fun !!! :)


