LCD Interfacing with Microcontrollers


LCD Interfacing with Microcontrollers
Here in the tutorial, LCD Interfacing with Microcontrollers, I will tell you about the configuration of the LCD, its pins specifications and about the procedure to interface it with different microcontrollers e.g Arduino, PIC Microcontroller and 8051. First of all, I would like to tell about the desired components and their specifications in the form of a list.Components Required
The list for the basic and necessary components required while LCD Interfacing with Microcontrollers is given below.- Microcontroller (Arduino, PIC, 8051)
- Jumper Wires (Male-female)
- Soldering Iron
- Soldering Iron and Gum
- Male Pins for LCD
- LCD (either 16×2 or 20×4)
Components Description
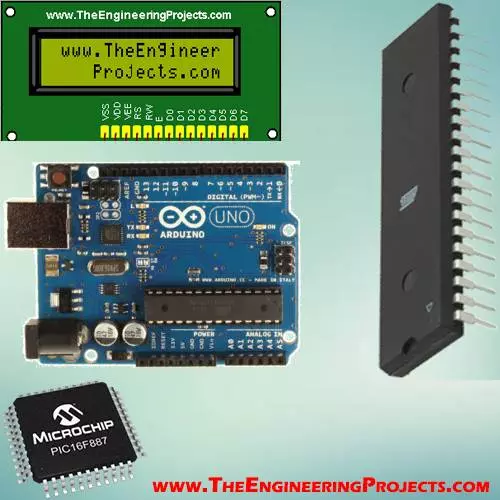
- Microcontroller acts as the back bone of any project because it controls and handles all the tasks and is used to exchange the desired commands either serially or simultaneously. In the tutorial LCD Interfacing with Microcontrollers, I am going to use three different microcontrollers as the backbone of the project, i.e. Arduino, PIC microcontroller and 8051 microcontroller.These microcontrollers are shown in the figure below.
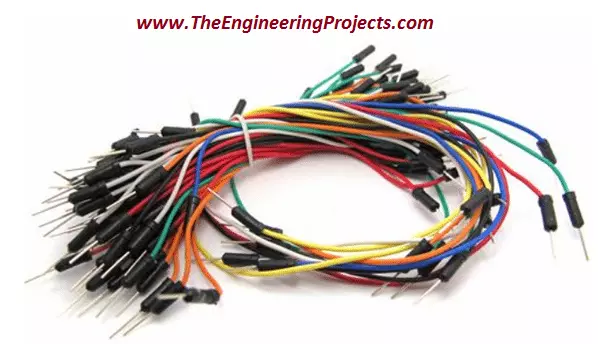
- Jumper Wires are basically used for making the connections between microcontrollers and LCD in order to obtain the circuit in proper working condition. The jumpers wires are usually of for different types i.e. male-male, male-female, female-female and female-male. The jumper wires are shown in the figure below.
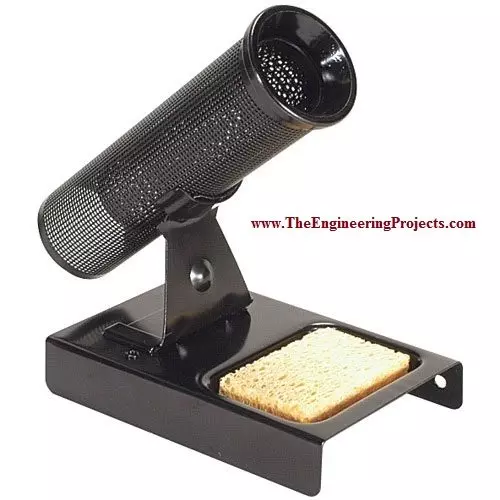
- Soldering Iron is used to join the male pins with the LCD specifically in this case. Its a device or an electronic equipment used to make the permanent connections between two or more devices. Soldering Iron is shown in the figure below.

- Soldering Gum and Stand are used for the purpose of clean soldering and supporting the solder respectively. The soldering gum along with the soldering stand is shown in the figure below.
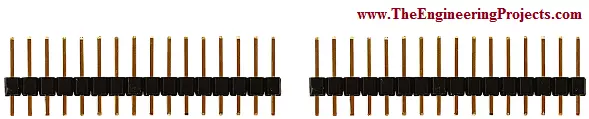
- Male Pins for LCD are used to make connect between LCD and microcontroller. These supporting pins are shown in the figure below.
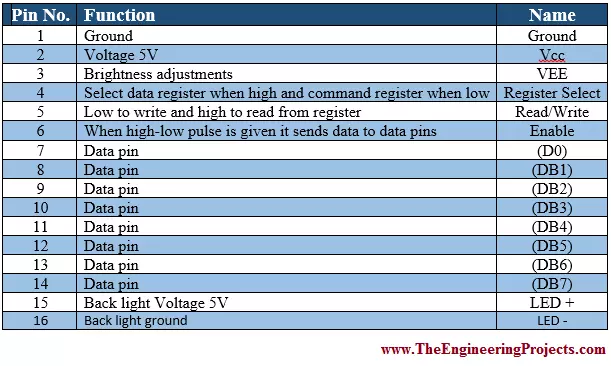
- Liquid Crystal Display (LCD) is used to display output messages and the desired results. LCD are available in the markets now a days, in different sizes. 16×2 and 20×4 are the most commonly used dimensions of the LCD. This type of LCD has 16 pins. Each pin is associated with the different function. The functions associated with each pin of the LCD are shown in the table below.
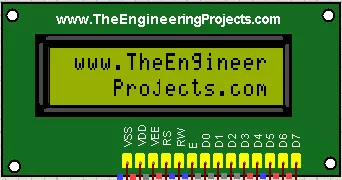
- LCD can be operated in two different modes 4-bit mode and 8-bit mode, depending upon the selection of data pins. If we have selected four of its data pins (DB0-DB3) then LCD will be in 4-bit operating mode and if we have selected all of its data pins (DB0-DB8) the LCD will operate in 8-bit mode. 16×2 LCD is shown in the figure below.
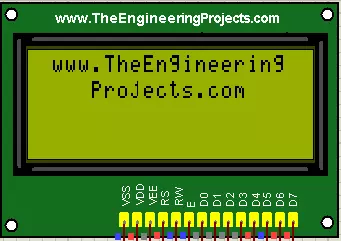
- Another most frequently used small LCD with 20×4 dimension is shown in the figure below.
- For the proper working of LCD in 4-bit mode we need to use four of its data pins i.e. (DB4-DB7). In total we need to use 8 pins including RS, Enable, DB4, DB5, DB6, DB7, Voltage (5V) and Ground (0V). Data pins are used for the exchange of the data between microcontrollers and LCD.
- RS is the pin 4 of the LCD and it selects data register when high and command register when low as described in the above table.
- Enable is the pin 6 of the LCD. When it is high a low pulse is provided and it i used to send data to data pins (DB4-DB7) in this case.
- So, that was the brief discussion of the components necessary for LCD Interfacing with Microcontrollers.
- Now, I am going to combine all of my previous tutorials related to LCD interfacing with different microcontrollers here on a single platform.
New LCD Library for Proteus
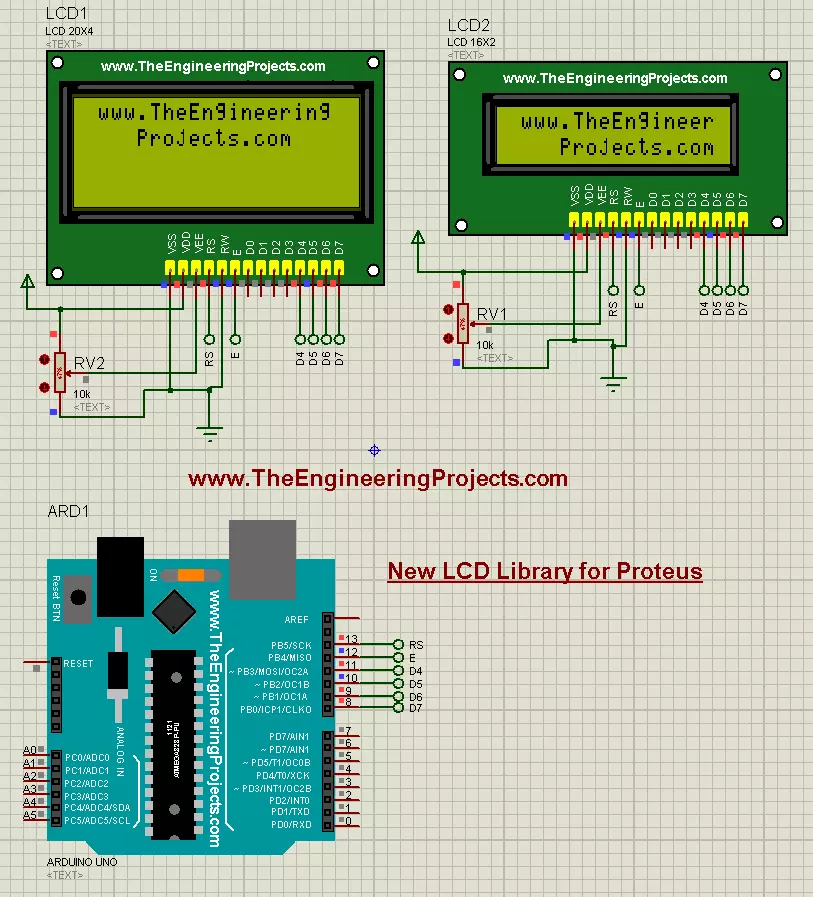
- You can download these libraries here by clicking on the button below.
- Download .rar file, extract it and enjoy these libraries.
Download LCD Library for Proteus
LCD Interfacing with Arduino
Here, in this section of the tutorial LCD Interfacing with Microcontrollers, I will combine my previous tutorials having detailed discussion about how to interface LCD with Arduino.Scrolling Text on LCD with Arduino
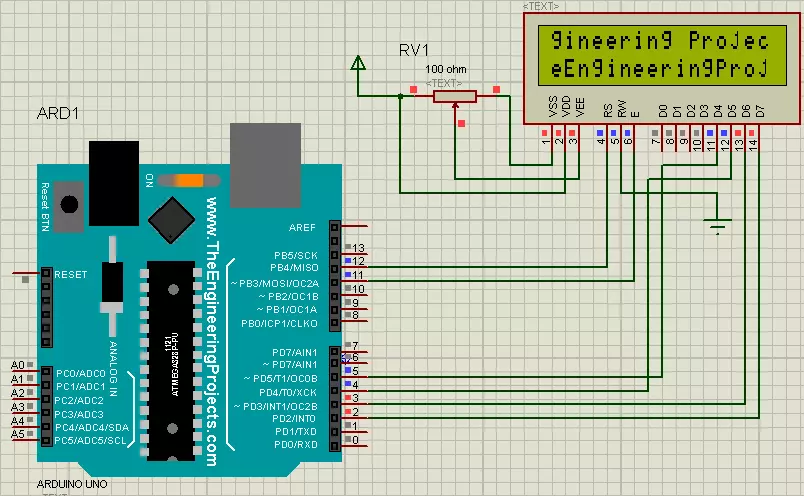
- You can download the Arduio source for displaying scrolling text on LCD.
- Download .rar file, extract it and enjoy the complete code.
ADC Value on LCD using Arduino
- You can download the circuit designed in Proteus and the Arduino Hex file here by clicking on the button below.
- Just download the .rar file, extract it and enjoy the complete package containing both Proteus design as well as Arduino Hex file.
Proteus Simulation & Arduino Hex File
LCD Interfacing with 8051 Microcontroller
In this section of the tutorial, LCD Interfacing with Microcontroller, I will explain you that how to interface an LCD with 8051 Microcontroller and the step by step procedure to design a simple program for 8051 microcontroller in order to display the messages on the LCD interfaced with it.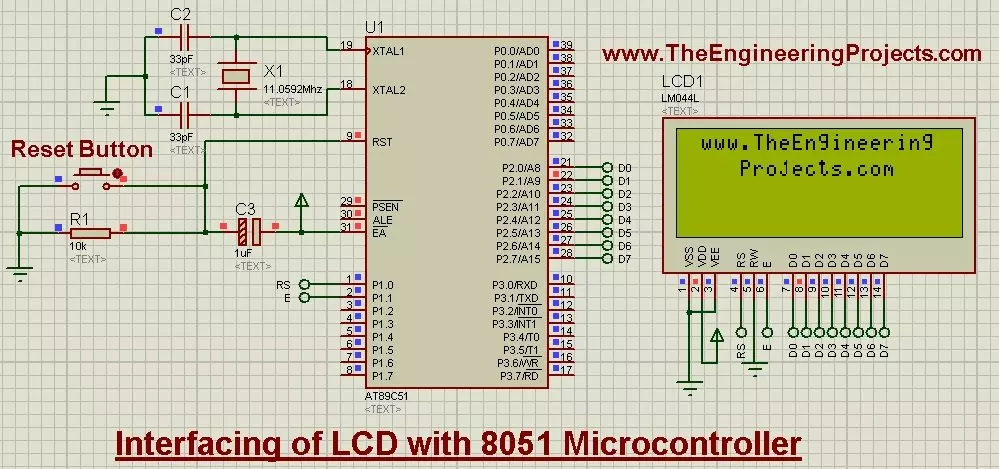
- You can download the complete Proteus design and the complete source code here by clicking on the button below.
- Download .rar file, extract it and enjoy the complete package.
LCD Interfacing with PIC Microcontroller
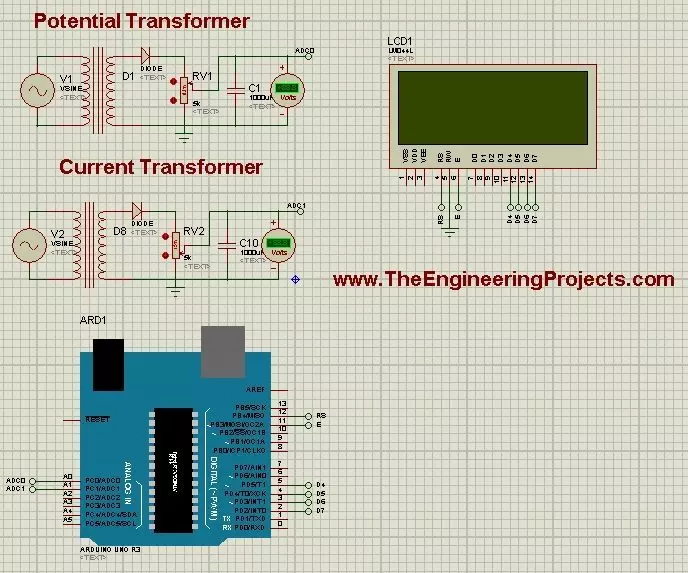
Here, in this section of the article LCD Interfacing with Microcontrollers, I have shared a detailed discussion with all of you guys about designing a circuit for LCD interfaced with PIC microcontroller as well as about designing an algorithm to display ADC value on LCD using the same microcontroller i.e. PIC microcontroller.Display ADC Value on LCD using PIC Microcontroller
- You can download the Proteus simulation here by clicking on the button below.
- Download .rar file, extract it and enjoy the package.
- That was the combined version of my all of the previous tutorials related to LCD Interfacing with the three different types of microcontrollers.
×
![]()