
Temperature Conversion in LabVIEW


Temperature Conversion Formulas
Here are the three formulas for temperature conversion.Celsius to Fahrenheit Conversion
- To convert "Celsius" to "Fahrenheit" use the expression below.
F = 9/5 °C + 32
Fahrenheit to Celsius Conversion
- If you want to convert "Fahrenheit" to "Celsius" use the expression below.
C = 5/9 ( F - 32 )
Celsius to Kelvin Conversion
- You can convert "Celsius" to "Kelvin" by using the expression below.
K = C + 273
By using all of the above expressions you can convert easily one scale to another one. Here, I am going to elaborate the steps which will help you to design Temperature Conversion in LabVIEW 2015. Click on the below button to download this LabView Simulation for Temperature conversion. So, now let's get started with the the designing of Temperature Conversion in LabView:Temperature Conversion in LabVIEW
- Go to the Front Panel and right click on it.
- Now, go to the Controls -> Modern -> Numeric -> Numeric Control as shown in below figure:
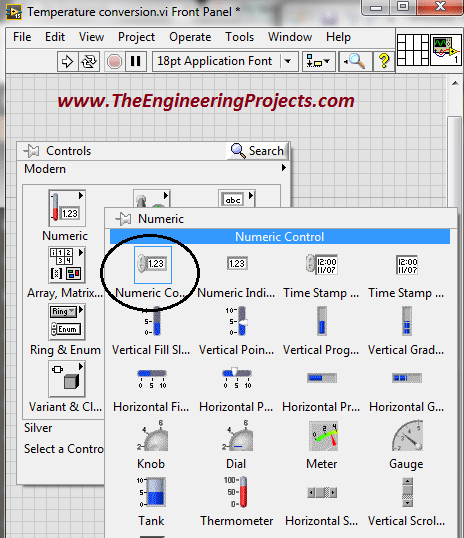
- Select this block and place it on the Front Panel.
- Change its name to "Celsius" as shown in below figure:
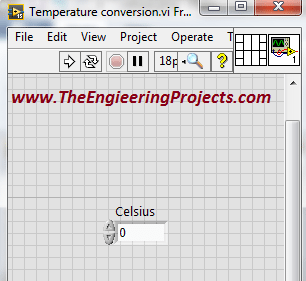
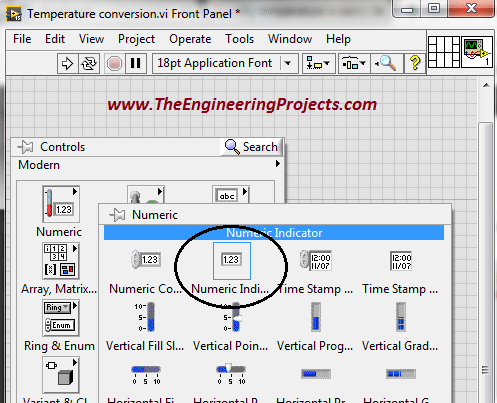
- Now, go to Controls -> Modern -> Numeric -> Numeric Indicator.
- Select this block and place it on the Front Panel.
- The figure below explains it:
- Name it as a Fahrenheit.
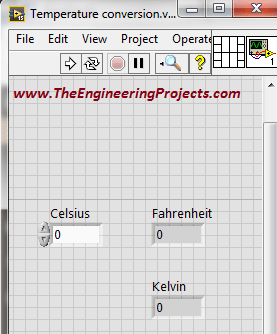
- Select another Numeric Control and place it similarly on the Front Panel and name it Kelvin.
- All these numeric controls are shown in below figure:
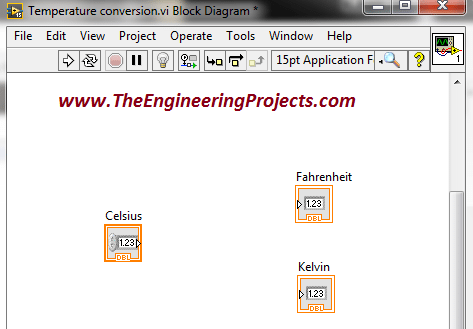
- Now let's move to the block diagram and design our small algorithm.
- Your block diagram will look something as shown in below figure:
- Now, we have to apply some technique so that the conversion from one scale to another becomes possible in an easy manner.
- Go to Functions -> Express -> Arithmetic & Comparison -> Formula.
- Select this block and place it on the "Front Panel" window.
- Here is the figure in which you can see how to do this:

- As you place this block on the "Front Panel" , you will see the figure below on your laptop's screen.
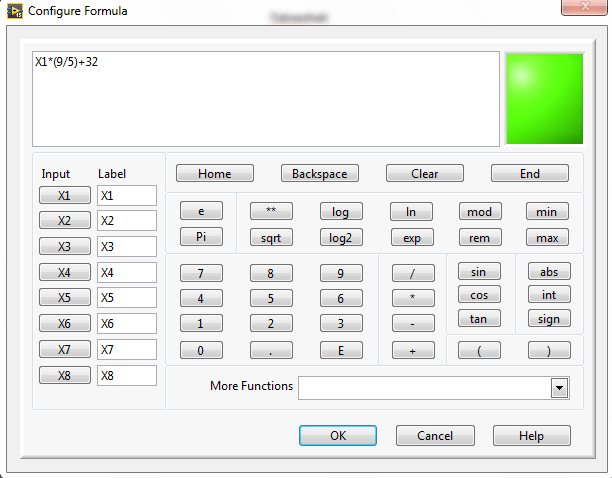
- Now Change the formula according to your requirements.
- I have changed the formula in order to convert "Celsius" to "Fahrenheit".
- After changing the formula press "OK".
- And now, the "Block Diagram" window looks like the figure below.
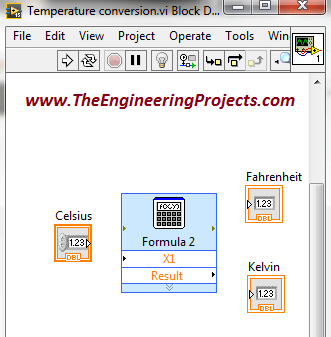
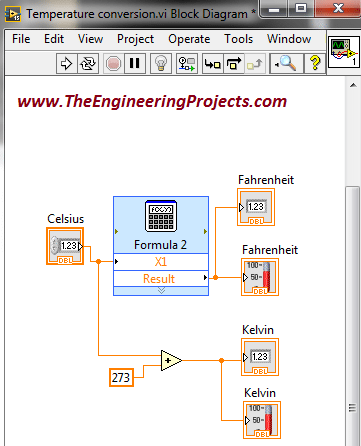
- Now, connect the "Celsius" with the "X1" terminal of the "Formula" block and connect "Result" with the "Fahrenheit" block.
- The figure below shows the display of the above step.
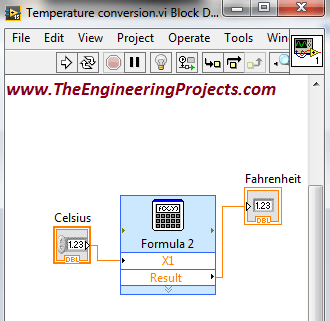
- Now, the "Celsius" scale is converted into the "Fahrenheit " scale.
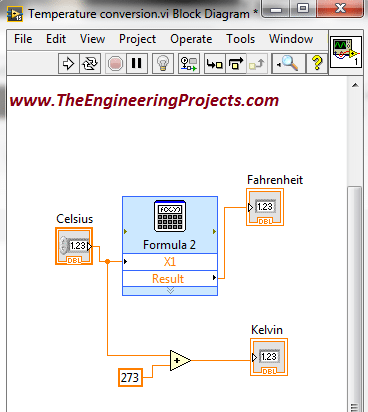
- We have to convert "Celsius" to "Kelvin" now.
- Go to Functions -> Programming -> Numeric -> Add.
- Select this block and place it on the Front Panel.
- Connect the input terminal of the Add block to the Celsius.
- And go to the second input terminal of the Add block.
- Go to Create -> Constant.
- And set the value of the constant as 273.
- The figure below explains all of the above steps.
- Go to the "Front Panel".
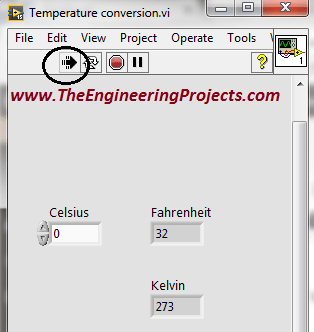
- Run the Program and you can see by changing the values of the "Celsius" the change occurs in the values of the "Fahrenheit" and "Kelvin" as well.
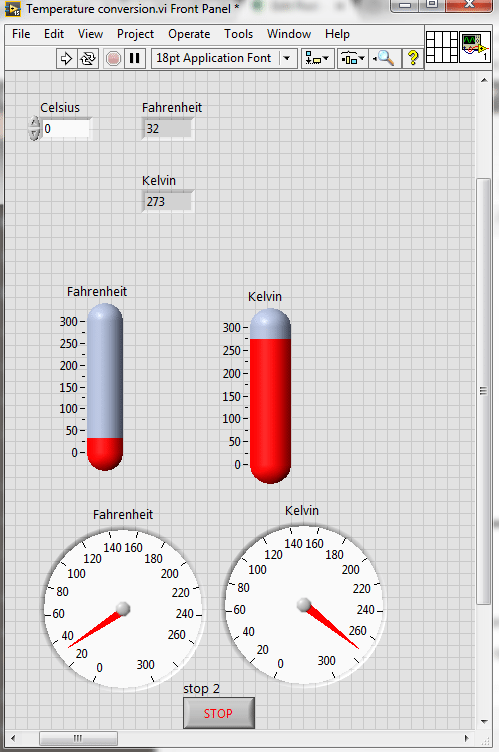
- You can see for 0°C the "Fahrenheit" scale shows 32 and the "Kelvin" scale show the value of 273.
- Here is the screen shot of the "Front Panel".
- You can also see the different temperatures by using other FPGA blocks.
- Go to Controls -> Modern -> Numeric -> Thermometer.
- Select this block and place it on the "Front Panel".
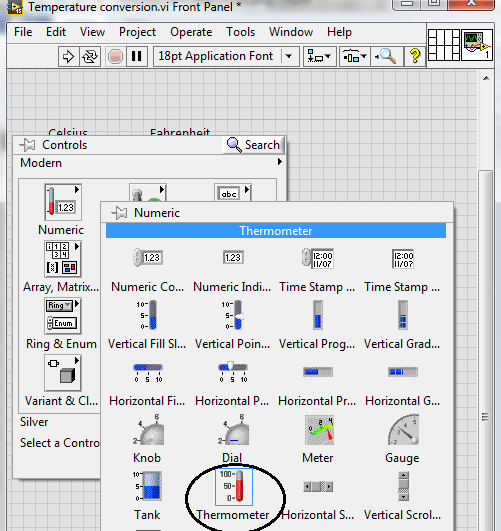
- Change its name from "Thermometer" to "Fahrenheit".
- Similarly select the same block again an place it on the "Front Panel".
- Change its name from "Thermometer" to "Kelvin".
- Change its upper limit from "100" to "300" in order to observe the results more accurately.
- The figure below shows the above steps.
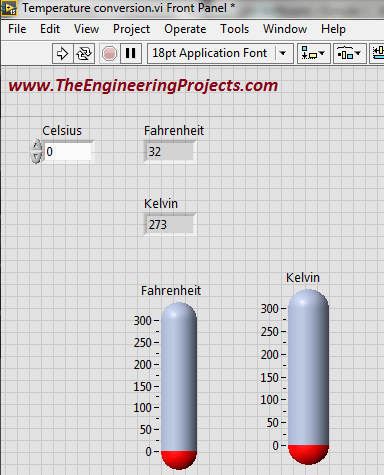
- Go to the "Front Panel" and connect these blocks with "Fahrenheit" and "Kelvin" as in below figure:
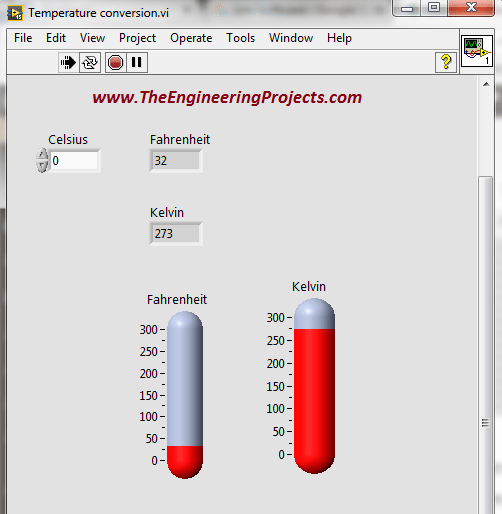
- Now "Run" the program and change the value of the "Celsius" scale.
- You can see the change in the temperature on both "Fahrenheit" and "Kelvin" scale. Red color shows the temperature.
- Here is the screen shot of the above steps.
- You can observe the temperature on "Gauge".
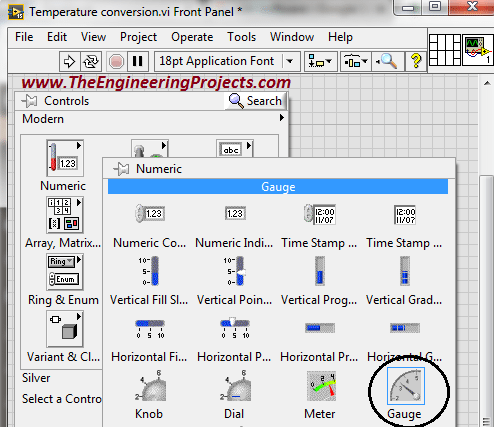
- Go to the Controls -> Modern -> Numeric -> Gauge.
- The figure below shows the gauge selection:
- Select this block and place it on the "Front Panel".
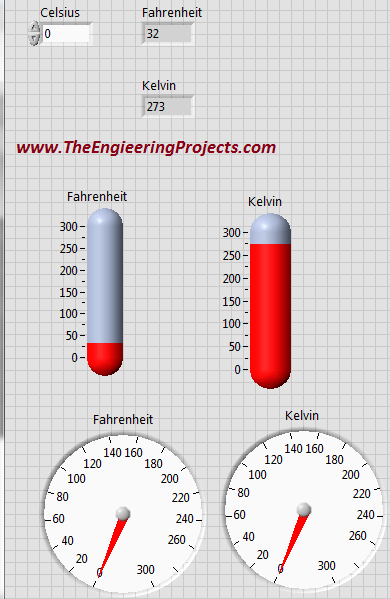
- Change its name from "Gauge" to "Fahrenheit".
- Similarly select another block and change its name from "Gauge" to "Kelvin".
- Change its range from "100" to "300".
- The figure below illustrates all of the above steps.
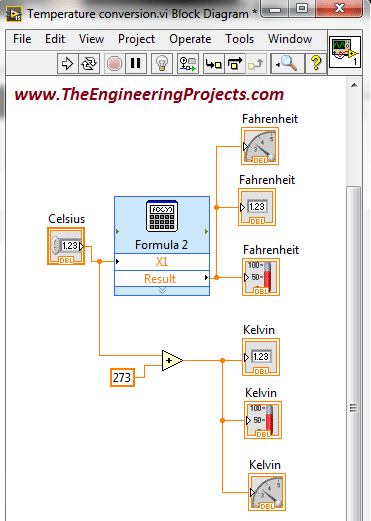
- Go to the "block Diagram" window and connect these blocks with "Fahrenheit" and "Kelvin".
- Here is the screen shot of the above step.
- Now, go to the "Front Panel".
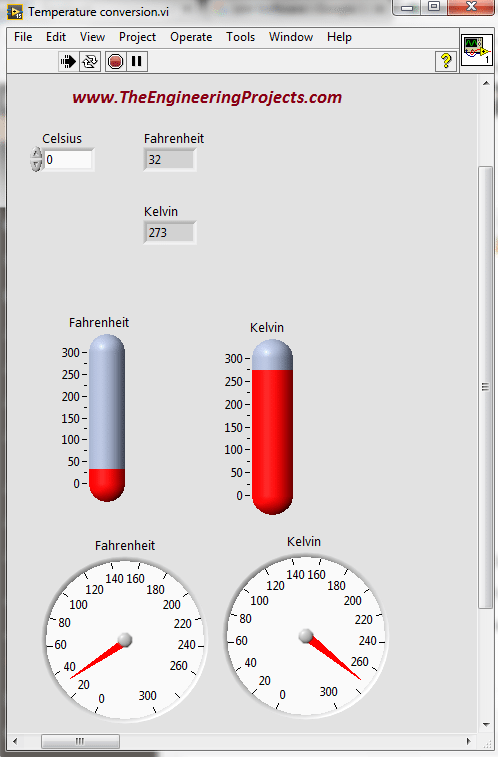
- Run the program and change the value of the "Celsius" scale.
- You can see the corresponding changes on both the blocks.
- The figure below elaborate all of the above steps.
- This is the temperature conversion program from the "Celsius" scale to both the "Fahrenheit" and the "Kelvin".
- If you want, that your program should continue to run until you terminate it, "For Loop" is helpful in this condition.
- Go to the "Block Diagram" window and press "Right Click".
- Go to Functions -> Programming -> Structures -> For Loop.
- The figure below illustrates the above steps:
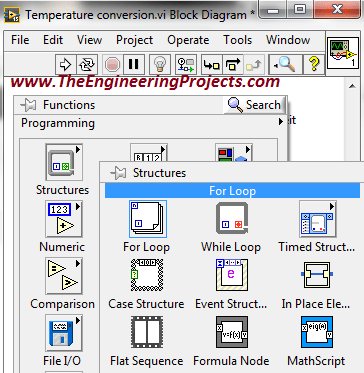
- Select this block and place it on the "Block Diagram" window.
- Place the complete program inside this loop as shown below
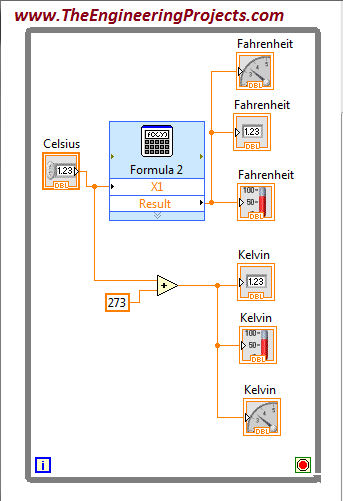
- Go to the bottom right button and go to Create -> Control as shown below.
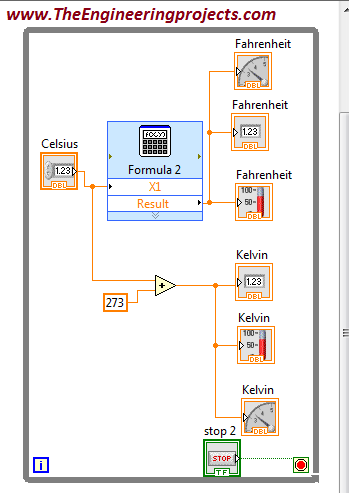
- Complete output of the system is shown below.

- Here's the video demonstration of this Temperature Conversion Project in LabView, it will explain How to use this simulation:
×
![]()


 1 user


 Continue Wishlist


 Getting Started Guide
 Help Center
 Contact us
 Doist Blog
 Privacy
 Security
 Terms of Service
 What's new: Channel Descriptions


 LabView Tutorials
 syedzainnasir
 0 Comments


 2.3k
2.3k
 953
953
 921
921
 2.1K
2.1K
 Temperature conversion in LabVIEW 2015
Temperature conversion in LabVIEW
Celsius to Fahrenheit conversion
Simple temperature conversion in NI LabVIEW
How to make temperature conversion program in LabVIEW
Make temperature conversion in LabVIEW 2015

 Saturday, April 1, 2017