Again I am mentioning that its the first library designed by our team so its in basic stages, it has few functions and will only display the numeric on the seven segment display which is normally required. I am planning on adding more examples in the library for future use, which will increase the functionality. Anyways that's a future talk, let's start today's post.
What is Seven Segment Display?
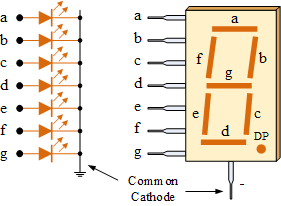
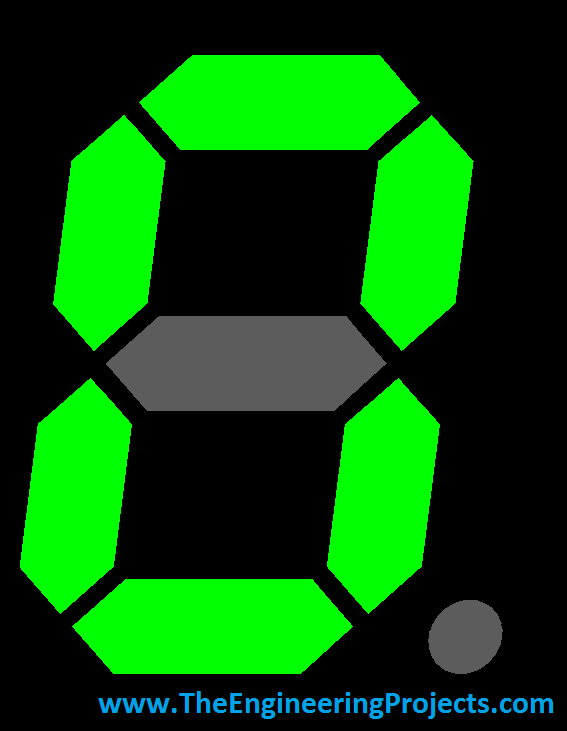
Let's first have a look at what is Seven Segment Display. Seven Segment display is nothing but an electronic device used for displaying the numeric data. It's a complex form of LED matrix and is normally used in clocks, LCD displays, calculators etc where there's a need to display the numeric data. It has total seven leds in it which you can also count from above image and by turning these LEDs ON or OFF we can display any numeric on it. For example, have a look at the below image. In this image I have shown numeric 0 on seven segment. Now in order to do so, I just simply turn OFF the centered LED and turn ON all the corner LEDs and it becomes 0.
How does Seven Segment Work?
Now, let's have look at how it works. So, we have seen that Seven Segment is named seven segment because it has total seven LEDs on it so now what we need to do is to control these seven LEDs, also named as segments, and then we can display any character on it. There are two types of seven segments available in the market and named as:
- Common Cathode
- Common Anode

Interfacing of Seven Segment with Arduino in Proteus
- Now we know all about Seven Segment Display and know how it works so let's interface Seven Segment with Arduino in Proteus.
- Now, I am assuming that you have installed the Arduino Library for Proteus and have also installed the Arduino Library for Seven Segment display.
- So, now open your Arduino Software and go to File>Examples>SevenSegment>Counting.
- Open this example, in this example I have added a counter which will start counting from 0 to 9 and once it reached 9 then it will start counting again.
- If you can't find this example then you must be making some mistake in installing the library, anyways the code is shown below.
- In order to run this example you will need two libraries, the inks are given below to download:
/* Counting This Arduino example is for Seven Segent display. It will start the counter from 0 and will end up at 9 and will start again from 0. This example code is in the public domain. Created by Syed Zain Nasir at 14 March 2015. You can get the explanation and latest version of this library at: http://www.TheEngineeringProjects.com/ */ #include "SevenSegment.h" SevenSegment tep = SevenSegment(0,1,2,3,4,5,6); char arr [10] = {'0','1','2','3','4','5','6','7','8','9'}; int index; void setup(){ index = 0; } void loop(){ tep.display(arr[index++]); delay(1000); if(index == 11) index = 0; }
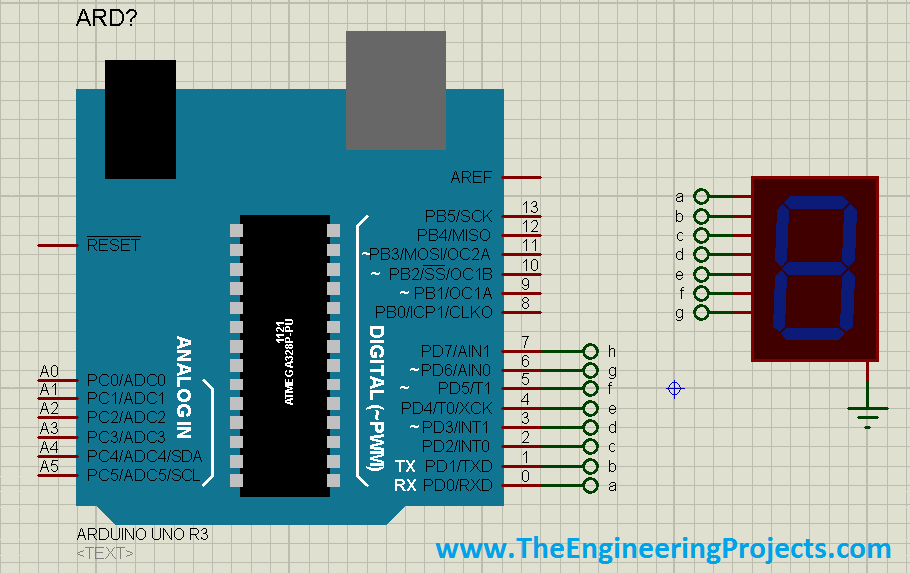
- Now open you Proteus Software and design the circuit in it as shown in below figure, I have also attached the file for download at the end.

- Now compile the code and gt the hex file and upload it in your Arduino Properties.
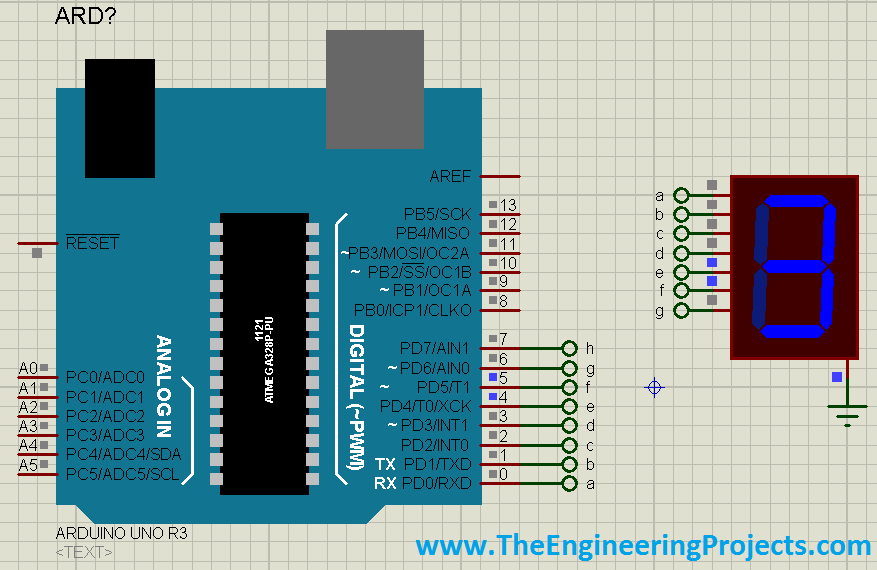
- Now Run the Proteus software, and you will see the seven segment display will start counting, a glimpse of it is shown in the below figure:

- Below is attached the Proteus file and the hex file for the counting example which you simply start and run but again I suggest that you should design it by yourself so that you get something out of it.
Download Proteus Simulation of Seven Segment with Arduino
- One last thing, any kind of contribution to this library from the readers is highly appreciated, design your projects and share codes with us and we will post them on our blog for other readers to get knowledge as knowledge is all about sharing.


