What is EasyVR Commander?
- EasyVR Commander is a software using which we save the voice commands in the EasyVR Shield. You guys can easily find it using google and its totally free.
- Download this software and install it.
How to use EasyVR Commander?
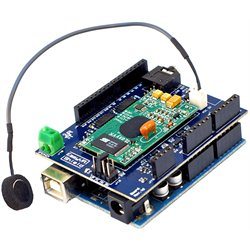
- First of all connect your EasyVR shield with the Arduino UNO Shield as shown in below figure.

- Now be careful in this step as it took the most of my time, on EasyVR shield you will find a jumper J12. Put this jumper on position PC.
- Connect your Arduino UNO shield with the computer and run the software EasyVR commander. The software will open up as shown in the figure below.

- Now select the COM Port on which Arduino UNO is attached, which in my case was at COM20.
- After selecting the COM Port, click the Connect icon as shown in below figure.

- When you hit on Connect icon, the software will connect to the COM Port and will open up as shown below:

- If you check the left pane, there are many groups and wordset.
- In wordset, there are pre defined words, which are already saved in the EasyVR shield.
- The words which I want to save in the shield, will be saved in the Groups.
- Now to save these words click on any group where you want to save.
- In the below figure, I have selected Group 2 and then click on the Add Command button (Click # 1) shown in the figure.
- It will add the command in the group as you can see I have saved the command OK.
- Now I have saved the command OK but I have to give it some voice to this command.
- In order to do so, click on the Train Command icon ( Click # 2 ).

- Click on the button which says Phase 1.
- Now as you click on this button, a box appears which say "speak now", now its the time to say your command in the mic like I said OK.
- After listening the command this pop up will again show up and this time the button will be Phase 2.
- Again click on the button and it will ask for "speak now" and you again speak the same command in the mic.
- After that the software verifies the two words and if they are same it will confirm the command.
- You should also have a look at these Arduino Projects for Beginners.
- In my case, I have saved total 5 commands in my software as shown in the below figure.

- These were my five commands to control my robot.
- Now after adding the commands, simply close the software as the voice commands are now saved in the EasyVR shield.
- Place the jumper J12 back to position SW.
- You can also test your added commands,to do so click on Test Command icon on the software and speak up any of the commands from the selected group.
- If the command matches, then the software will indicate it. Test it and you will see.


