
Relay Interfacing With Microcontroller using ULN2003A


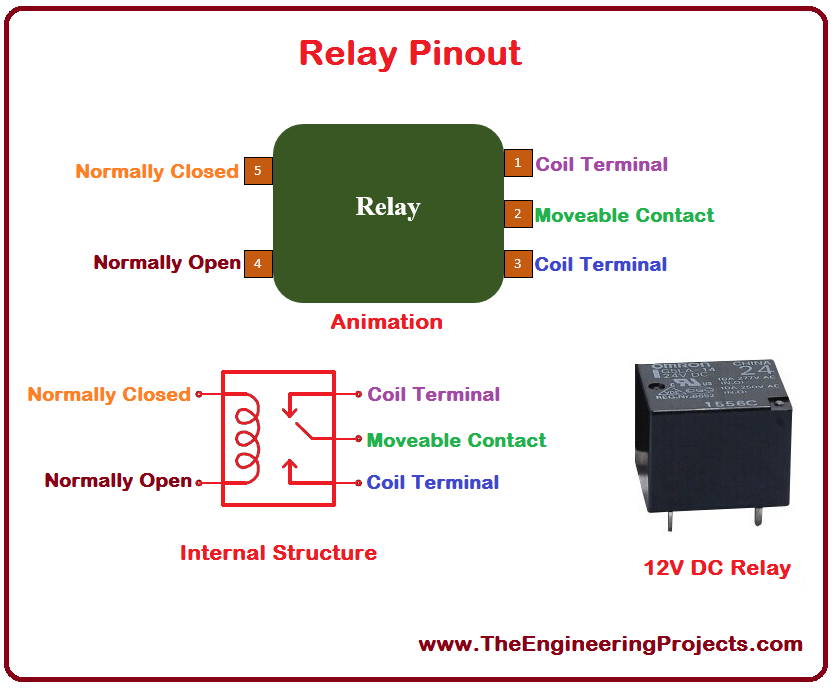
Hello friends, I hope you all are doing great. In today's tutorial, I am going to explain the Relay Interfacing with Microcontroller using ULN2003A. In the previous lecture, we have discussed the detailed Introduction to Relay along with its working. Now we are going to practically interface the relay with a microcontroller to design an automatic switch. Relay is a key component in almost every electronic circuit. It can be used as a switch and can also be used as a voltage regulator.
The microcontroller I am going to use here is PIC18F4552 but you can use any other Microcontroller. You just need to change the syntax of coding but the logic will remain the same. Here, I am using ULN2003A to control the relay and from this relay, we can control anything.
So, let's get started:
Relay Interfacing With Microcontroller
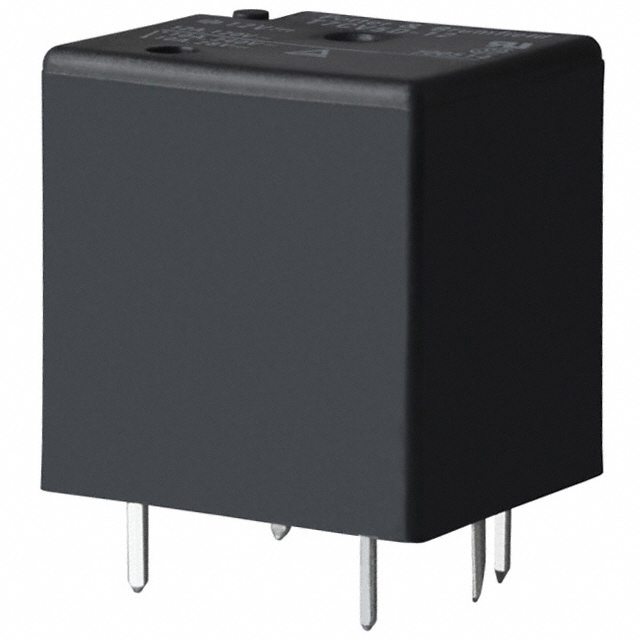
- I am using a 12V relay, meaning we need to provide a 12V at its input coil, in order to get it energized.
- In simple words, when we send the +12V signal from our PIC microcontroller, it will actuate the relay coil and the relay output gets connected and when we make the input LOW, the coil de-energized.

Now, the question is ???
- But the real question is PIC gives 5V at its high signal but the relay operates at 12V so how to convert this 5V signal into 12V?
What's the Solution ???
- The solution to this problem is ULN2003A.
- ULN2003A is used in between the PIC and the relay, so when the PIC sends the HIGH signal i.e. 5V, ULN converts it to 12V, sends it to the relay and the relay gets actuated.
Circuit Diagram of Relay with ULN2003A
- Here's the circuit diagram for this complete project:
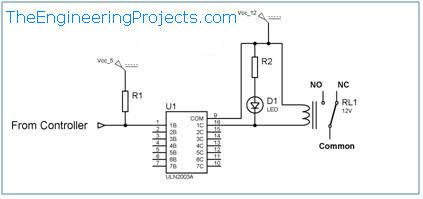
- Resistance R1 is used as a pull-up resistance.
- LED is used for the indication, when the relay is actuated LED goes ON otherwise OFF.
- The programming portion is not much, just send high and low signals from PIC to ON and OFF the relay.
That's all for today guys. If you guys have any problem in any part of this tutorial ask in the comments, and I will reply to your queries. Till next tutorial ALLAH HAFIZ .... :))


 1 user


 Continue Wishlist


 Getting Started Guide
 Help Center
 Contact us
 Doist Blog
 Privacy
 Security
 Terms of Service
 What's new: Channel Descriptions


 PIC Projects
 syedzainnasir
 2 Comments


 2.3k
2.3k
 953
953
 921
921
 2.1K
2.1K

 Sunday, November 4, 2012