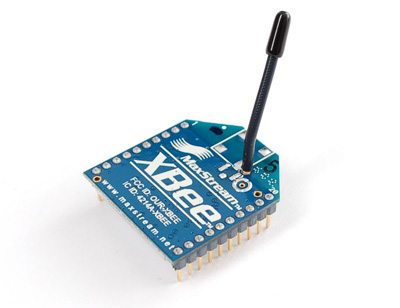
Hello friends, I hope you all are fine and having fun with your lives. In today's tutorial, I am going to show you the Interfacing of XBee with Computer. In the previous part of this tutorial, I have given the Introduction to XBee Module. Hope you guys have read it and if not then go visit it so that you may have some idea about XBee module.
Now come to the second part about how to interface xbee with computer because its important as if you cant interface the xbee with computer then you cant interface it with any microcontroller and later I will tell you its interfacing with microcontroller. You should also check this XBee Library for Proteus which will help you to simulate XBee module in Proteus.
We will cover arduino with more detail as its the most usable microcontroller these days with XBee. In this tutorial, I will remain to the basics of XBee i.e. we will just simple send data from one xbee to another but in coming tutorials we will have a look on quite difficult projects i.e. plotting of nodes using Rssi value. I have also posted a tutorial on Interfacing of XBee Module with Arduino. If you guys have any question, you may contact me or can ask in the comments. So, let's get started with Interfacing of XBee with Computer:
Interfacing of XBee with Computer
- XBee works on the TX / RX logic so if we want to interface xbee with computer, we need to use a serial module.
- There are two type of module, one is usb module available at sparkfun and its costly for the students of Pakistan.
- So we have created our own module, its based on serial port and works is a similar way as this sparkfun module.
- This serial module consists of MAX232 and here's its circuit diagram.
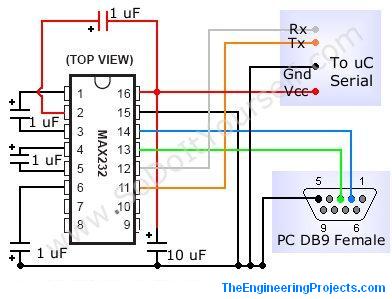
- You just need to do is, the pins going to the uC are now go to the pin # 2 and pin # 3 of XBee.
- Moreover, +3.3 V to the pin # 1 of XBee and Ground to the pin # 10 of XBee.
- One more thing , dont forget to common the grounds of XBee and this circuit.
Software to Download
- There is a software named X-Ctu, is used for Interfacing of XBee with Computer.
- So first of all, download X-Ctu and install it in your computer.
- Attach your module's serial port with the computer after placing the XBee in it.
- Open the software, the first interface of this software is shown in the image below :
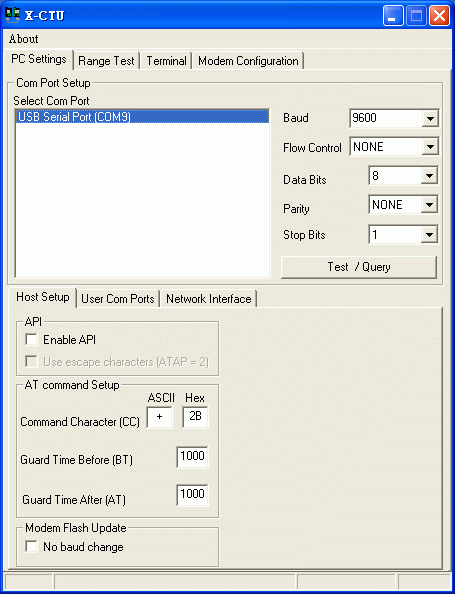
- The White Box in which there is written USB Serial Port (COM 9) indicates the serial ports attached to your computer.
- In my case it is COM 9 and in your case it will be mostly COM 1.
- Now Click on the Test / Query button and if everything's going fine then the following window will pop up.
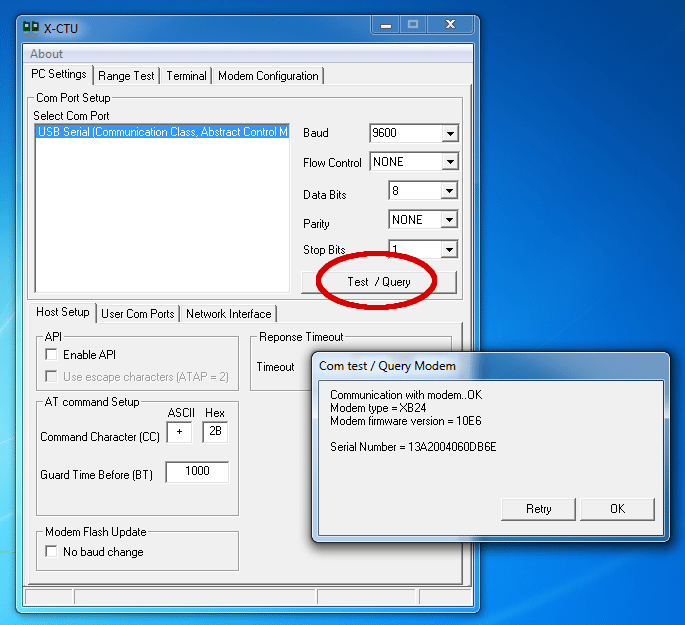
- This prompt box tell us a few things about XBee.
- In case if something's missing and not working properly then you will get something like that :

Configuring the XBee
- There are a lot of AT commands used for the configuring XBee. I will tell you where to enter these commands but first lets have a view at these commands.
- Here I am explaining those which we are going to use for the simplest communication.
- + + + : This command will initiate the command mode and now our xbee is ready for taking orders and in this mode it wont transmit data.
- ATMY2 : ATMY is used to set the address of xbee we are using and 2 is the address we have set for our module.
- ATDL5 : ATDL is used to set the address of the destination module and 5 is the address. In other words now our module 2 only send data to that module which has address 5 .
- ATWR : This command is used to write these configurations into XBee . If you don't use these commands then once you removed your xbee your values will be erased.
- ATCN : To terminate the command mode and after that you are ready to send data.
- ATDL of tranmitter = ATMY of reciever
- Suppose I have two modules so in order them to communicate I will set the first module as ATMY = 2 and ATDL = 5 and the second module as ATMY = 5 and ATDL = 2. Now both the modules can send data to each other.But if I change the second module's ATDL = 3 then my second module can't send the data to first but still my first module can send data to the second. ( a bit complicated :) )
- Only this +++ command doesn't require ENTER but in all other press the ENTER tab after entering command.
Where to Enter These Commands
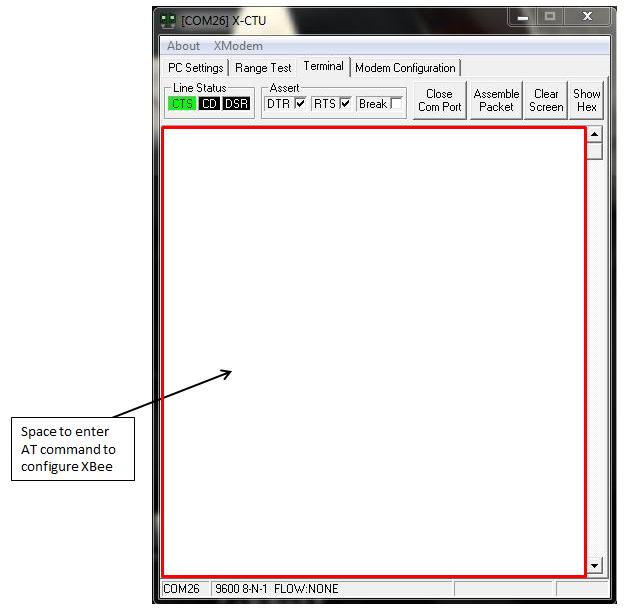
- Now the most common question is where to enter these commands.
- Let's come back to X-Ctu,Now click the Terminal tab on top of the software as shown below :
- Now Enter the Commands one by one as shown in the image below :
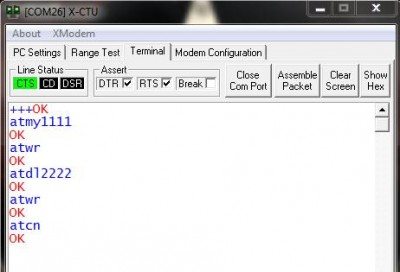
- In the above figure, I have set my first xbee as ATMY = 1111 and ATDL = 2222.
- Now remove the first XBee and attach the second XBee , restart the software and do the same steps as for first but now the settings will be as follows :
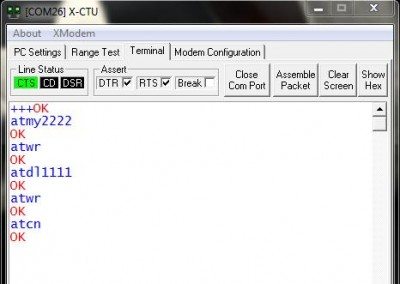
- In the above figure, I have set my first xbee as ATMY = 2222 and ATDL = 1111.
- Check the difference in addressing of both XBees.
- Your both XBees are configured.
Communication Between XBees
- Now attach first XBee to one computer using the module and the second to other computer using another module.
- Open the software and click the terminal tab.
- Now whatever you enter in the terminal tab of first xbee , it will be receiving on the terminal tab of second and vice versa.
- So, that's all about Interfacing of XBee with Computer.
That's all for today and I am a bit tired too while writing this tutorial on Interfacing of XBee with Computer, so I will continue it tomorrow regarding the microcontroller part. One more thing play with the software and do let me know what you find in the comments. Thanks. ALLAH HAFIZ :))


