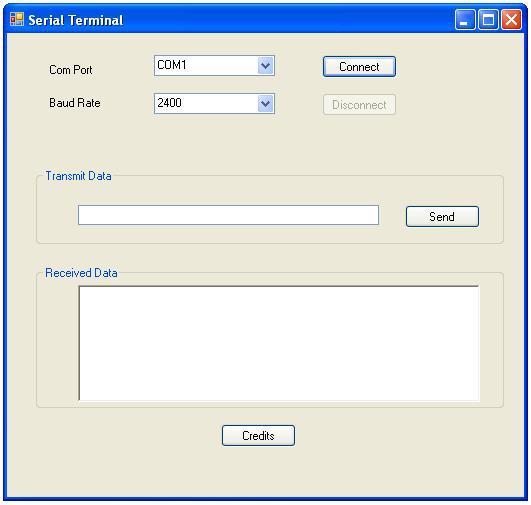

Today we will make a software on Microsoft Visual Basic 2010 in which we will send data through the serial port in VB 2010. In this software we will send the data and also receive it. Simply follow all the given steps carefully and you can easily interface the Serial Port in VB 2010, its a fully working project with code so don't do any mistake. Moreover check these two complete tutorials on Microsoft Visual Studio 2010 as well, these are quite fascinating.
- How To Send Email in Microsoft Visual Studio 2010
- Creating a Database in Microsoft Visual Studio 2010
First of all download the Microsoft Visual Basic 2010. The installer can be freely downloaded from Microsoft. After installing the software follow these simple steps. So ,let's get started with How to use Serial Port in VB 2010:
How to use Serial Port in VB 2010 ???
Step 1 : Creating a New Project
- Open your installed Microsoft Visual Studio 2010 software. The first interface will be something like that :
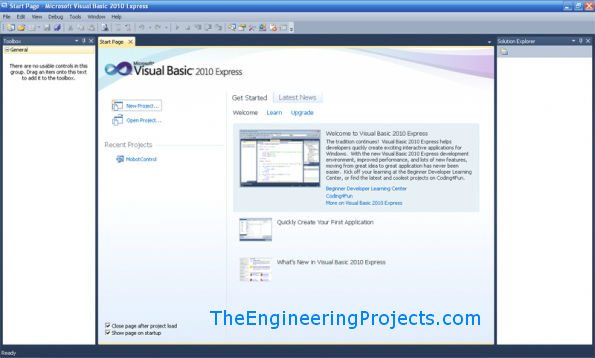
- Now click on the New Project and select Windows Form Applications.
- In the project name box, add name of your project as I have added Serial Port Interface.
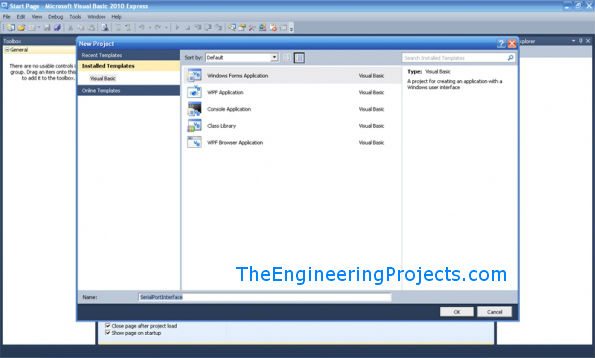
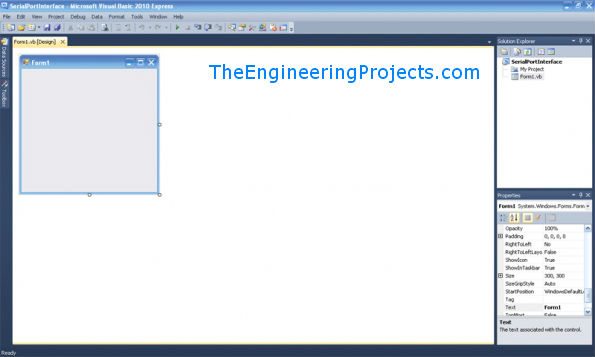
- Click OK and a new window will be opened as shown in below image which contains a blank Form1.
- In this Form1 we are gonna add our controls buttons etc.
Step 2 : Changing Name of Form
- Now click on the form1 and the properties panel will be open on the right side. Now, in the properties tab shown on the right side change its name to frmMain (for easier identification specially when adding more forms).
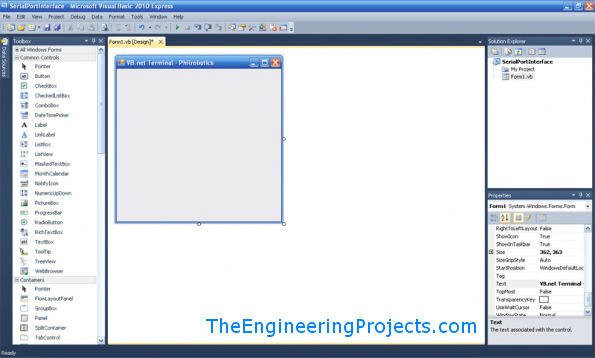
- Also change the text of the form to something you like as Serial Terminal. This will be shown on the title bar of your application.
Step 3 : Adding Controls To The Project
- Lets start to add some controls in our software like buttons,combo box and labels etc.
- So from the Common Controls tab add two buttons, two combo boxes and two labels into your Form1 and align them as shown below :
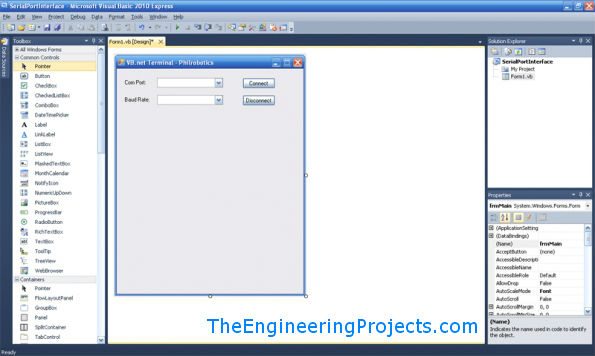
- For Button 1, change the text to Connect and change the name to btnConnect.
- For Button 2, change the text to Disconnect and change the name to btnDisconnect.
- For Combo Box 1, change the name to cmbPort.
- For Combo Box 2, change the name to cmbBaud.
- For Label 1, change the text to Comm Port.
- For Label 2, change the text to Baud Rate.
- Keep the names and texts of same character as i wrote them.
- They are case sensitive so be careful. I will recommend to just copy paste them.
- If you make even a one letter mistake the code will not run.
- btn and cmb are just to remind that they are button and combo box respectively. Its better to do neat programming.
Step 4 : Adding Serial Port & Boxes
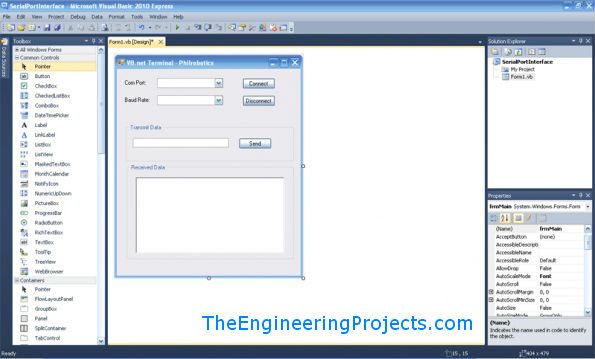
- Now from Container tab, add two Group Boxes in the forum.
- Change the name of Group Box 1 to Transmit Data.
- Change the name of Group Box 2 to Received Data.
- Now add a Text Box and a Button in the Transmit Data Group Box.
- Change the name of the Button to Send and text to btnSend.
- Change the name of the Text Box to txtTransmit.
- Now add a Rich Text Box in the Received Data Box and change its text to rtbReceived.
- Arrange all these components as shown in the below image :
- Lastly and i think its the most important part of this tutorial, add a Serial Port Block into your forum. It will appear at the bottom. Don't change any of its parameters just leave it as it is.
Step 5 : Coding Section
- Now we come to the coding part of our project. If you double click on your forum, it will open a new window something like that :
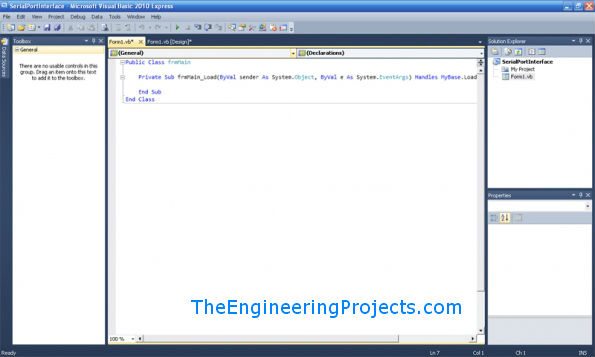
- This is the place where we add our code and in other words add functionality to our project, this window is called Code Editor.
- If you double click on any button or box, its respective code will created in this region automatically.
- Now what you need to do is copy the below code and paste it in your code editor window.
- Just remove all the previous code in your Code Editor Window.
- Here's the code for Serial Port in VB 2010:
    'Code Starts here ....
    'Import Systems which we are gonna use in our code
    Imports System
    Imports System.ComponentModel
    Imports System.Threading
    Imports System.IO.Ports

    'frmMain is the name of our form ....
    'Here starts our main form code .....
    Public Class frmMain
    Dim myPort As Array
    Delegate Sub SetTextCallback(ByVal [text] As String)

    'Page Load Code Starts Here....
    Private Sub frmMain_Load(ByVal sender As System.Object, ByVal e As System.EventArgs) Handles MyBase.Load
    myPort = IO.Ports.SerialPort.GetPortNames()
    cmbBaud.Items.Add(9600)
    cmbBaud.Items.Add(19200)
    cmbBaud.Items.Add(38400)
    cmbBaud.Items.Add(57600)
    cmbBaud.Items.Add(115200)
    For i = 0 To UBound(myPort)
    cmbPort.Items.Add(myPort(i))
    Next
    cmbPort.Text = cmbPort.Items.Item(0)
    cmbBaud.Text = cmbBaud.Items.Item(0)
    btnDisconnect.Enabled = False
    End Sub
    'Page Load Code Ends Here ....

    'Connect Button Code Starts Here ....
    Private Sub btnConnect_Click(ByVal sender As System.Object, ByVal e As System.EventArgs) Handles btnConnect.Click
    SerialPort1.PortName = cmbPort.Text
    SerialPort1.BaudRate = cmbBaud.Text
    SerialPort1.Parity = IO.Ports.Parity.None
    SerialPort1.StopBits = IO.Ports.StopBits.One
    SerialPort1.DataBits = 8
    SerialPort1.Open()
    btnConnect.Enabled = False
    btnDisconnect.Enabled = True
    End Sub
    'Connect Button Code Ends Here ....

    'Disconnect Button Code Starts Here ....
    Private Sub btnDisconnect_Click(ByVal sender As System.Object, ByVal e As System.EventArgs) Handles btnDisconnect.Click
    SerialPort1.Close()
    btnConnect.Enabled = True
    btnDisconnect.Enabled = False
    End Sub
    'Disconnect Button Code Ends Here ....

    'Send Button Code Starts Here ....
    Private Sub btnSend_Click(ByVal sender As System.Object, ByVal e As System.EventArgs) Handles btnSend.Click
    SerialPort1.Write(txtTransmit.Text)
    End Sub
    'Send Button Code Ends Here ....

    'Serial Port Receiving Code Starts Here ....
    Private Sub SerialPort1_DataReceived(ByVal sender As Object, ByVal e As System.IO.Ports.SerialDataReceivedEventArgs) Handles SerialPort1.DataReceived
    ReceivedText(SerialPort1.ReadExisting())
    End Sub
    'Serial Port Receiving Code Ends Here ....

    'Serial Port Receiving Code(Invoke) Starts Here ....
    Private Sub ReceivedText(ByVal [text] As String)
    If Me.rtbReceived.InvokeRequired Then
    Dim x As New SetTextCallback(AddressOf ReceivedText)
    Me.Invoke(x, New Object() {(text)})
    Else
    Me.rtbReceived.Text &= [text]
    End If
    End Sub
    'Serial Port Receiving Code(Invoke) Ends Here ....

    'Com Port Change Warning Code Starts Here ....
    Private Sub cmbPort_SelectedIndexChanged(ByVal sender As System.Object, ByVal e As System.EventArgs) Handles cmbPort.SelectedIndexChanged
    If SerialPort1.IsOpen = False Then
    SerialPort1.PortName = cmbPort.Text
    Else
    MsgBox("Valid only if port is Closed", vbCritical)
    End If
    End Sub
    'Com Port Change Warning Code Ends Here ....

    'Baud Rate Change Warning Code Starts Here ....
    Private Sub cmbBaud_SelectedIndexChanged(ByVal sender As System.Object, ByVal e As System.EventArgs) Handles cmbBaud.SelectedIndexChanged
    If SerialPort1.IsOpen = False Then
    SerialPort1.BaudRate = cmbBaud.Text
    Else
    MsgBox("Valid only if port is Closed", vbCritical)
    End If
    End Sub
    'Baud Rate Change Warning Code Ends Here ....

    End Class
    'Whole Code Ends Here ....
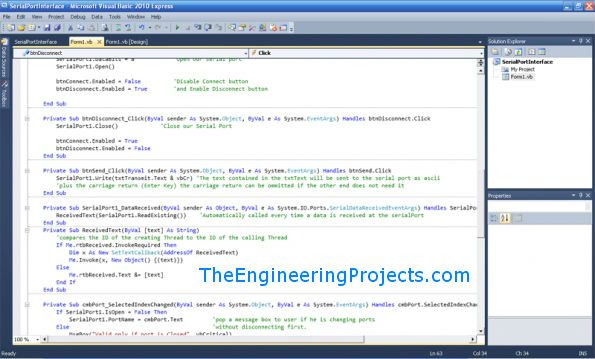
- After adding the code your Code Editor Window will look something like this one :
Step 6 : Compile Your Project
- After adding all the code, now you are ready to compile your code and run your application.
- To compile go to Debug -> Build SerialPortInterface and if everything's going right then your project will pop up.
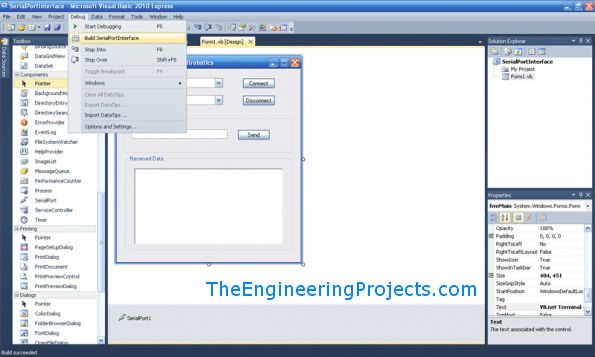
- To test your application, just add some LCD to your serial port or simply short your Rx Tx pins and whatever you send you will receive it.
- Here's the image of my final application. I have converted it to .exe file, in my coming tutorials i will tell you how to convert a project to .exe file.

- The project exe file and the complete code has already been emailed to all our subscribed members.
- If someone didn't get it or want to get these files then first Subscribe to Our Newsletter and then post your email here and I will email it to them.


Sir I follow the procedure and make the program and compile it successfully, but before that i miss to rename the transmit text box, however after compiling the program i start the program but it does not shows any thing in combo box nor port no neither baud rate, i also try virtual serial port but it does not works, i repast the whole code again and i got an error and form in design tab also vanishes.
I just forget the what error was because while writing this i repast and test it, and it works launch the program it works, i wonder what happens, Its like charm , Can u explain what happened, first it does not work but later it works Reply
i want .exe file for above mentioned terminal. my email id is pardeep_acet74@yahoo.com.
i want to receive data sent from my micro controller unit to system via serial port db9. and the store in the data base of system in excel file or in other formet..
plz help
thanks.. Reply
i want .exe file for above mentioned terminal. my email id is pardeep_acet74@yahoo.com.
i want to receive data sent from my micro controller unit to system via serial port db9. and the sore in the data base of system in excel file or in other former..
plz help
thanks.. Reply
My name is Nimal Rathnaweera and just joined the site today. I am also interested to obtain the above code. Could you please sent it to me at: nratnaweera@gmail.com
Many thanks in advance !!!
Nimal Reply
Thanks. Reply
I have got this problem as below,
The PortName cannot be empty.
Parameter name: PortName
The list of com port does not drop down as well. It is blank when I run the program. I really appreciate your help.
Regards,
Teh Reply
Actually you are getting the problem because you haven't attached any COM Port with the computer on which you are running it .....
So, before running this software first attach some COM Port or create a virtual COM Port.
Thanks. Reply
i am using visual studio 2010 c++,i have try to made terminal using c++ windows form applications.i tried run exe file on other pc which don't have studio it showing errors.i changed the settings project->properties-> cofiguration->c++->codegeneration->multi threaded(mt). after changing settings also i'm getting errors.what is the solution for this? give reply asap.
thanks Reply
i am vishnu,i have subscribed would please send me the code my mail id:-vishnu471@gmail.com.
Thanks Reply
Thanks for subscribing to our newsletter. I have emailed you the complete project.
Thanks. Reply
Thanks. Reply
Thanks. Reply
Can you please send me the code . I need it urgently. Reply
Could this be computer related? Reply
The best way to test the software is via virtual port .... the port you are taking is not virtual .... virtual is actually a software port which doesn't exist but operates virtually (software level) ... Reply
Moreover, have you changed the name of Form1 to frmMain ? Double check it.
If still having problem, let me know. Reply
my name is Laurentiu and just joined the site today. I am also interested to obtain the above code. Could you please sent it to me at: vj_lau@yahoo.com
Many thanks in advance !!! Reply
Thanks. Reply
Good work!
Grettings Reply
Cheers !!! Reply
I have problem with this. SerialPort1 is not declared
Reply
I think you didn't add the serial port block in your project that's what causing problem and if you have added then make sure the name of your serial port block is SerialPort1 .... you can change it in the properties. Reply
this is my mailing list gopsi1234@gmail.com Reply
@Seol This Invoke function is used actually to automatically called every time a data is received at the Serial Port. Its kind of an interrupt for the coming data.
@saim lodhi The code and the software has been sent bro, check your email id. and stay connected ... :)) Reply
this is my id please send the code to my email id
i have subscribed to the newsletter really need this one
thanks in advance Reply